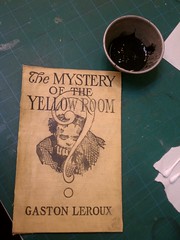
Case Study: The Murders in the Rue Morgue and Other Tales of Horror, circa 1935

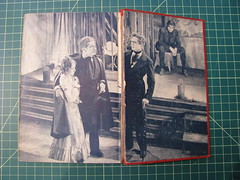
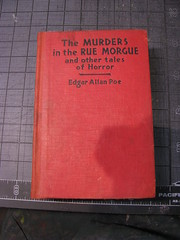
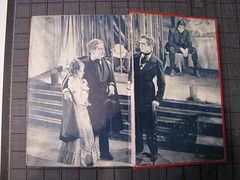
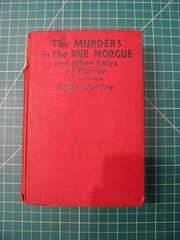
I’m not sure how old this book is — much to my surprise, it has no copyright date! It does, however, have screen shots from the Universal movie of the same name, which came out in 1932, so that gives a rough date. It’s an old Grosset and Dunlap book, which means that while it’s neato in terms of content, it’s el cheapo in terms of binding. I actually took it with me as a possible candidate for my first book repair class, but wound up not using it because it wasn’t going to work well for the set of skills we would be practicing that day. It turned out to be great for the The Restoration of Cloth and Leather Bindings class I took at the SFCB, taught by Don Etherington.

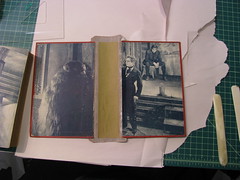
Before

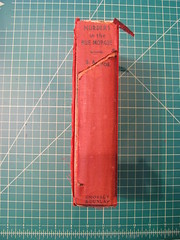
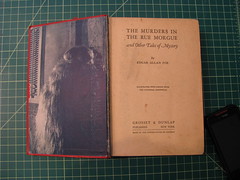
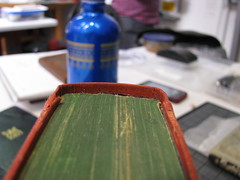
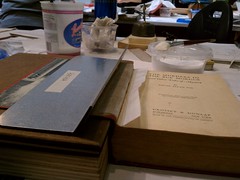
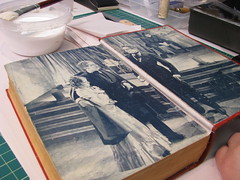
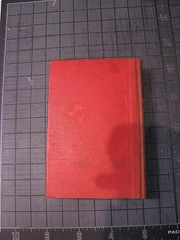
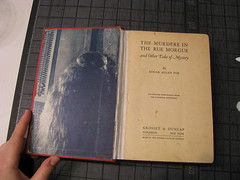
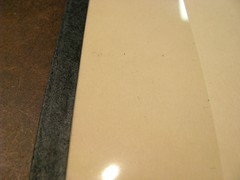
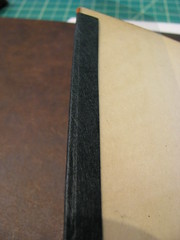
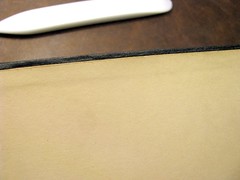
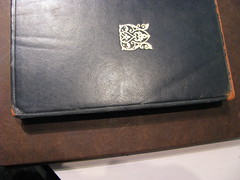
The Murders in the Rue Morgue: Before The Murders in the Rue Morgue: Before The Murders in the Rue Morgue: Before

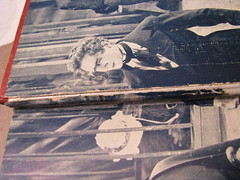
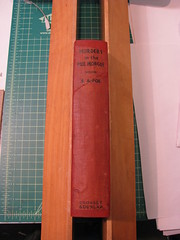
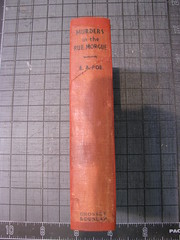
As you can see, pretty much all of the damage is to the spine. The cover boards were still attached, but the spine piece had started to come off (the small piece near the top was completely detached and I’d been keeping it inside the book all this time). The shadows in the lower right corner of each photo are thanks to the weird lighting in the classroom. I didn’t have the time to take away from class to set up for really nice shots. Sigh.

The Murders in the Rue Morgue: Before The Murders in the Rue Morgue: Before

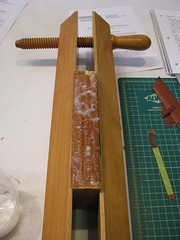
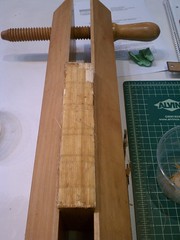
The text block is in good shape, but the front end paper is half-missing and the back end paper had detached. First things first: I removed the cover and cleaned the spine. Here you can see the text block with some gloopy paste on it to soften the old, brittle spine lining.

The Murders in the Rue Morgue: Cleaning the spine

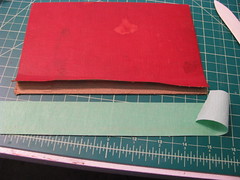
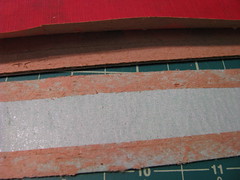
While waiting for the spine lining to soften, I worked on the cover boards. First I had to lift some of the book cloth on the outside, then use masking tape to remove some of the book board’s thickness. This way when I put the cover back together with new, strong fabric for the spine, there won’t be a lump under the book cloth.

The Murders in the Rue Morgue: Neat trick The Murders in the Rue Morgue: Neat trick part 2

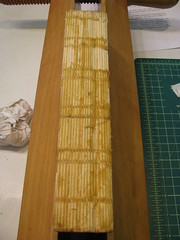
And here’s the text block after the spine lining was removed. You can see that the glue is still pretty thick.

The Murders in the Rue Morgue: Cleaner spine!

After another round of softening, I got most of the glue off, and it looked like this:

The Murders in the Rue Morgue: Ready!

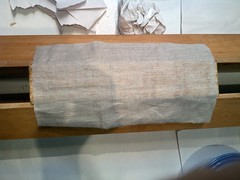
Time to attach the new, stronger spine lining cloth! This is Irish linen, which is strong and light.

The Murders in the Rue Morgue: Irish linen to line the spine

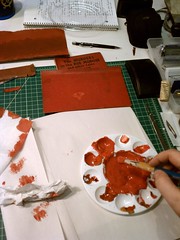
While waiting for the paste between the text block and linen to dry, I started mixing paint to match the cover. This is, weirdly, one of my favorite parts of the process. It takes forever, but it’s really rewarding when you’re done.

The Murders in the Rue Morgue: Color mixing, woo!

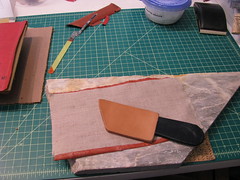
Once it was mixed, I painted a piece of Japanese paper with the paint, let it dry, and then glued it to a new piece of Irish linen. Once that was dry, it was time to bevel one edge, making it nice and thin so it would go under the book cloth flap I lifted earlier. There are two ways to bevel it, with a leather-paring knife (left) or with a sanding block (right).

The Murders in the Rue Morgue: Paring the rebacking fabric The Murders in the Rue Morgue: Paring the rebacking fabric 2

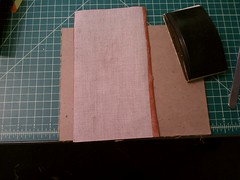
Here’s the reassembled cover from the inside. The painted Japanese-paper-and-linen spine is attached to the cover boards and a new spine stiffener is in the center.

The Murders in the Rue Morgue: Cover is ready!

The cover is attached by gluing the spine stiffener to a hollow already glued to the text block (unfortunately, I neglected to photograph that part). A hollow is a tube of strong, flexible paper pressed flat and glued to the text block’s spine. By having the tube, the book can still open nicely and have a gap between the text block and the spine of the cover! It’s a neat technique, and one I hadn’t done before this class. I’ll try and get a good series of photos of how it works another time. Once the cover was attached to the book, the ends were tucked in top and bottom. Here’s a closeup!

IMG_7875

This next shot shows my favorite tool of ALL TIME! Well, maybe not of all time, but certainly one of my favorite tools. It’s tricky to see, but the metal gizmo there is holding the end paper up a bit from the cover so that I can glue down the linen spine liner and the nice Japanese paper hinge that will join the frontmost page of the text block to the cover.

The Murders in the Rue Morgue: BEST TOOL EVER

Here’s how the back end paper looked after getting that treatment. It probably would’ve looked a bit nicer if I’d tinted the Japanese paper instead of leaving it white, but I didn’t realize how big a difference it would make until it was too late. Note for next time: dye the hinge paper!

The Murders in the Rue Morgue: Interior hinge

Here’s a closeup after I reattached a long strip of end paper that had separated along the hinge:

The Murders in the Rue Morgue: A finishing touch

At this point, all that was left was to reattach the original spine fabric from the cover!

The Murders in the Rue Morgue: Finishing the spine!

All done!

After

IMG_7869 The Murders in the Rue Morgue: After IMG_7871

And a look at the inside.

IMG_7872 The Murders in the Rue Morgue: After

Overall, I’m pretty happy with how this one turned out. I learned some new tricks while I was working on it, and have a little mental list of things I’ll do better with next time. Plus, I ordered my own metal-lifter-holder-gizmo from Don once I realized how awesome it was. Hooray! Got a book of your own that could use this treatment? Check out my Book Repair services page or get in touch!
Case Study: The Collected Poems of Rupert Brooke, c. 1915

Let’s take a look at one of the books I worked on in the latest class I took at the SFCB, The Restoration of Cloth and Leather Bindings taught by the one and only Don Etherington.

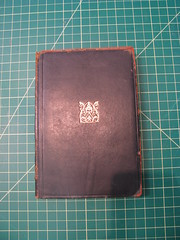
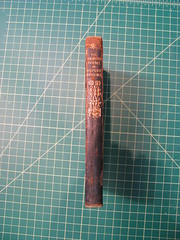
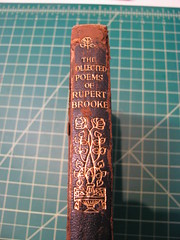
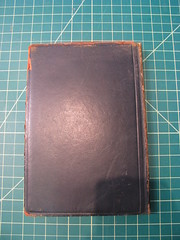
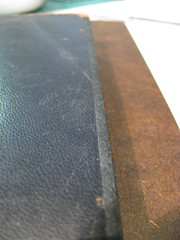
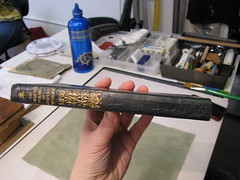
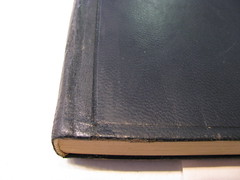
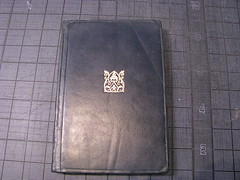
Here’s the book before. Notice that while it has a fair amount of normal wear for a cheap leather-bound book of its period, it’s not in terrible shape. It is, however, starting to get red rot at the joints where the leather’s worn. That’s no good, and will progress if unstopped. (Click the photos to see them larger on Flickr.)

Before

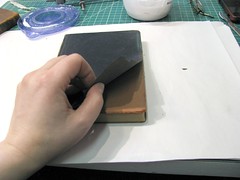
The photos are: Front cover, spine, spine closeup, back cover, and a look at the leather lifting off the back cover.

The Collected Poems of Rupert Brooke: Before The Collected Poems of Rupert Brooke: Before The Collected Poems of Rupert Brooke: Before The Collected Poems of Rupert Brooke: Before IMG_7780

In the last photo, you can see how the leather was actually disconnected from the board! It flapped around pretty badly.
Thankfully, the text block itself and the inner hinges (the paper that is glued to the cover and also part of the text block) were in top-notch shape, so I only had to reinforce the leather at the hinges, glue the leather flap down again, and do some repairs around the edges where the leather had worn through or nearly worn through.

Working

Here are some in-progress photos!

IMG_7781

In this shot, I’m using mylar film to protect the end papers while I glue black Japanese paper around the edges of the cover. This lets me put the paper exactly where I want it, and not worry about damaging the endpapers. Here’s another look at the mylar in action:

IMG_7783

After I carefully slit along the edge of the mylar, I’m left with exactly the right coverage, as you can see here. The Japanese paper just covers the places where the leather was worn away, no more. Right now the paper looks pretty matte in finish, but I’ll take care of that later on in the process.

IMG_7784

Here’s a look at the edges of the cover when I’m partway through restoring it. If you look back at the “before” photo, you’ll see that the whole long edge was very exposed. Here, that is all covered with Japanese paper.

IMG_7786

Here’s a closeup of a neat trick Don taught us: you can use tooling to help disguise the edges of the Japanese paper! For this, I carefully lined up the straight-cut paper with a tooled line in the leather.

IMG_7788

I didn’t take many photos during the finicky process of working on the spine, unfortunately, but here’s the finished product! The Japanese paper covers from the tooled line on each cover up to about a quarter of an inch of the spine. I carefully trimmed it so as not to cover the beautiful gold toling. As an experiment, since this is a book for me and not for a client, I cut one edge along the undecorated half of the spine straight, and feathered the other a bit. You can see here which has a more natural look. I took this photo after I treated the cover and Japanese paper with Klucel-G and Renaissance Wax, both of which serve to protect the materials and give the paper a more leathery look. As a bonus, they stop the red rot that had set in along the spine in its tracks!

IMG_7843

Here’s a closeup of the lower part of the spine. You can see how I used the tooling to hide the edge of the Japanese paper again.

IMG_7846

Last but not least, a final shot of the front cover, with all the edges restored. This will last well for a long time — Japanese paper is very strong and flexible, and can stand up to a lot of abuse! It will be quite a while before this book needs more work, provided no accidents befall it in the meantime.

The Collected Poems of Rupert Brooke: After

I had a lot of fun working on this book, especially because its cover reminded me of a lot of family Bibles I’ve seen over the years, their black leather bindings decaying and hinges starting to go. I’m looking forward to helping many of those books look their best as the years go by.

Finishing Touches for Your Library

So, you’ve prepared, packed, schlepped, unpacked, and organized your library. You’re probably beat!

Make It Yours

Once you’ve taken a break, though, it’s nice to add a few finishing touches. These are entirely personal, and offer you a chance to add your own flair to your collection.

  • Maybe you’re the Spartan type, and just want the books and shelves.
  • Or maybe you’ve got a green thumb, and want to tuck a few potted plants here and there.
    Tip: put your plants in plastic pots that then sit inside larger, sealed pots, rather than using pots with saucers. This will keep overzealous watering from dribbling all over your precious books!
  • Do you collect something interesting? Why not display some of your collection in the extra space on your shelves (if any!) or on top of your bookcases?
  • If your bookshelves are bracket mounted, you can hang things from the brackets.

Your imagination is the limit! Well, your imagination and a little common sense.

DO NOT:

  • Light candles in your bookcases.
    I know, this seems obvious, but it happens. Even tall shelves and short candles can spell DISASTER. At best, you wind up with bubbled veneer or smokestains. At worst, your place burns down.
  • Have anything containing water in your bookshelves unless you take thorough precautions to prevent capsizing/spillage.
  • Leave bottom shelves empty, especially if you live in earthquake country.
    You want your bookcases to be bottom-heavy, not top-heavy. Even the best safety strap is no match for a tall bookcase loaded with heavy books at the top and little or nothing at the bottom if a big quake hits.

Earthquakes

Speaking of quakes: it’s very, very important to fasten your bookcases to the wall. It’s easy to be careless, especially if you’ve shimmed your bookcases so they’re leaning against the wall, but any bookcase over 3 feet tall should be attached to the wall. There are loads of ways to do this, from safety strapping to little l-brackets, but it has to be done.

Stacking short bookcases isn’t recommended, and if you do it, be sure to secure them well. I watched as two stacked bookcases adding up to over six feet high faceplanted during a big quake when I was a kid, and have never forgotten the sight. Nobody was hurt, but the books were a bit damaged and it was scary as heck.

It’s important to secure your bookcases even if you don’t live in earthquake country. Small kids often think bookshelves look like fun to climb and can be injured when the bookcase overturns. Yikes!

It’s even worth considering installing elastic straps to make sure your books don’t come off the shelves during a quake. The professors at my college all had built-in bookcases in their offices lining the walls, floor-to-ceilling, and every shelf had a thick elastic cord running across it in the middle. It was easy to move out of the way to get a book when you wanted it, and ensured that the profs wouldn’t be crushed under their libraries if a big quake hit. Plus, lots of professors tucked things between the straps and the books as a sort of ersatz bulletin board. Win all ’round!

What About You?

How do you decorate your bookcases/bookshelves? What safety measures have you taken?

New Blank Books!

We interrupt your irregularly-scheduled programming to bring you this important announcement!

I’ve finished some blank books, and listed them in my Etsy shop! I’ve been so absent from the blog due to first day-job issues and then getting caught up in producing more lovely little journals and pocket notebooks. Yay!

Arranging and Unpacking Your Library

This is the third post in a series on moving.

So, you’ve packed your books and schlepped ’em to the new place. Now what? If you’re anything like me, you now have a bunch of bookcases that haven’t been put where they go, and an enormous pile of boxes.

Prep Work

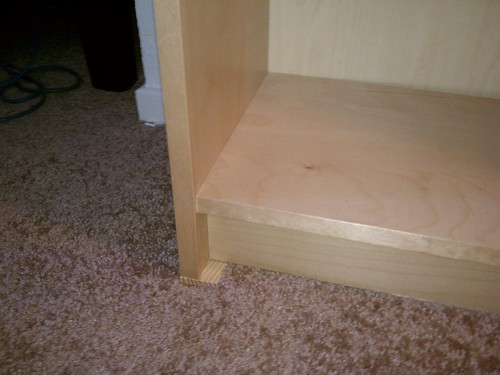
Get all your bookcases arranged. If they’re not level, or are leaning dangerously out into the room, you can pick up some wood shims from a local hardware store. Shims are basically thing wedges of wood, and you can stick ’em under the front of your bookcase to help level them. I used to use cardboard, but found that it compacted pretty severely, especially once the bookcases were full. So, wood is the way to go!

IMG_20111002_121707.jpg

If you were super meticulous and labelled all your book boxes, you can pretty easily put all the boxes near the bookcases where they’ll go. Easy peasy. If you didn’t, you have a couple strategy options: just go box-by-box and unpack them as you open them, or open them all and put them where they go, then unpack. Whatever works for you.

Organizing

I’ve already done a whole series of posts on organizing my library, and the same principles hold. The most important thing is knowing how you want your books organized. Everything beyond that is basically little tricks to make things easier.

A trick I used with my latest organization is wooden dividers for sections in my nonfiction bookshelf. I didn’t have to label the shelves, I had wooden dividers with the section names on them (huzzah for labelmakers!), and I could just move them around as the books got put away and started taking up space. I went to my local lumber store, bought a sheet of 3/4″ plywood, and had them mill it into 6″x6″ squares. I used veneer strips to make the edges look nicer, but that’s not really necessary.

IMG_20111110_132739.jpg

Demco also offers some spiffy dividers that double as bookends, holding up your books while also labeling the section. They have a ton of dividers in general, so check out their selection! Library supply stores are a bibliophile’s best friend.

One thing to watch for when unloading: bending over to pick up books from a box on the floor and then reaching up to put them away is really hard on your back over time. Stack boxes or find something to put them on so your books are at about waist height. Your back will thank you later, believe me!

Time to Relax!

There are few things so satisfying as a bookcase you’ve just filled and organized. Line your books up (remember to pull them toward the front of the bookcase so air can circulate behind them, it helps prevent mold, bugs, and other nasty stuff), take a photo or two, and put your feet up!

The fourth and final post in this series will be up in a bit. Stay tuned. Be sure you’re subscribed to the RSS feed or following me on Twitter, so you won’t miss it!

IMG_20111016_155338.jpg

Packing and Schlepping

This is the second installment in a series on moving.

Packing and schlepping your books is what most folks think of when they think of moving, and most of the sad stories I hear about moving books come from poor packing. Boxes get dropped, books shift inside them during transit, and just the weight of stacked boxes can do a number on poorly-packed books. Using good boxes and following a few basic principles can save you a lot of heartache down the road.

Packing

Here are the principles I pack by.

Firstly: group books by size. I generally sort one or two shelves at a time by size, pack most of them, then add any stragglers to the next couple of shelves and repeat. This has two advantages: my books wind up packed mostly in the right groupings, so I can label the boxes by section, and it makes fitting the books together in the box a lot easier.

IMG_20110816_202235.jpg

Secondly: Any books that will be vertically oriented in the box should go spine down. This is non-negotiable for hardcover books, and I generally do it for paperbacks too. Why? If you drop the box, any hardcover book with spine up or spine to the side will be subject to the momentum of the pages when the covers stop. Especially if they’re spine up, it can damage the spine a great deal, even tear the text block loose from the cover. Bad stuff. For paperbacks, the spine is stronger and less likely to get damaged in the event the box is dropped. Books are heavy, boxes fall or get dropped, it happens. Better to be prepared.

Thirdly: when possible, make two stacks in opposing corners of the box of books lying flat, and have those stacks go from the bottom of the box all the way to the top. This helps the box keep its structural integrity when other things are stacked on top of it. Cardboard isn’t actually all that strong, as I learned when I packed 70 or so boxes of books for a book drive last year. Stack poorly-packed boxes more than two or three high and they’ll start to collapse under the weight of the boxes on top of them. Not good!

IMG_20111016_125032.jpgFourthly, and worth saying in spite of being obvious: pack the boxes all the way full. Don’t let your books slide around! They always seem to find the worst possible direction to slide and wind up getting damaged. Use soft, light things like pillows, fluffy sweaters, towels, tshirts, or just about anything else that works well to fill in any gaps in your book boxes (in the photo here, you’ll see a weird rubber knick-knack holder I tucked in there — I shook the box around a bit before taping it closed and it worked to hold the books in place just fine).

Another practical thing to consider when packing your books is how much detail to use in labeling the boxes. I’m a fairly lazy labeler when it comes to my own moving, and it seems like every time I move I swear that next time I’ll do a better job. In this move, I just scribbled a letter or two on each box to indicate which part of my library it belonged to (U for Unread, SC for Special Collections, etc).

Schlepping

You’ve probably heard all the standard advice: lift with your legs, not your back! Take breaks! Another less-well-known thing to watch out for: don’t pivot while holding something heavy! If you are picking things up from a dolly and lifting them into the back of a truck or car, be careful that you aren’t rotating without moving your feet while you’re holding the box. Generally one can get away with it a few times, especially if the rotation is only 90 degrees or so, but more than that and you will almost certainly throw your back out. This, I know from personal experience. Learn from my mistakes, my friends! Be nice to your back. Use a dolly! Get friends to help you! (Be sure to stock up on their snacks/beverages of choice, especially at the new residence. Friends help you move, good friends help you move books.)

A Final Note

Be careful when unloading wall-mounted book cases, even those where the brackets are attached to the boards. Books are very heavy, and an unbalanced shelf can very easily shift unexpectedly — at best, it dumps some books on the floor, at worst, it can rip half your bookcase off the wall. I’ve seen it happen! So be careful. Even with regular bookcases, it’s wise to unload them from top to bottom so that the center of gravity stays nice and low. Packing and moving is bad enough without adding injuries to the mix!

Preparing to Move

This is the first installment in a series on moving.

So, fellow bibliophile! You’re going to be moving soon? You have my sympathies! Moving a library can be a nightmare. Preparation is vital.

Give Your Books a Once-Over

Do you have any particularly delicate books? Books in this category include:

  • Any paperback or hardcover with loose pages or other structural damage.
  • Antique books that seem a bit fragile
  • Odd-sized books (very small or very tall and thin)


Decide how concerned you are for these books’ well-being and either set them aside to be transported separately (possibly each wrapped in packing paper first) or make a mental note to pack with them in mind so they’ll be supported and braced by other books.

Find the Right Boxes

This is very important. It’s really, really easy to look at a box and think it’ll be fine when packed with books and then find yourself unable to move it without injury. Books are heavy.  Three trade paperbacks weigh about a pound. So does a single normal-size hardcover.

In my experience, the small cube-sized boxes offered by places like U-Haul are a bit small, while their small rectangular boxes are too big. The best boxes I’ve found so far are the ones from Better World Books I was able to get leftover from a book drive done in partnership with them. That’s what I used for my most recent move.

If you can’t get your hands on book drive boxes, you’re better erring on the side of too small than too big. If all you can find are big boxes, try hitting up a local library or bookstore for leftover boxes from their book shipments. Or, pack a layer of books at the bottom of your big boxes and then filling the rest of the space with something lightweight.

The C-Word

I am of course, talking about culling.

I read Unclutterer frequently, and most of the folks writing/commenting there are major proponents of getting rid of any book that isn’t reference or something you’re going to read and reread.You’ll find the same message on many other sites, and not just minimalist-oriented ones.

Unsurprisingly, I disagree.

Books are more than just the stories they hold. They are historical artifacts, memorabilia, and plenty more. If nobody ever held onto old books, there are a lot of researchers who would be majorly out of luck. Consider the museums that showcase children’s books, or the ancient books historians and bibliophiles pour over. Hell, I’m really irked that I will probably never get my hands on a complete copy of Varney the Vampire because it was a penny dreadful and those cheap pamphlets almost never survived culling (even Project Gutenberg doesn’t have a complete version). At the time, nobody thought Varney the Vampire was anything more than just another pulp horror story. Looking back, though, it was one of the first vampire novels in English, and that makes it significant.

I’ve frequently held onto books and reread them later because I learned something new about the author or otherwise had my views changed.

I’m a big believer that what we each do with our book collections is our own business, so if you choose to cull yours, I won’t give you a hard time about it — but if you’re considering culling mostly because of pressure from other people, don’t. Nobody can say what the right standards for collecting are for you but you.

All Set?

Once you’ve got your boxes and decided how to handle your delicate books, you’re ready to pack! Come back next week for my take on that.

She’s BACK!

So! I’ve been AWOL from the blog for a while. Why?

I moved.

Nothing like prepping to move when you not only have over 1,200 books but are also something of a packrat. Ouch.

So, I figured I’d do a series of posts about the realities of moving when you are a bibliophile!

Watch this space as I cover:

  1. Preparing to move
  2. Packing your books — books into boxes, boxes into truck/van/car/whatever
  3. Unpacking your books — from the truck/van/car/whatever, and from the boxes
  4. Final touches

See you next Wednesday!

I’m Selling Blank Books!

OK, so I think in theory, the way selling stuff online goes, you’re supposed to have a big co-ordinated launch thing with newsletters and tweets and posts and whatnot.

Which is great, but I am sick and am jobhunting for another cubicle gig, so I’m a little preoccupied. Sorry about that.

But! You Can Still Buy Stuff

I am selling blank books, like the ones I made in my early Bookbinding classes at the SFCB! They are basically your standard sized hardbound blank books, with unlined pages, except I made them!

Pretty sweet, no?

Also, I am a Paper Nerd

The blank books use Mohawk Superfine 70lb Text paper for the pages, and let me tell you, I am in love with this paper. I used it to make myself an oversized journal to do my Morning Pages in, and I still can’t get over how smooth it is — just the right amount of smooth. It’s got an eggshell finish, so the ink soaks in and there’s a bit of friction against the nib of your pen, but just the right amount.

Even better, if you make dark lines on a loose sheet of paper and put it behind the sheet you’re writing on, you can just barely see the lines through the Mohawk Superfine! Seriously, this stuff is basically my Platonic ideal of paper. I know it’s not gonna be everybody’s, but if you taste in paper is anything like mine, you will drool when you touch it.

I used colors and patterns on the covers that I thought looked spiffy, but I’ve barely touched my stash of decorative paper and book cloth, so there will be plenty of other designs coming! I’ll be posting the books two or three at a time, as I finish them, so keep an eye on my Etsy Shop!

The Art and Science of Cloth Rebacking

Last week I spent four days, 9:30-6ish, up at the San Francisco Center for the Book, learning how to do cloth rebacking.

WTF is Cloth Rebacking?

Well might you ask!

Cloth rebacking is when you take a cloth-bound book that is falling apart and fix its binding.

Fitting the clothBasically, it involves putting new cloth underneath the old cloth and rebinding the book. There’s a lot more to it than that, and I put up a ton of photos on my personal Flickr detailing the process.

It was really fun!

The teacher, Dominic Riley, is a professional bookbinder and book repairer from the UK, and he has done over 900 cloth rebackings alone in the course of his career. He knew all kinds of tricks and methods of dealing with the various odd bits of damage and peculiarities of the books my classmates and I were working on for the class.

There were a few steps that were incredibly stressful, like cutting into the bookboard to make a channel for the new cloth to go into, and working the cloth into it. My book’s bookboard was very old and fragile, and really uncooperative!

Front Cover: progressWeirdly, my favorite part was repainting the cover — a very painstaking and exact process using the finest brush I own (which I originally bought for detail work painting lead miniatures). It was also the part I did the best at — Dominic seemed very impressed with my work. So gratifying!

I’m looking forward to practicing on several of my own books and on some of my family’s books — and then I’m going to start offering this service to all of you!

Got damaged books?

Start making a note of which books you have that could use some TLC. The Book Roadie’s Book Hospital will be taking patients soon!