Case Study: The Murders in the Rue Morgue and Other Tales of Horror, circa 1935

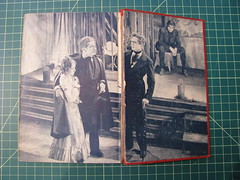
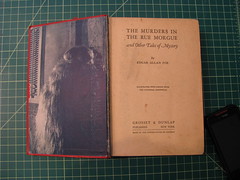
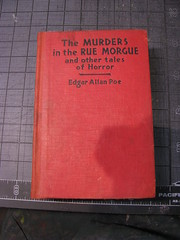
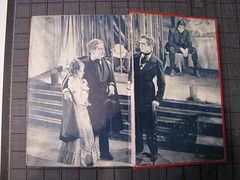
I’m not sure how old this book is — much to my surprise, it has no copyright date! It does, however, have screen shots from the Universal movie of the same name, which came out in 1932, so that gives a rough date. It’s an old Grosset and Dunlap book, which means that while it’s neato in terms of content, it’s el cheapo in terms of binding. I actually took it with me as a possible candidate for my first book repair class, but wound up not using it because it wasn’t going to work well for the set of skills we would be practicing that day. It turned out to be great for the The Restoration of Cloth and Leather Bindings class I took at the SFCB, taught by Don Etherington.
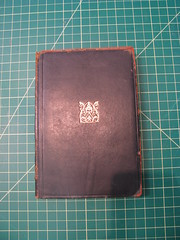
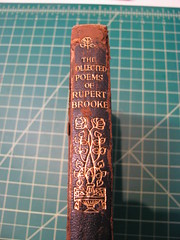
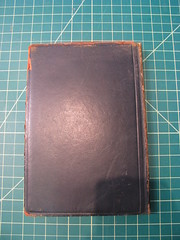
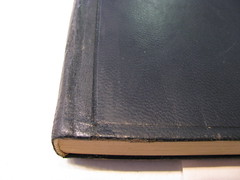
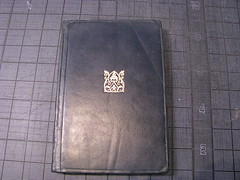
Before

The Murders in the Rue Morgue: Before The Murders in the Rue Morgue: Before The Murders in the Rue Morgue: Before

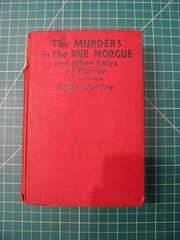
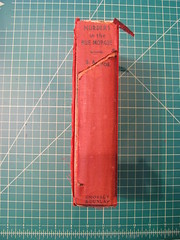
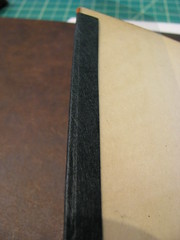
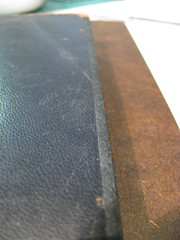
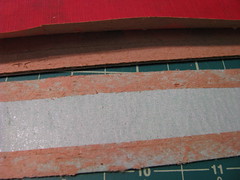
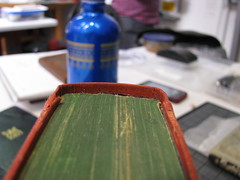
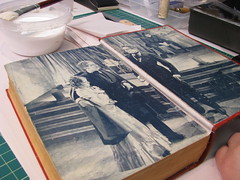
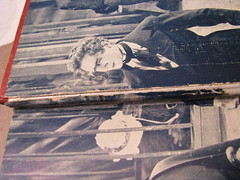
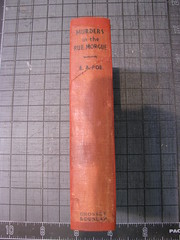
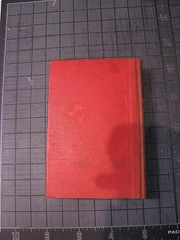
As you can see, pretty much all of the damage is to the spine. The cover boards were still attached, but the spine piece had started to come off (the small piece near the top was completely detached and I’d been keeping it inside the book all this time). The shadows in the lower right corner of each photo are thanks to the weird lighting in the classroom. I didn’t have the time to take away from class to set up for really nice shots. Sigh.

The Murders in the Rue Morgue: Before The Murders in the Rue Morgue: Before

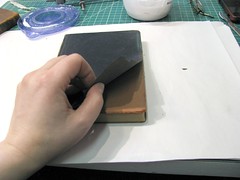
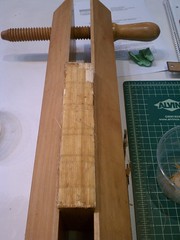
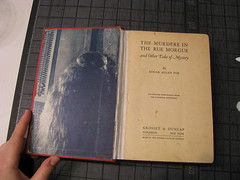
The text block is in good shape, but the front end paper is half-missing and the back end paper had detached. First things first: I removed the cover and cleaned the spine. Here you can see the text block with some gloopy paste on it to soften the old, brittle spine lining.

The Murders in the Rue Morgue: Cleaning the spine

While waiting for the spine lining to soften, I worked on the cover boards. First I had to lift some of the book cloth on the outside, then use masking tape to remove some of the book board’s thickness. This way when I put the cover back together with new, strong fabric for the spine, there won’t be a lump under the book cloth.

The Murders in the Rue Morgue: Neat trick The Murders in the Rue Morgue: Neat trick part 2

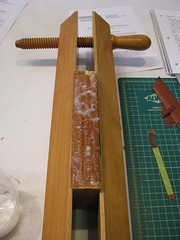
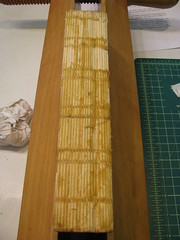
And here’s the text block after the spine lining was removed. You can see that the glue is still pretty thick.

The Murders in the Rue Morgue: Cleaner spine!

After another round of softening, I got most of the glue off, and it looked like this:

The Murders in the Rue Morgue: Ready!

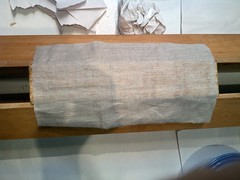
Time to attach the new, stronger spine lining cloth! This is Irish linen, which is strong and light.

The Murders in the Rue Morgue: Irish linen to line the spine

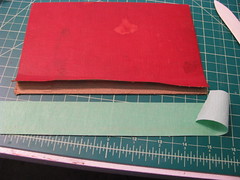
While waiting for the paste between the text block and linen to dry, I started mixing paint to match the cover. This is, weirdly, one of my favorite parts of the process. It takes forever, but it’s really rewarding when you’re done.

The Murders in the Rue Morgue: Color mixing, woo!

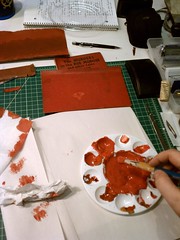
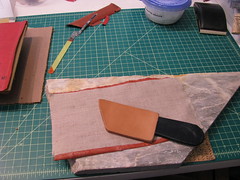
Once it was mixed, I painted a piece of Japanese paper with the paint, let it dry, and then glued it to a new piece of Irish linen. Once that was dry, it was time to bevel one edge, making it nice and thin so it would go under the book cloth flap I lifted earlier. There are two ways to bevel it, with a leather-paring knife (left) or with a sanding block (right).

The Murders in the Rue Morgue: Paring the rebacking fabric The Murders in the Rue Morgue: Paring the rebacking fabric 2

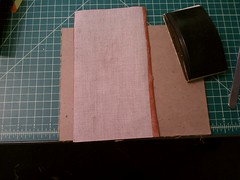
Here’s the reassembled cover from the inside. The painted Japanese-paper-and-linen spine is attached to the cover boards and a new spine stiffener is in the center.

The Murders in the Rue Morgue: Cover is ready!

The cover is attached by gluing the spine stiffener to a hollow already glued to the text block (unfortunately, I neglected to photograph that part). A hollow is a tube of strong, flexible paper pressed flat and glued to the text block’s spine. By having the tube, the book can still open nicely and have a gap between the text block and the spine of the cover! It’s a neat technique, and one I hadn’t done before this class. I’ll try and get a good series of photos of how it works another time. Once the cover was attached to the book, the ends were tucked in top and bottom. Here’s a closeup!

IMG_7875

This next shot shows my favorite tool of ALL TIME! Well, maybe not of all time, but certainly one of my favorite tools. It’s tricky to see, but the metal gizmo there is holding the end paper up a bit from the cover so that I can glue down the linen spine liner and the nice Japanese paper hinge that will join the frontmost page of the text block to the cover.

The Murders in the Rue Morgue: BEST TOOL EVER

Here’s how the back end paper looked after getting that treatment. It probably would’ve looked a bit nicer if I’d tinted the Japanese paper instead of leaving it white, but I didn’t realize how big a difference it would make until it was too late. Note for next time: dye the hinge paper!

The Murders in the Rue Morgue: Interior hinge

Here’s a closeup after I reattached a long strip of end paper that had separated along the hinge:

The Murders in the Rue Morgue: A finishing touch

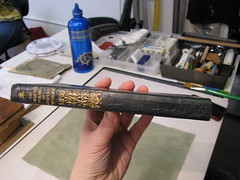
At this point, all that was left was to reattach the original spine fabric from the cover!
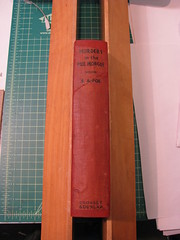
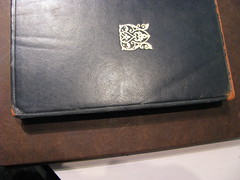
The Murders in the Rue Morgue: Finishing the spine!

All done!

After

IMG_7869 The Murders in the Rue Morgue: After IMG_7871

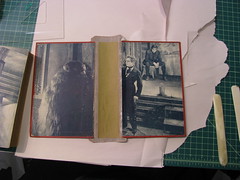
And a look at the inside.

IMG_7872 The Murders in the Rue Morgue: After

Overall, I’m pretty happy with how this one turned out. I learned some new tricks while I was working on it, and have a little mental list of things I’ll do better with next time. Plus, I ordered my own metal-lifter-holder-gizmo from Don once I realized how awesome it was. Hooray! Got a book of your own that could use this treatment? Check out my Book Repair services page or get in touch!

Case Study: The Collected Poems of Rupert Brooke, c. 1915

Let’s take a look at one of the books I worked on in the latest class I took at the SFCB, The Restoration of Cloth and Leather Bindings taught by the one and only Don Etherington.

Here’s the book before. Notice that while it has a fair amount of normal wear for a cheap leather-bound book of its period, it’s not in terrible shape. It is, however, starting to get red rot at the joints where the leather’s worn. That’s no good, and will progress if unstopped. (Click the photos to see them larger on Flickr.)

Before

The photos are: Front cover, spine, spine closeup, back cover, and a look at the leather lifting off the back cover.

The Collected Poems of Rupert Brooke: Before The Collected Poems of Rupert Brooke: Before The Collected Poems of Rupert Brooke: Before The Collected Poems of Rupert Brooke: Before IMG_7780

In the last photo, you can see how the leather was actually disconnected from the board! It flapped around pretty badly.

Thankfully, the text block itself and the inner hinges (the paper that is glued to the cover and also part of the text block) were in top-notch shape, so I only had to reinforce the leather at the hinges, glue the leather flap down again, and do some repairs around the edges where the leather had worn through or nearly worn through.

Working

Here are some in-progress photos!

IMG_7781

In this shot, I’m using mylar film to protect the end papers while I glue black Japanese paper around the edges of the cover. This lets me put the paper exactly where I want it, and not worry about damaging the endpapers. Here’s another look at the mylar in action:

IMG_7783

After I carefully slit along the edge of the mylar, I’m left with exactly the right coverage, as you can see here. The Japanese paper just covers the places where the leather was worn away, no more. Right now the paper looks pretty matte in finish, but I’ll take care of that later on in the process.

IMG_7784

Here’s a look at the edges of the cover when I’m partway through restoring it. If you look back at the “before” photo, you’ll see that the whole long edge was very exposed. Here, that is all covered with Japanese paper.

IMG_7786

Here’s a closeup of a neat trick Don taught us: you can use tooling to help disguise the edges of the Japanese paper! For this, I carefully lined up the straight-cut paper with a tooled line in the leather.

IMG_7788

I didn’t take many photos during the finicky process of working on the spine, unfortunately, but here’s the finished product! The Japanese paper covers from the tooled line on each cover up to about a quarter of an inch of the spine. I carefully trimmed it so as not to cover the beautiful gold toling. As an experiment, since this is a book for me and not for a client, I cut one edge along the undecorated half of the spine straight, and feathered the other a bit. You can see here which has a more natural look. I took this photo after I treated the cover and Japanese paper with Klucel-G and Renaissance Wax, both of which serve to protect the materials and give the paper a more leathery look. As a bonus, they stop the red rot that had set in along the spine in its tracks!

IMG_7843

Here’s a closeup of the lower part of the spine. You can see how I used the tooling to hide the edge of the Japanese paper again.

IMG_7846

Last but not least, a final shot of the front cover, with all the edges restored. This will last well for a long time — Japanese paper is very strong and flexible, and can stand up to a lot of abuse! It will be quite a while before this book needs more work, provided no accidents befall it in the meantime.

The Collected Poems of Rupert Brooke: After

I had a lot of fun working on this book, especially because its cover reminded me of a lot of family Bibles I’ve seen over the years, their black leather bindings decaying and hinges starting to go. I’m looking forward to helping many of those books look their best as the years go by.