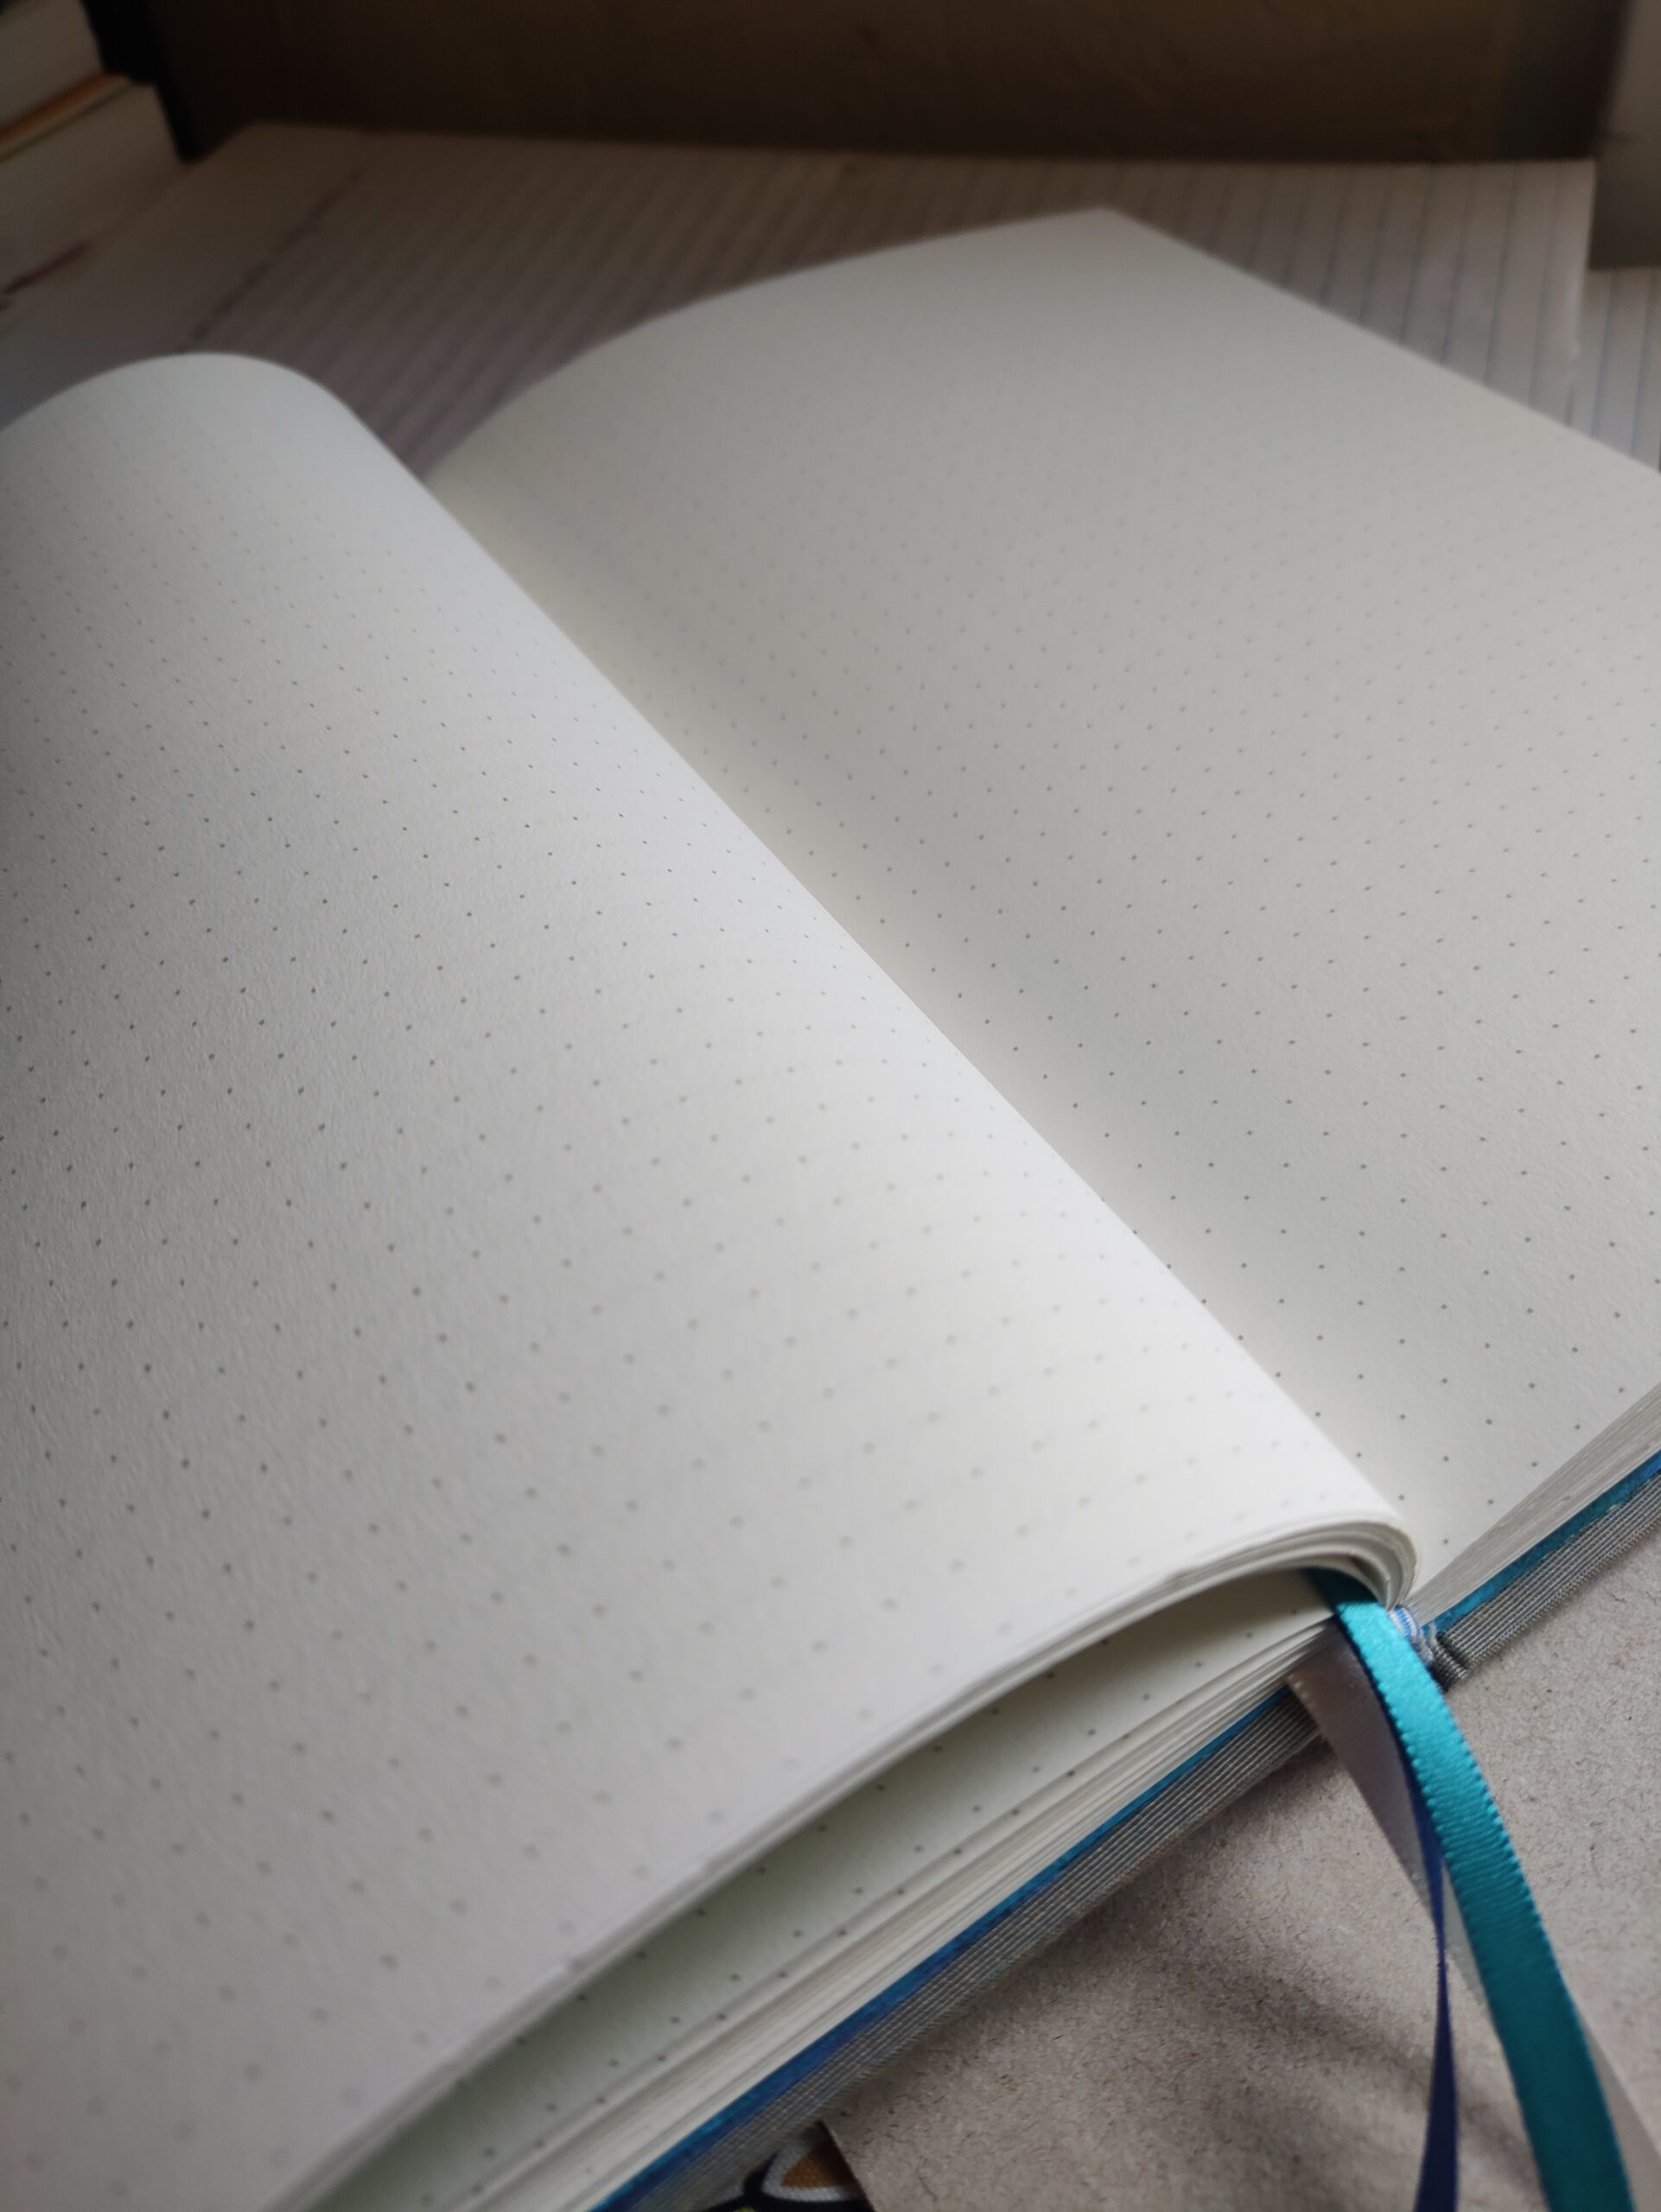
Dot grid paper! Beloved of all sorts of folks, especially in the bullet journal community. It makes laying out page templates much simpler, works for writing vertically or horizontally, and so on.
I’ve been using a pdf a very kind friend made for me years ago when I bind bullet journals for myself and the occasional customer, but I finally found a tutorial that made sense and can now generate my own! All different colors, and a handful of different sizes too. Behold:
I did have to make one tweak to the tutorial, though – pixels aren’t perfectly square, apparently, so setting the height and width to the same number of pixels gives you a rectangular grid rather than a square one. I did some experiments and a bit of web searching to get the ratio right – 16px high by 17px wide and 19px high by 20px wide are the sizes I like.
Doubtless, if I had fancier software and more knowhow I’d be able to do any size I wanted and just generate an image at a higher resolution or something, but I am not a graphic designer. I do have Google Sheets though!
So now I can make dot grid paper in two sizes and numerous colors!
And there’s also these samplers, which will give you a rough idea of what the dots look like at different sizes and in different colors! 19px sampler and 16px sampler of course, my printer and your printer will differ a bit, colorwise, but it gives you a good idea.
I’m excited about the possibilities here – I love picking materials that have overlapping color palettes, and now I can do dot grids in various colors to match the bindings! Yes, I am a giant nerd. But it’s cool, right?
Are you interested in ordering a custom book with dot grid pages? Drop me a line! I love binding custom books.
Recently, I had the opportunity to vend at an online witchcraft conference. The Critical Thinking Witch Collective (formerly SASS Witches – Science-minded, Agnostic/Atheist, Secular, and Skeptical Witches) held their annual CritWitchCon at the beginning of October this year, and when I saw on Instagram that they’d be having vendors I was immediately interested. I’ve been following them for a while, and love their approach.
The con is held in a Zoom room, with breakout rooms to offer the kind of hangout space an in-person con has in the hallways. There’s a Discord server for the convention (think instant messaging but there are a bunch of different channels where chats happen), with channels for each presentation, various topics, and for each vendor. The vendor fee was pretty low and included a ticket to the con, so I figured it was worth a try.
I’m so glad I gave it a shot! There are quite a few things to like about my online vending experience:
Watching the presentations while also vending. I kept my channel open in one window and the Zoom in another, and so was effectively in the vendor room while also attending panels. Not something I get to do at most cons!
Zero commute. I vended from the comfort of my home office. This removes the biggest source of vending costs for me – travel expenses. (no joke, even for local cons there’s gas and time, and for out-of-town events there’s hotel room, parking, etc etc etc).
Easy setup and teardown. I didn’t have to haul inventory, set up tables, load a vehicle, etc. I cleared my desk a bit and tided up the parts of my office that would show on camera.
I got to be on a panel! There was a brief vendor panel that was even more fun than I expected. It was fun to talk a little about my biz and gave attendees a chance to see me a bit.
No con crud concerns! A big deal these days, and the reason I’m not vending in person yet. I’m chronically ill, so I have to be extra careful about covid. But nobody was in my room but me, so it was totally safe on that front!
There were a few less-than-great things:
Attendees couldn’t handle my books. This is easily the most important thing for my little biz. Photos don’t do them justice, and the quality of material and construction are much easier to see in person vs. online.
Fewer chats with attendees. One of the things I miss most about vending is chatting with folks about books! I had my Discord channel, but it was pretty low traffic. It’s hard to look friendly and easy to talk to through a screen.
I wasn’t sure how best to promote myself in the Discord. This being a brand new thing for me, I had almost no idea what I was doing. 🙂
Overall, though, it was a very positive experience! I have a few ideas for things to do if/when I get to virtually vend in the future:
Do a demo! One of the things that’s great about in-person vending is that people get to see me working on books. I posted a few photos in my channel, but doing a proper demo would probably have made more of an impression. Even just a little video stream in my own channel (though having time in the main Zoom would be amazing)
Do a raffle/giveaway! Getting more of my books into the hands of folks who can appreciate them is always a good thing.
Many thanks to the organizers for this fun opportunity! I hope to vend with y’all again soon.
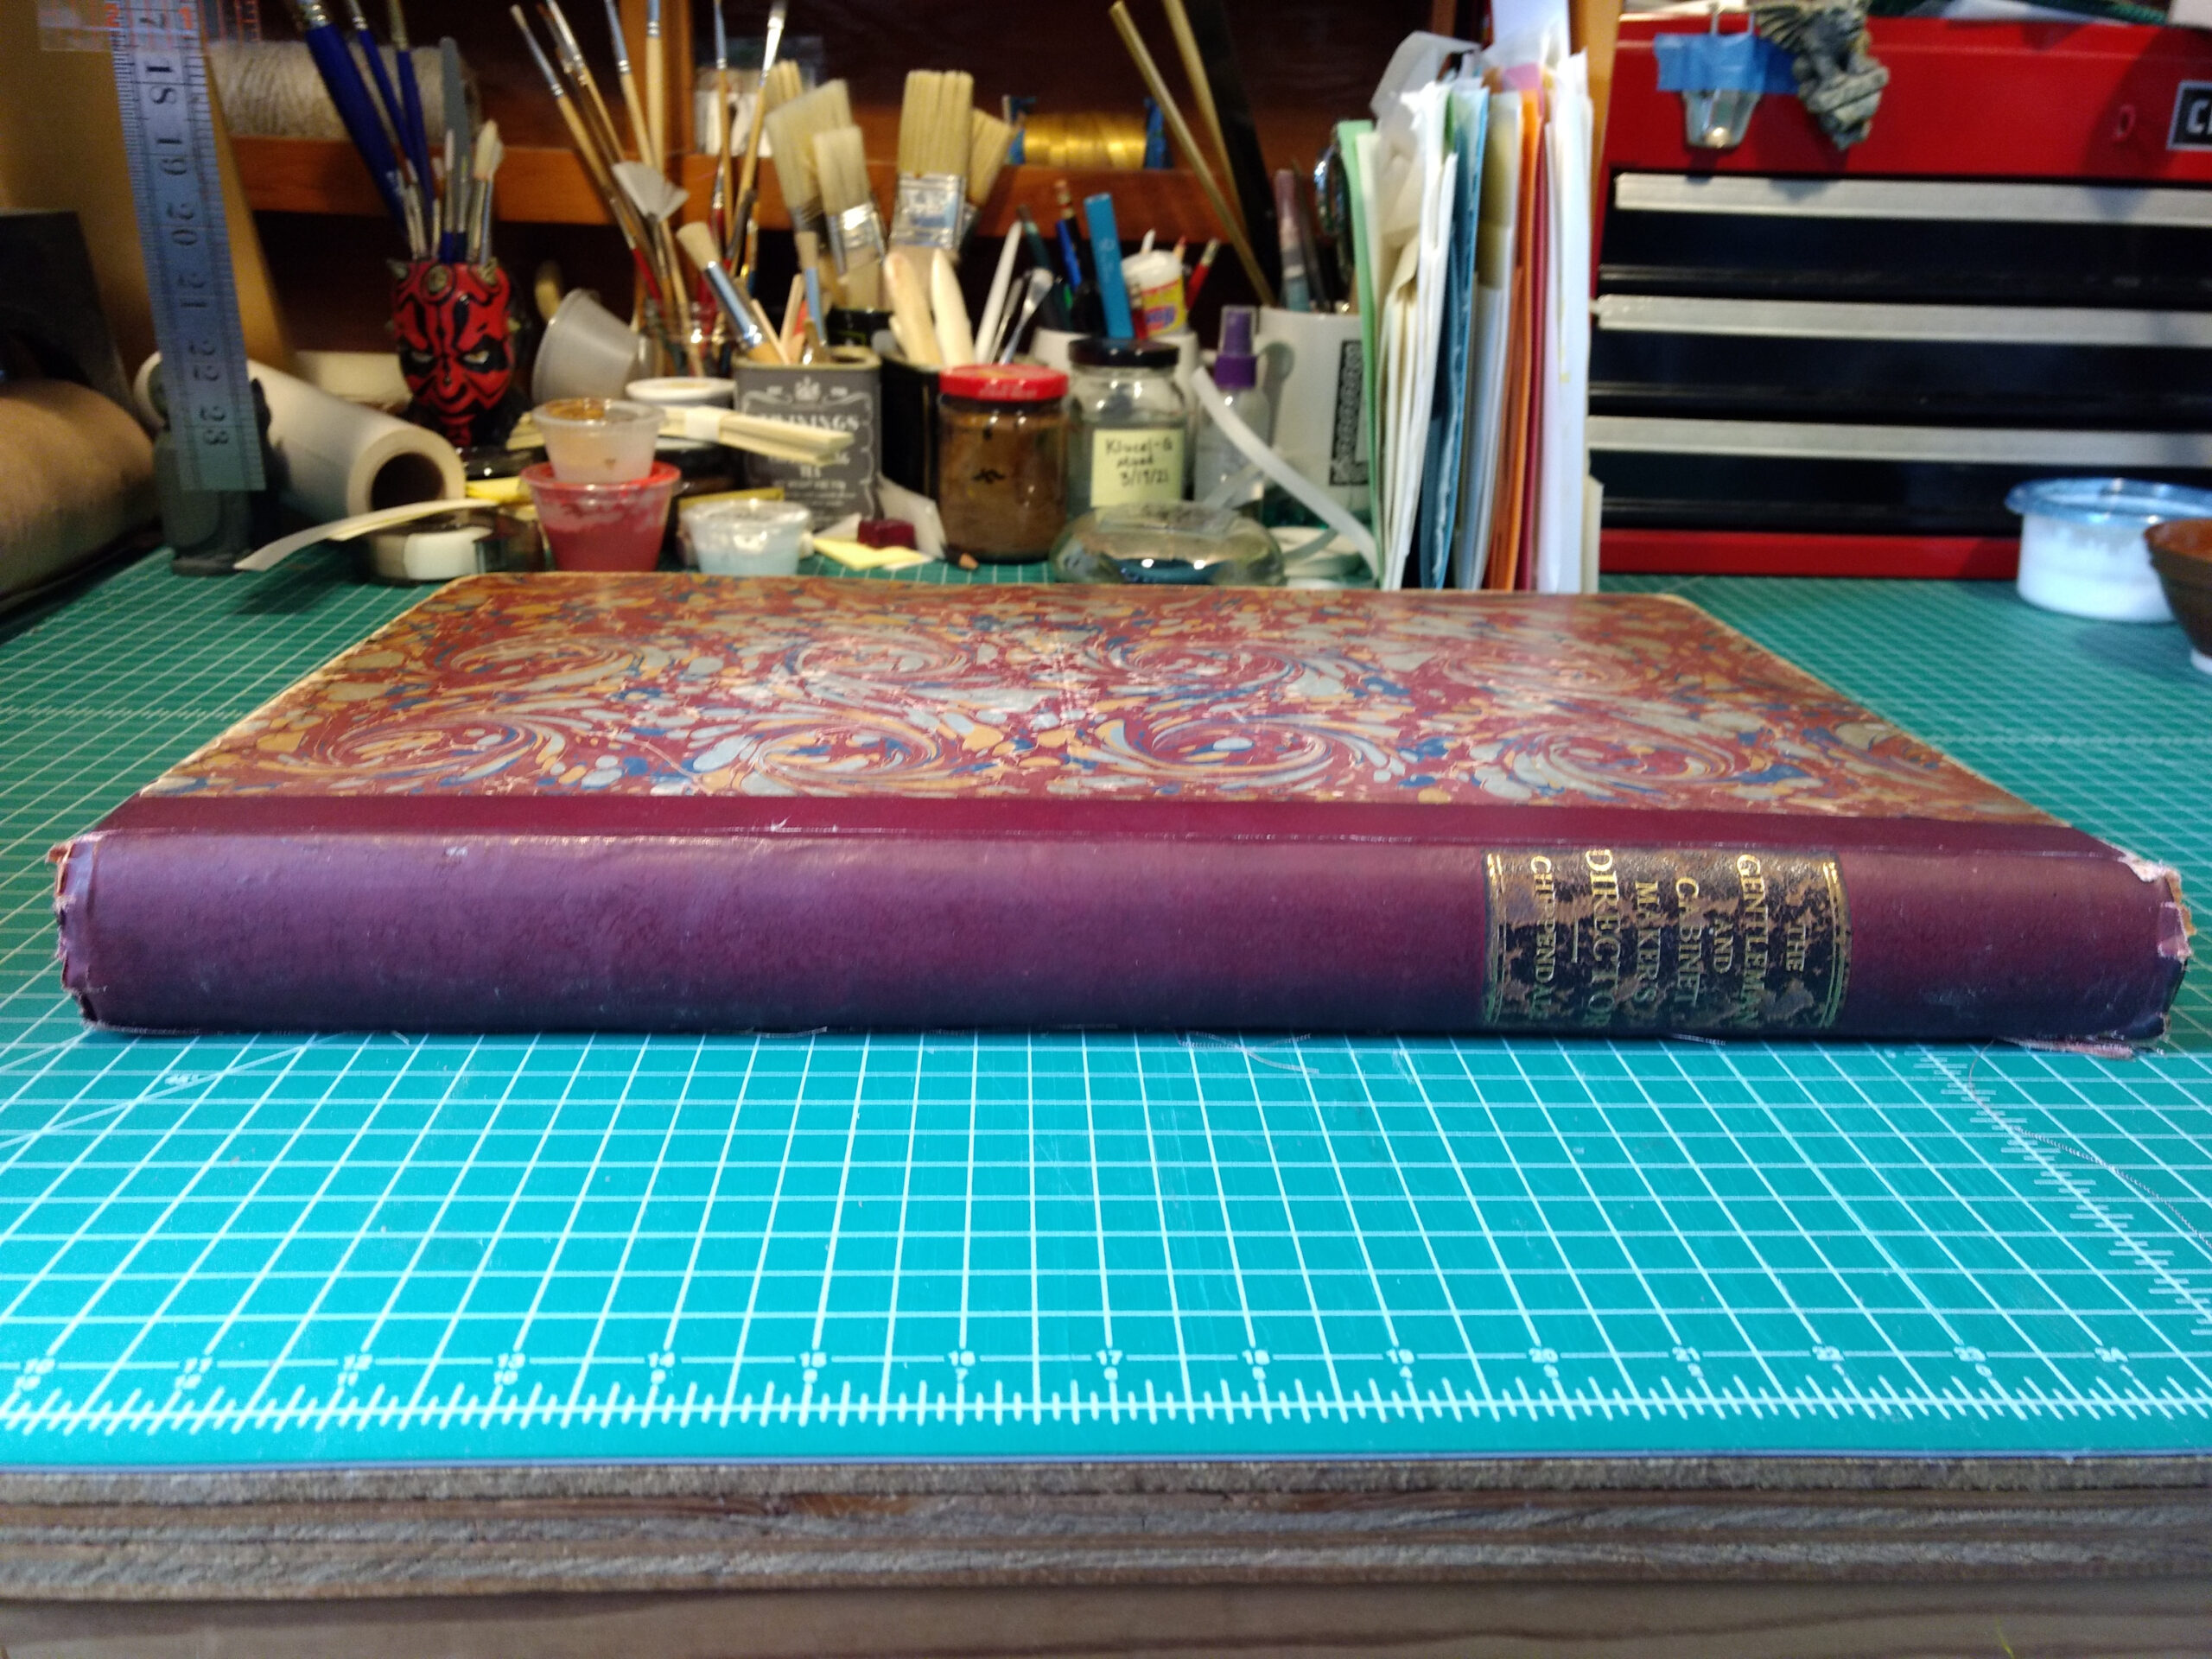
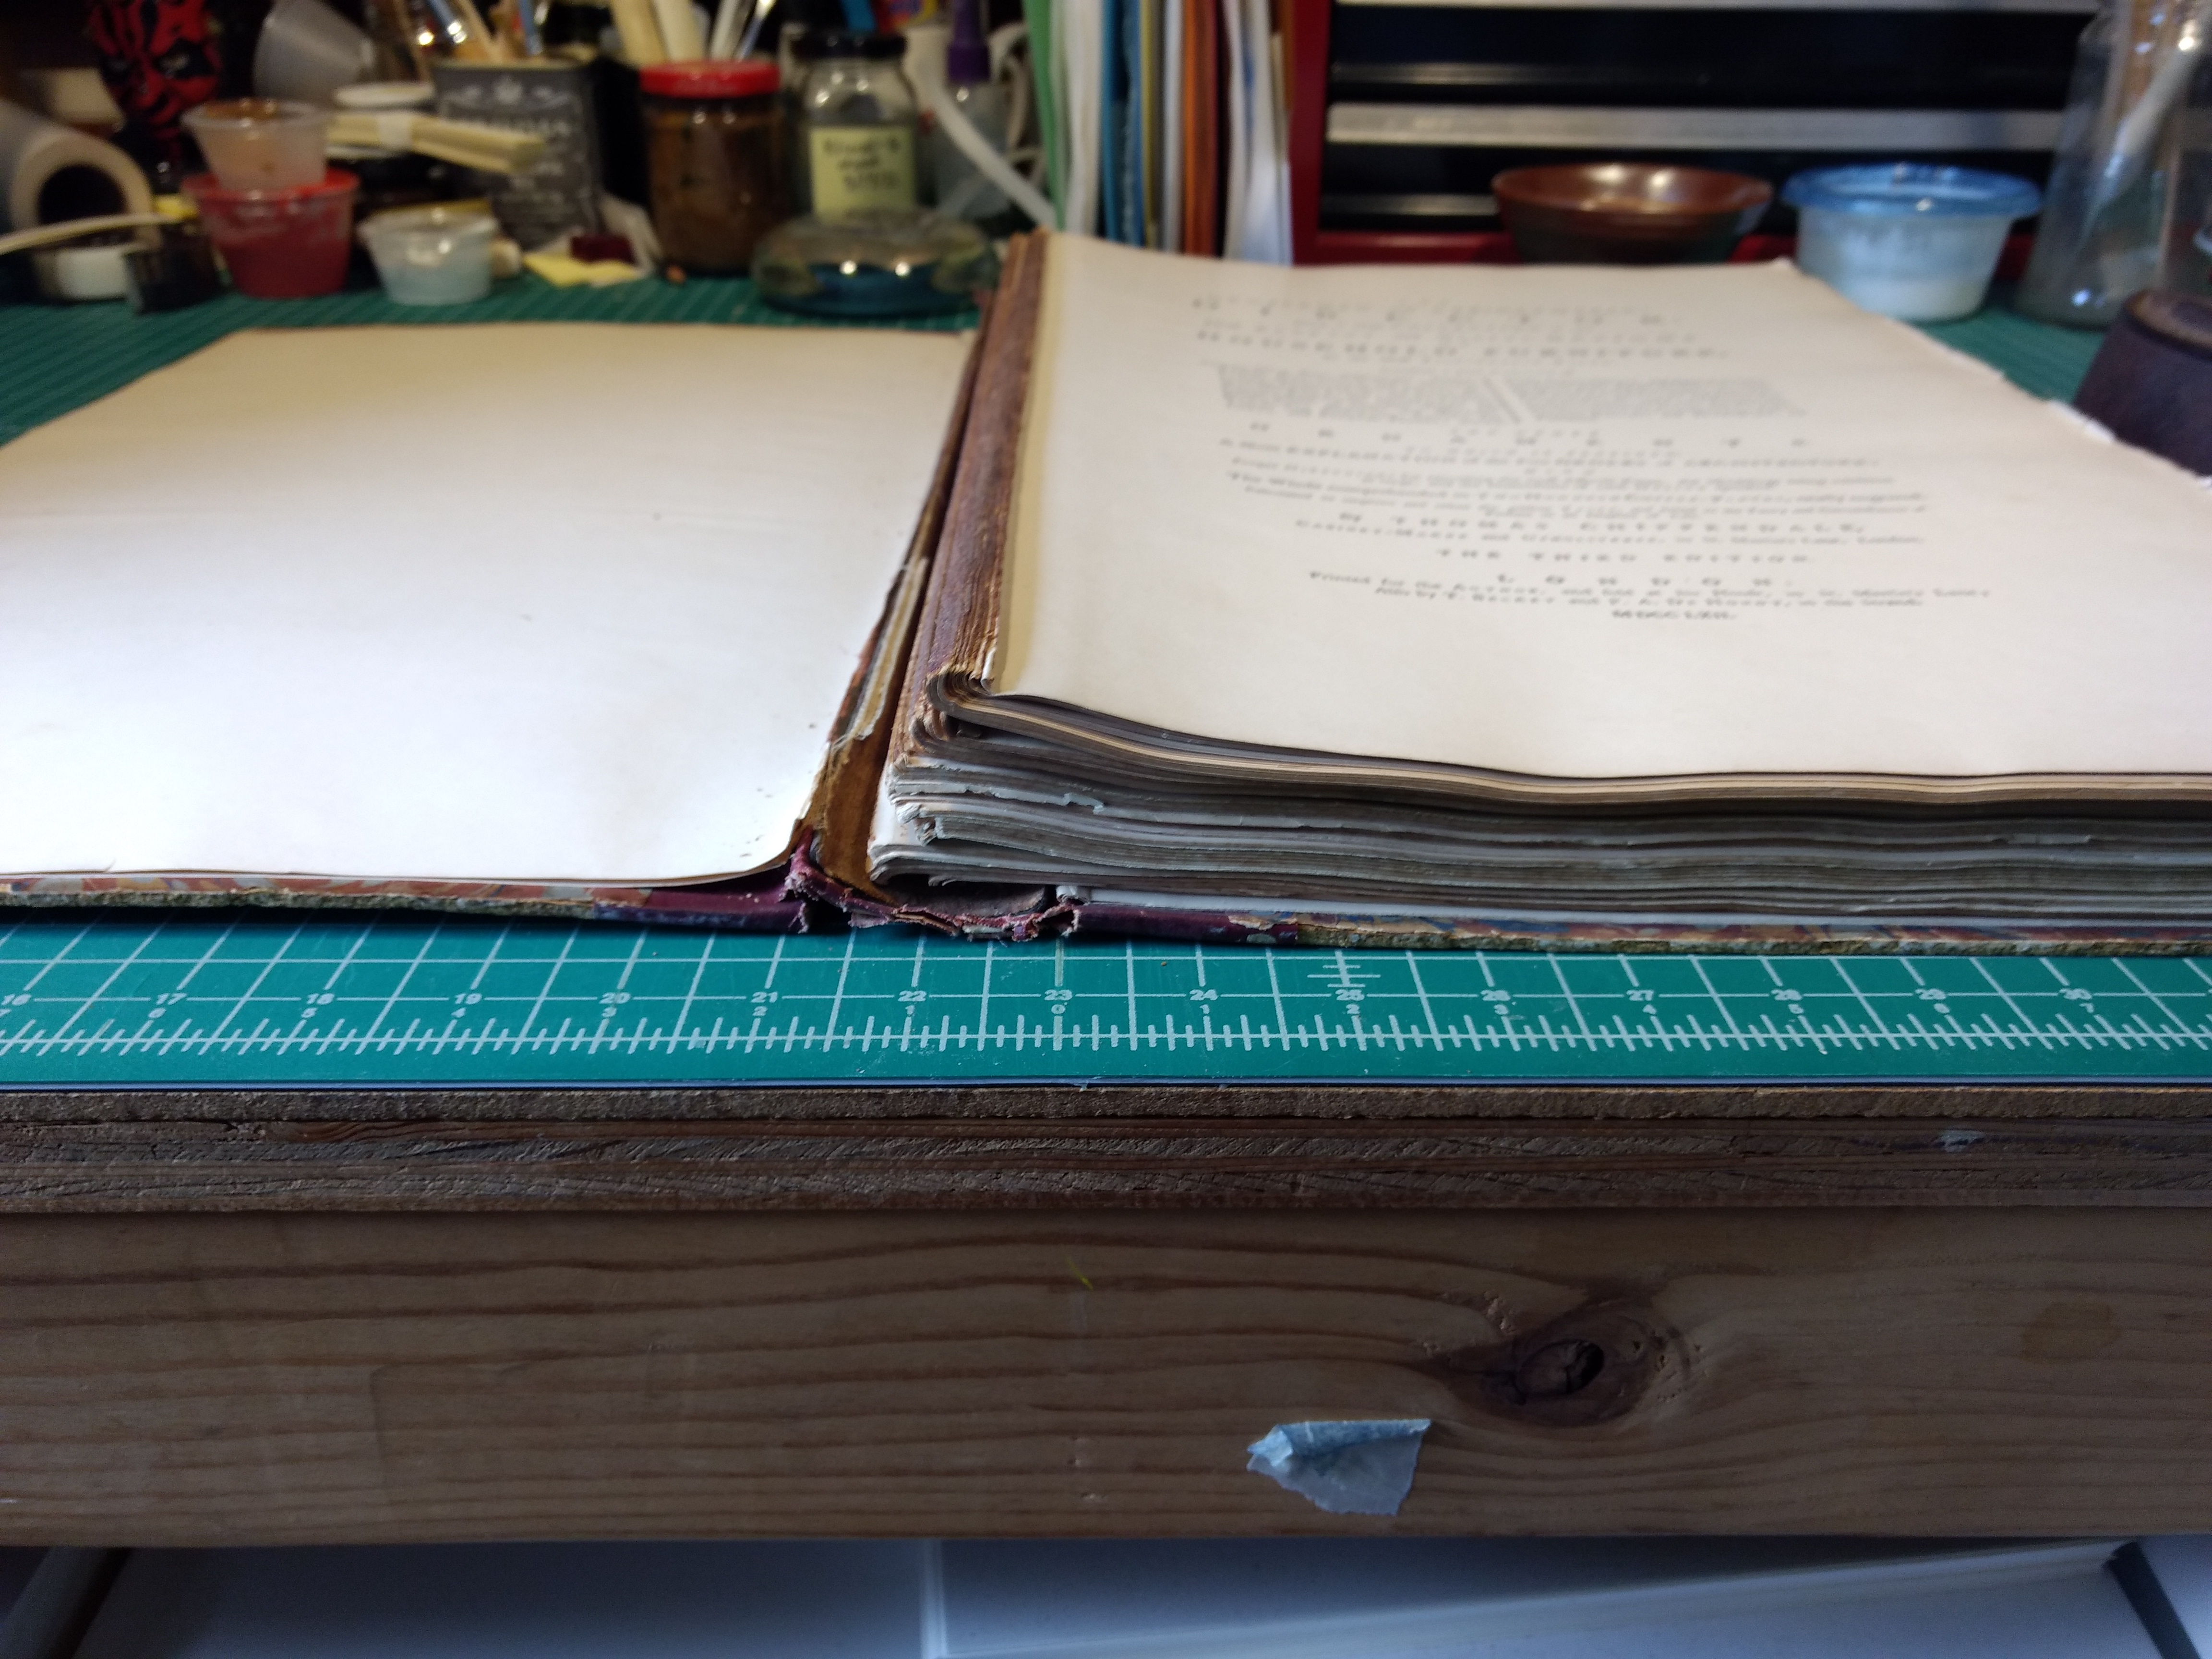
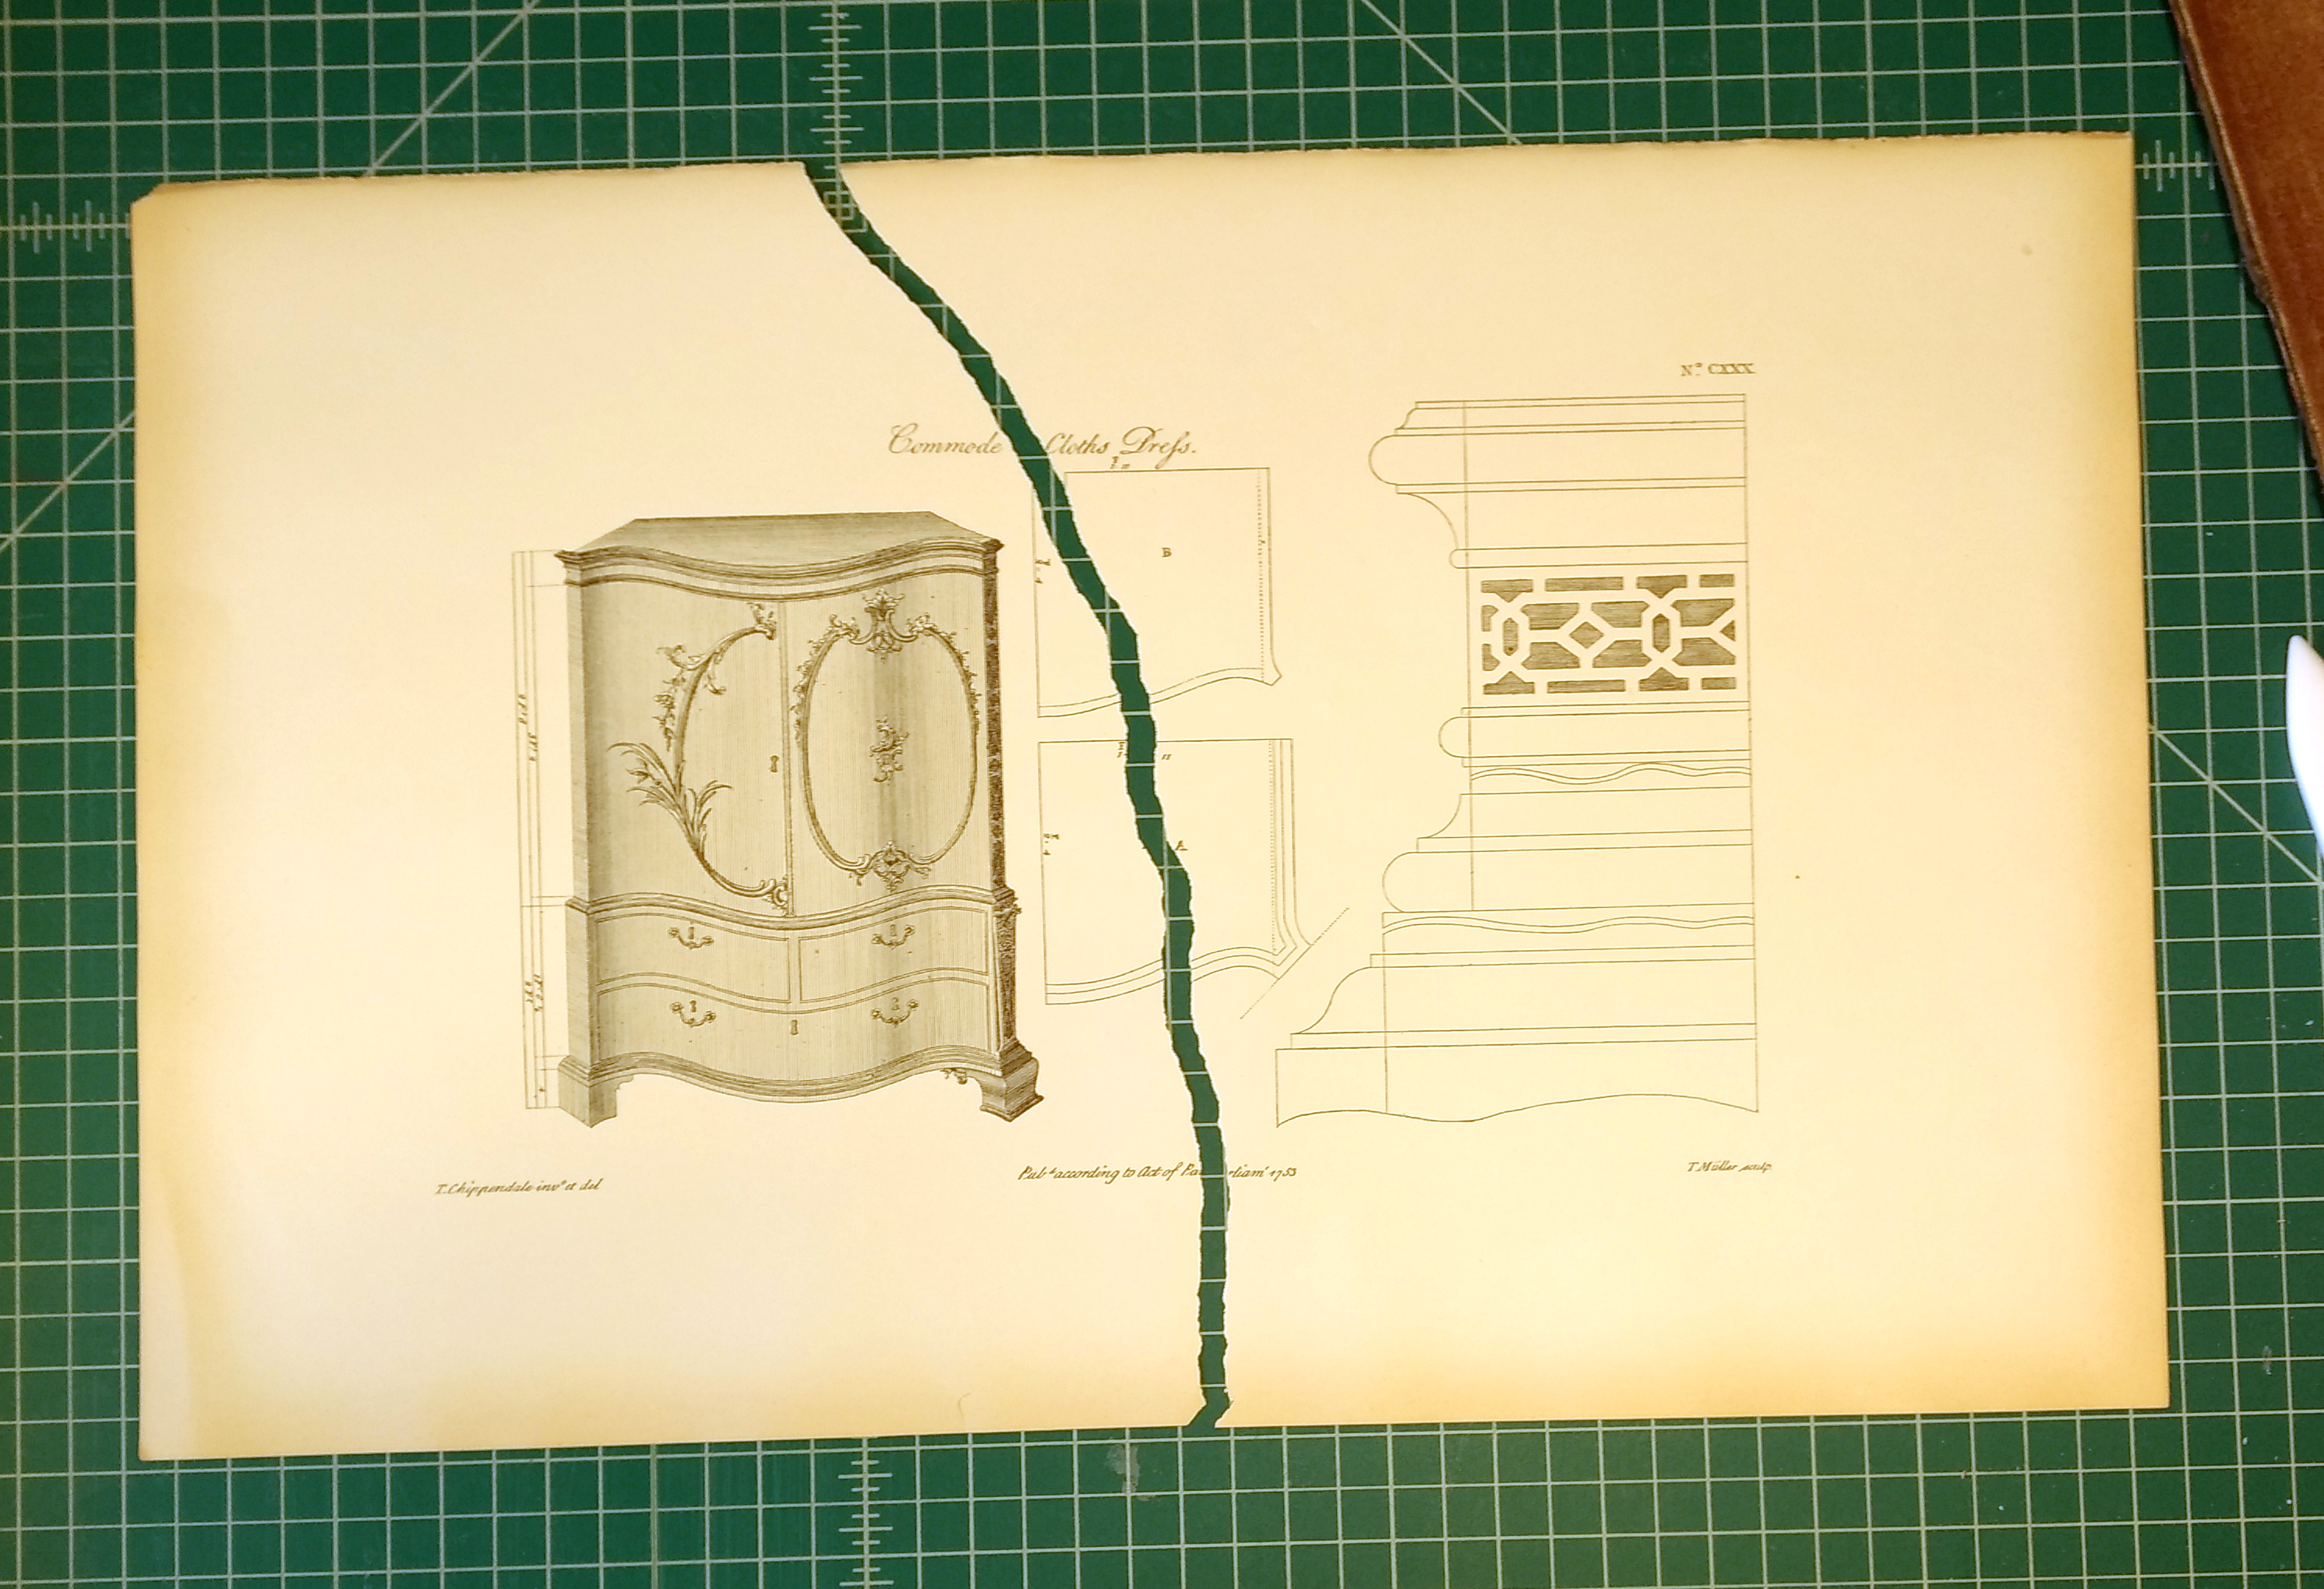
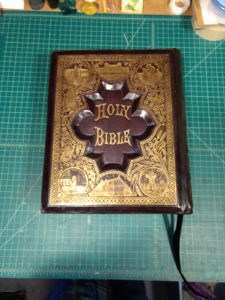
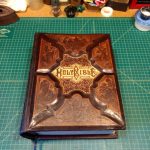
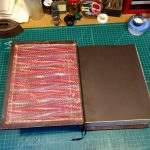
Where do I even start with this tome? Frank Coates, the owner of local antiques-and-fine-art place Bloomsbury PDX, brought this to me in the early days of the pandemic. He said it was okay if it took a while, which is good because it took me about two years.
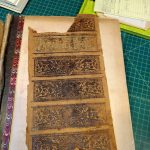
This is the oldest book I’ve ever worked on, published in 1772! Take a look at the title page, which contains a lot of information:
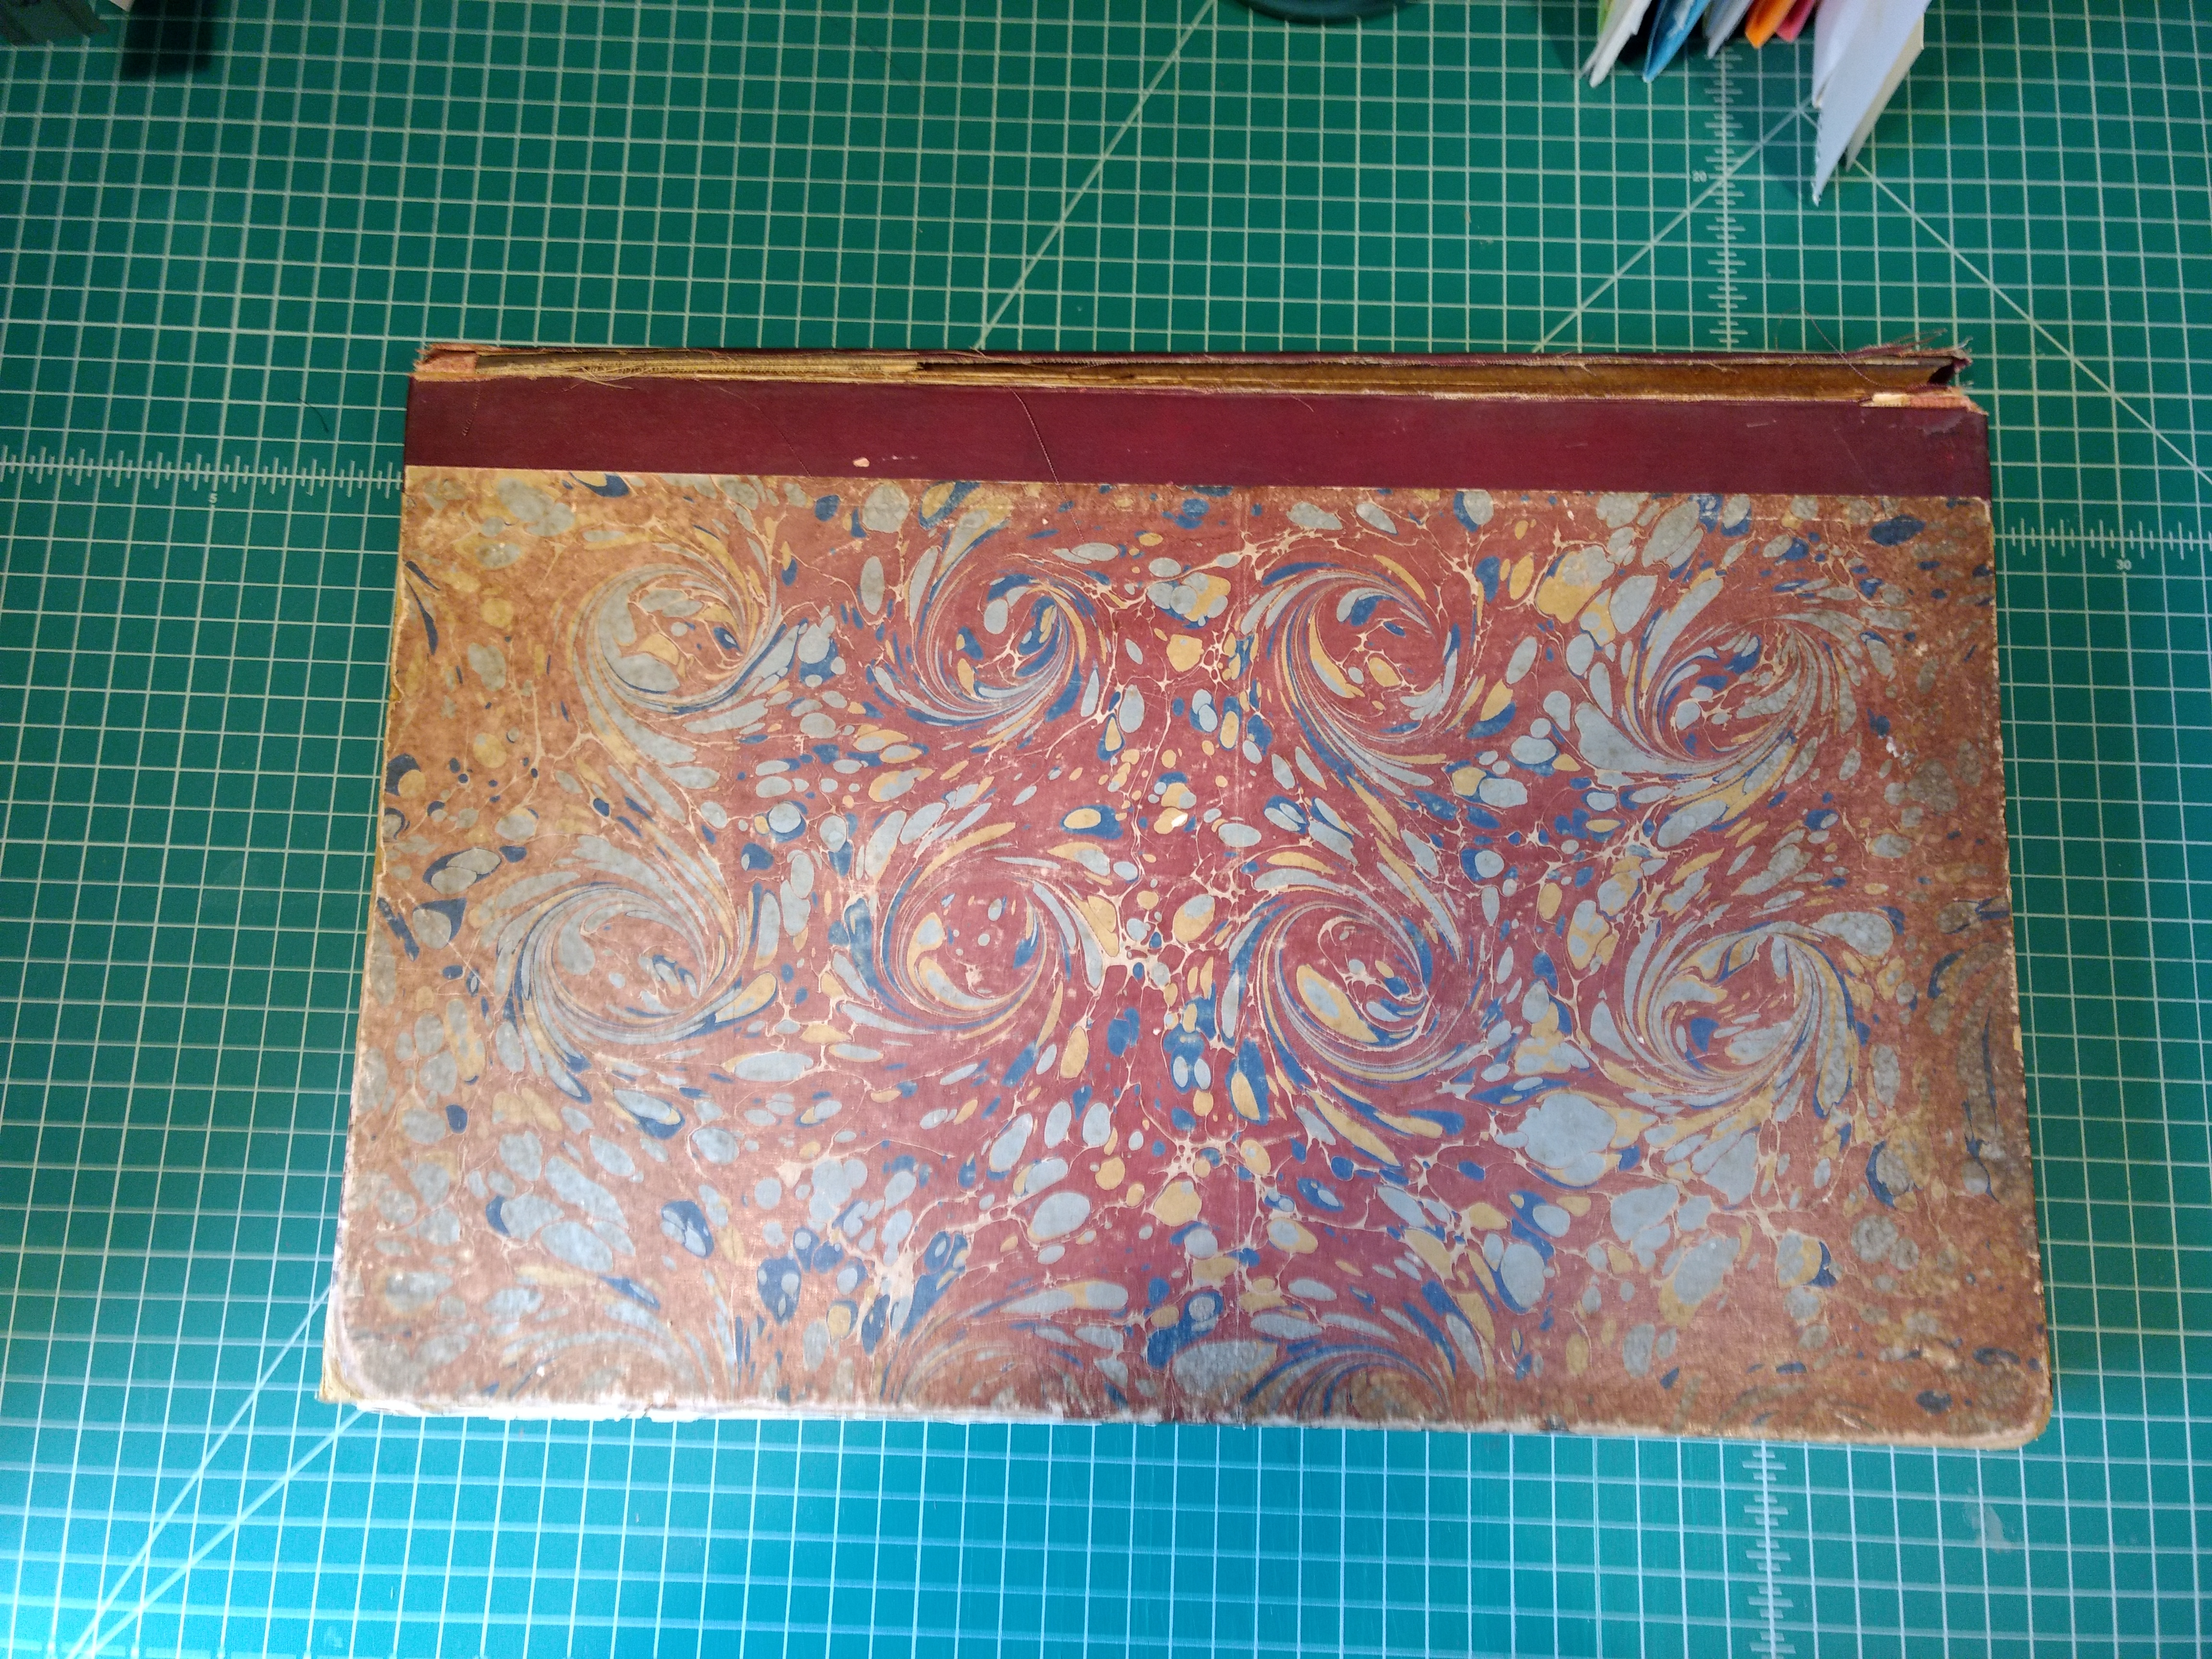
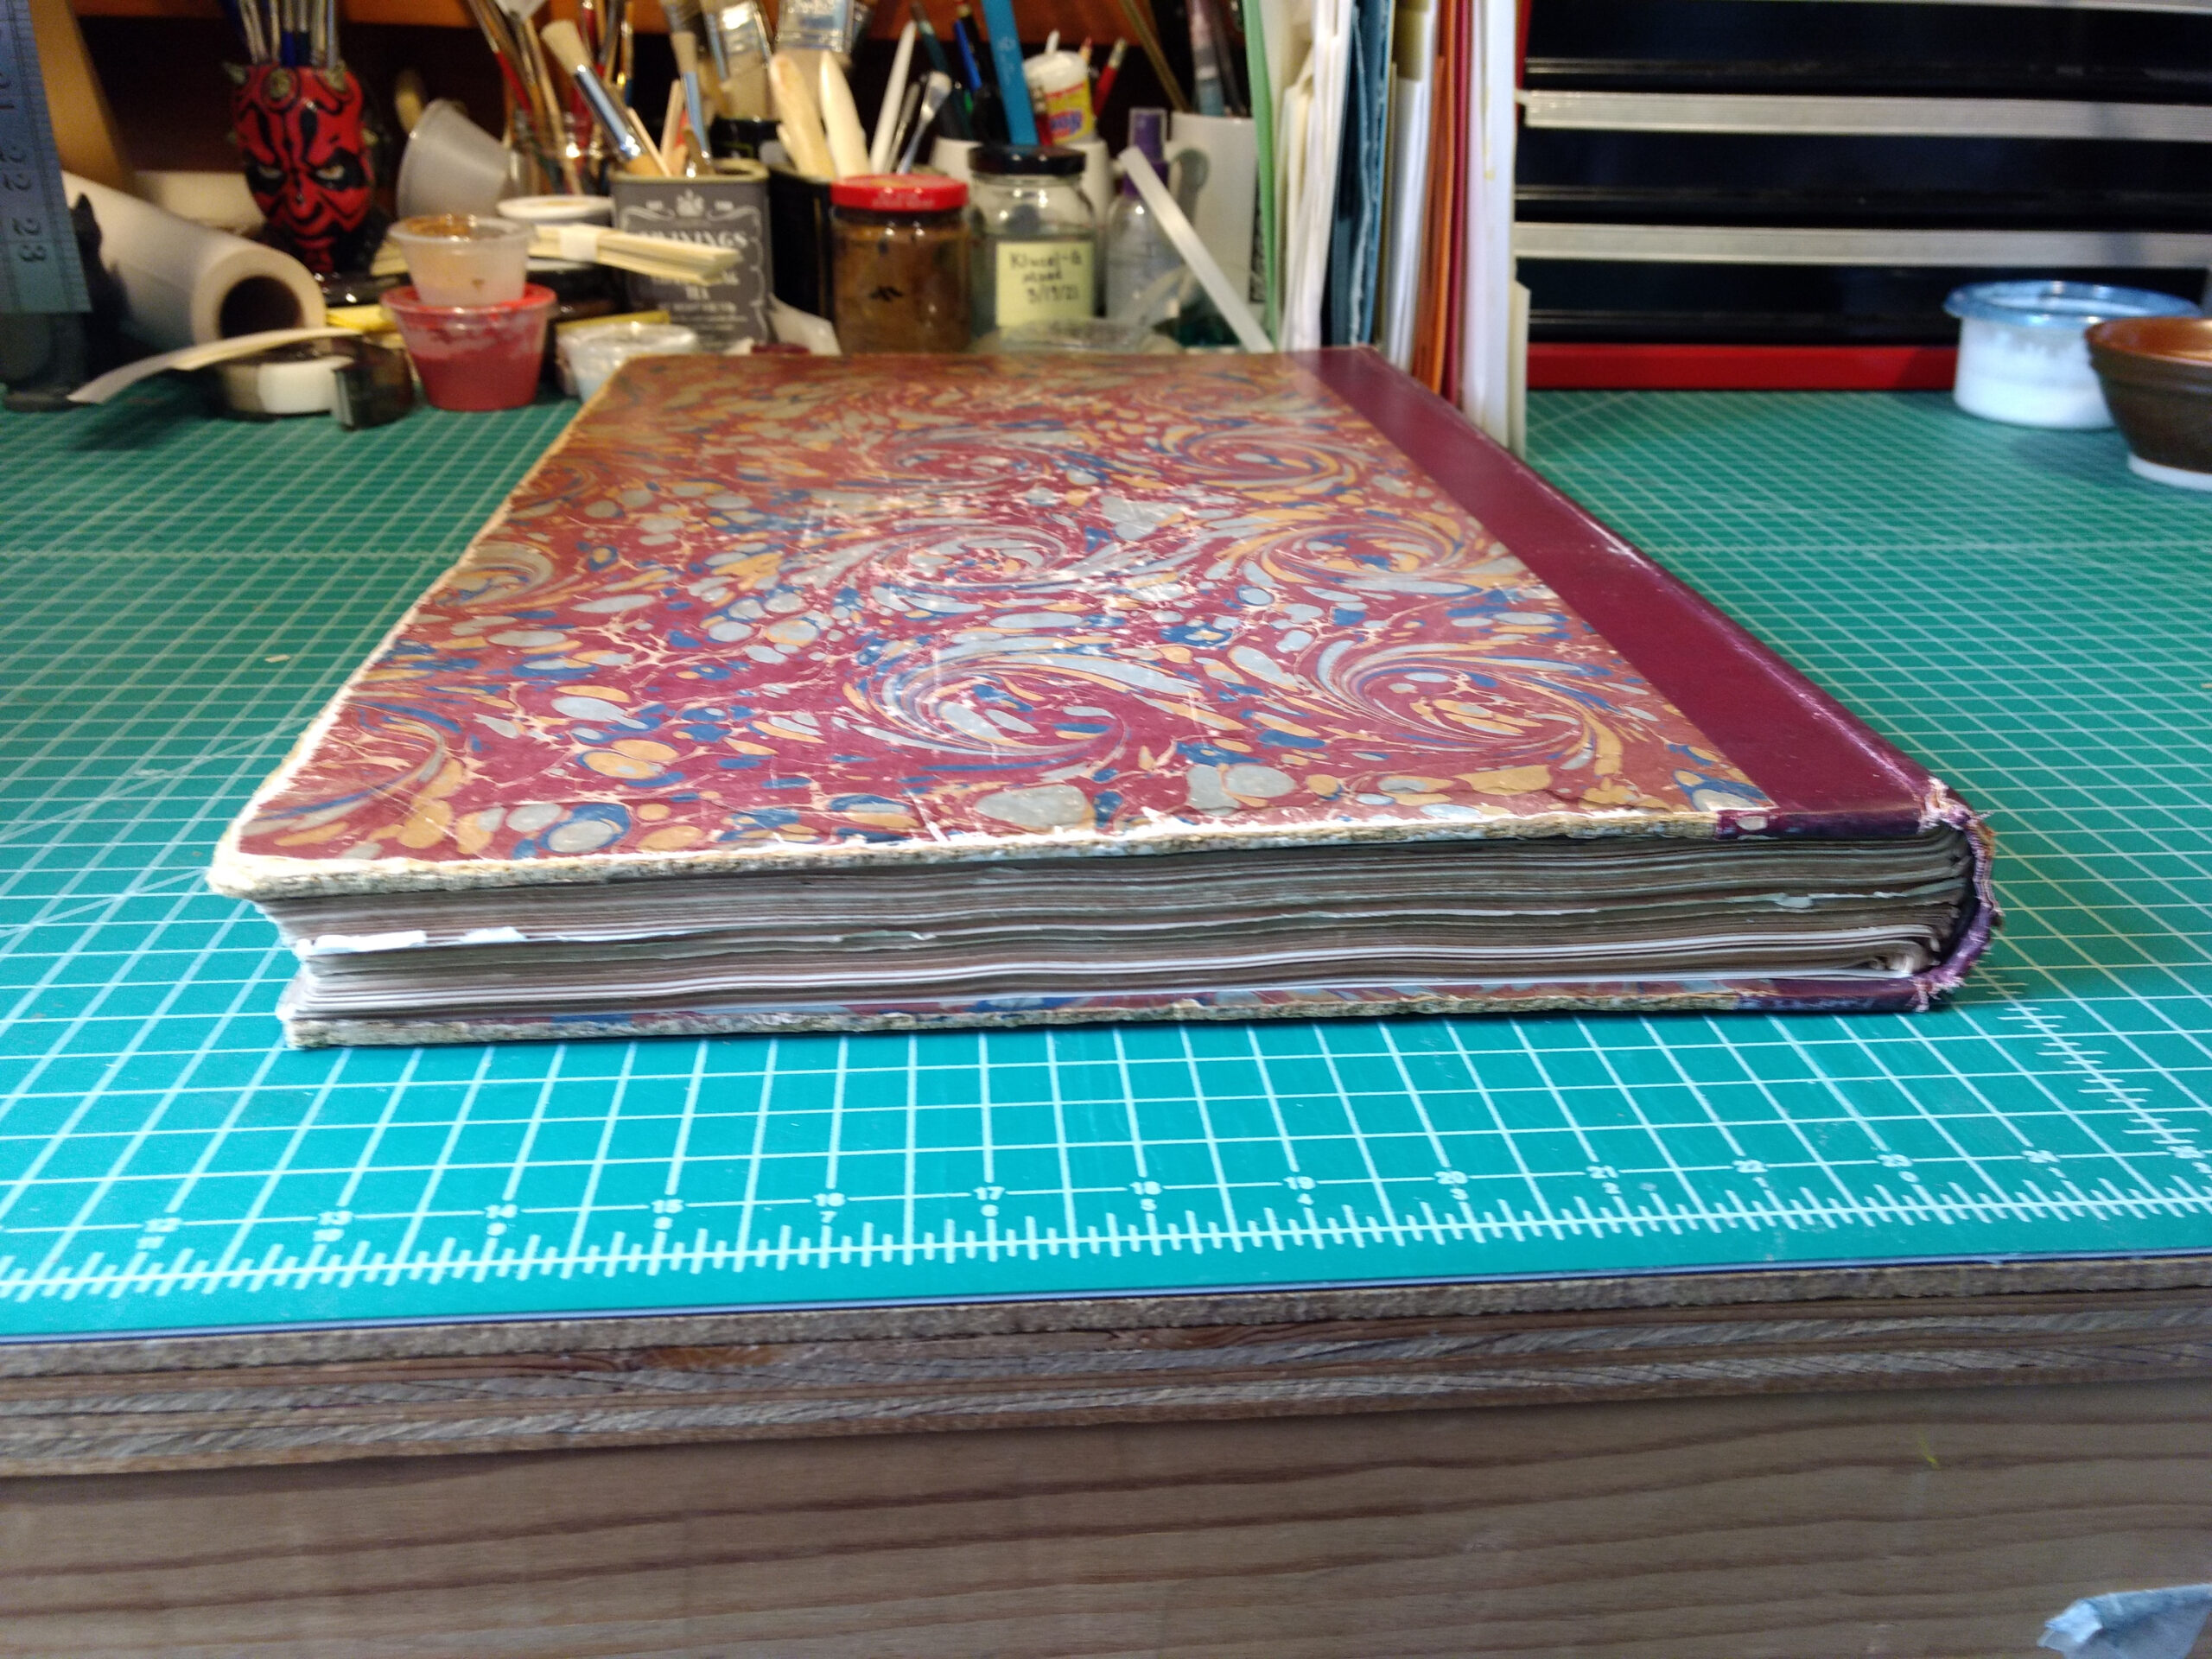
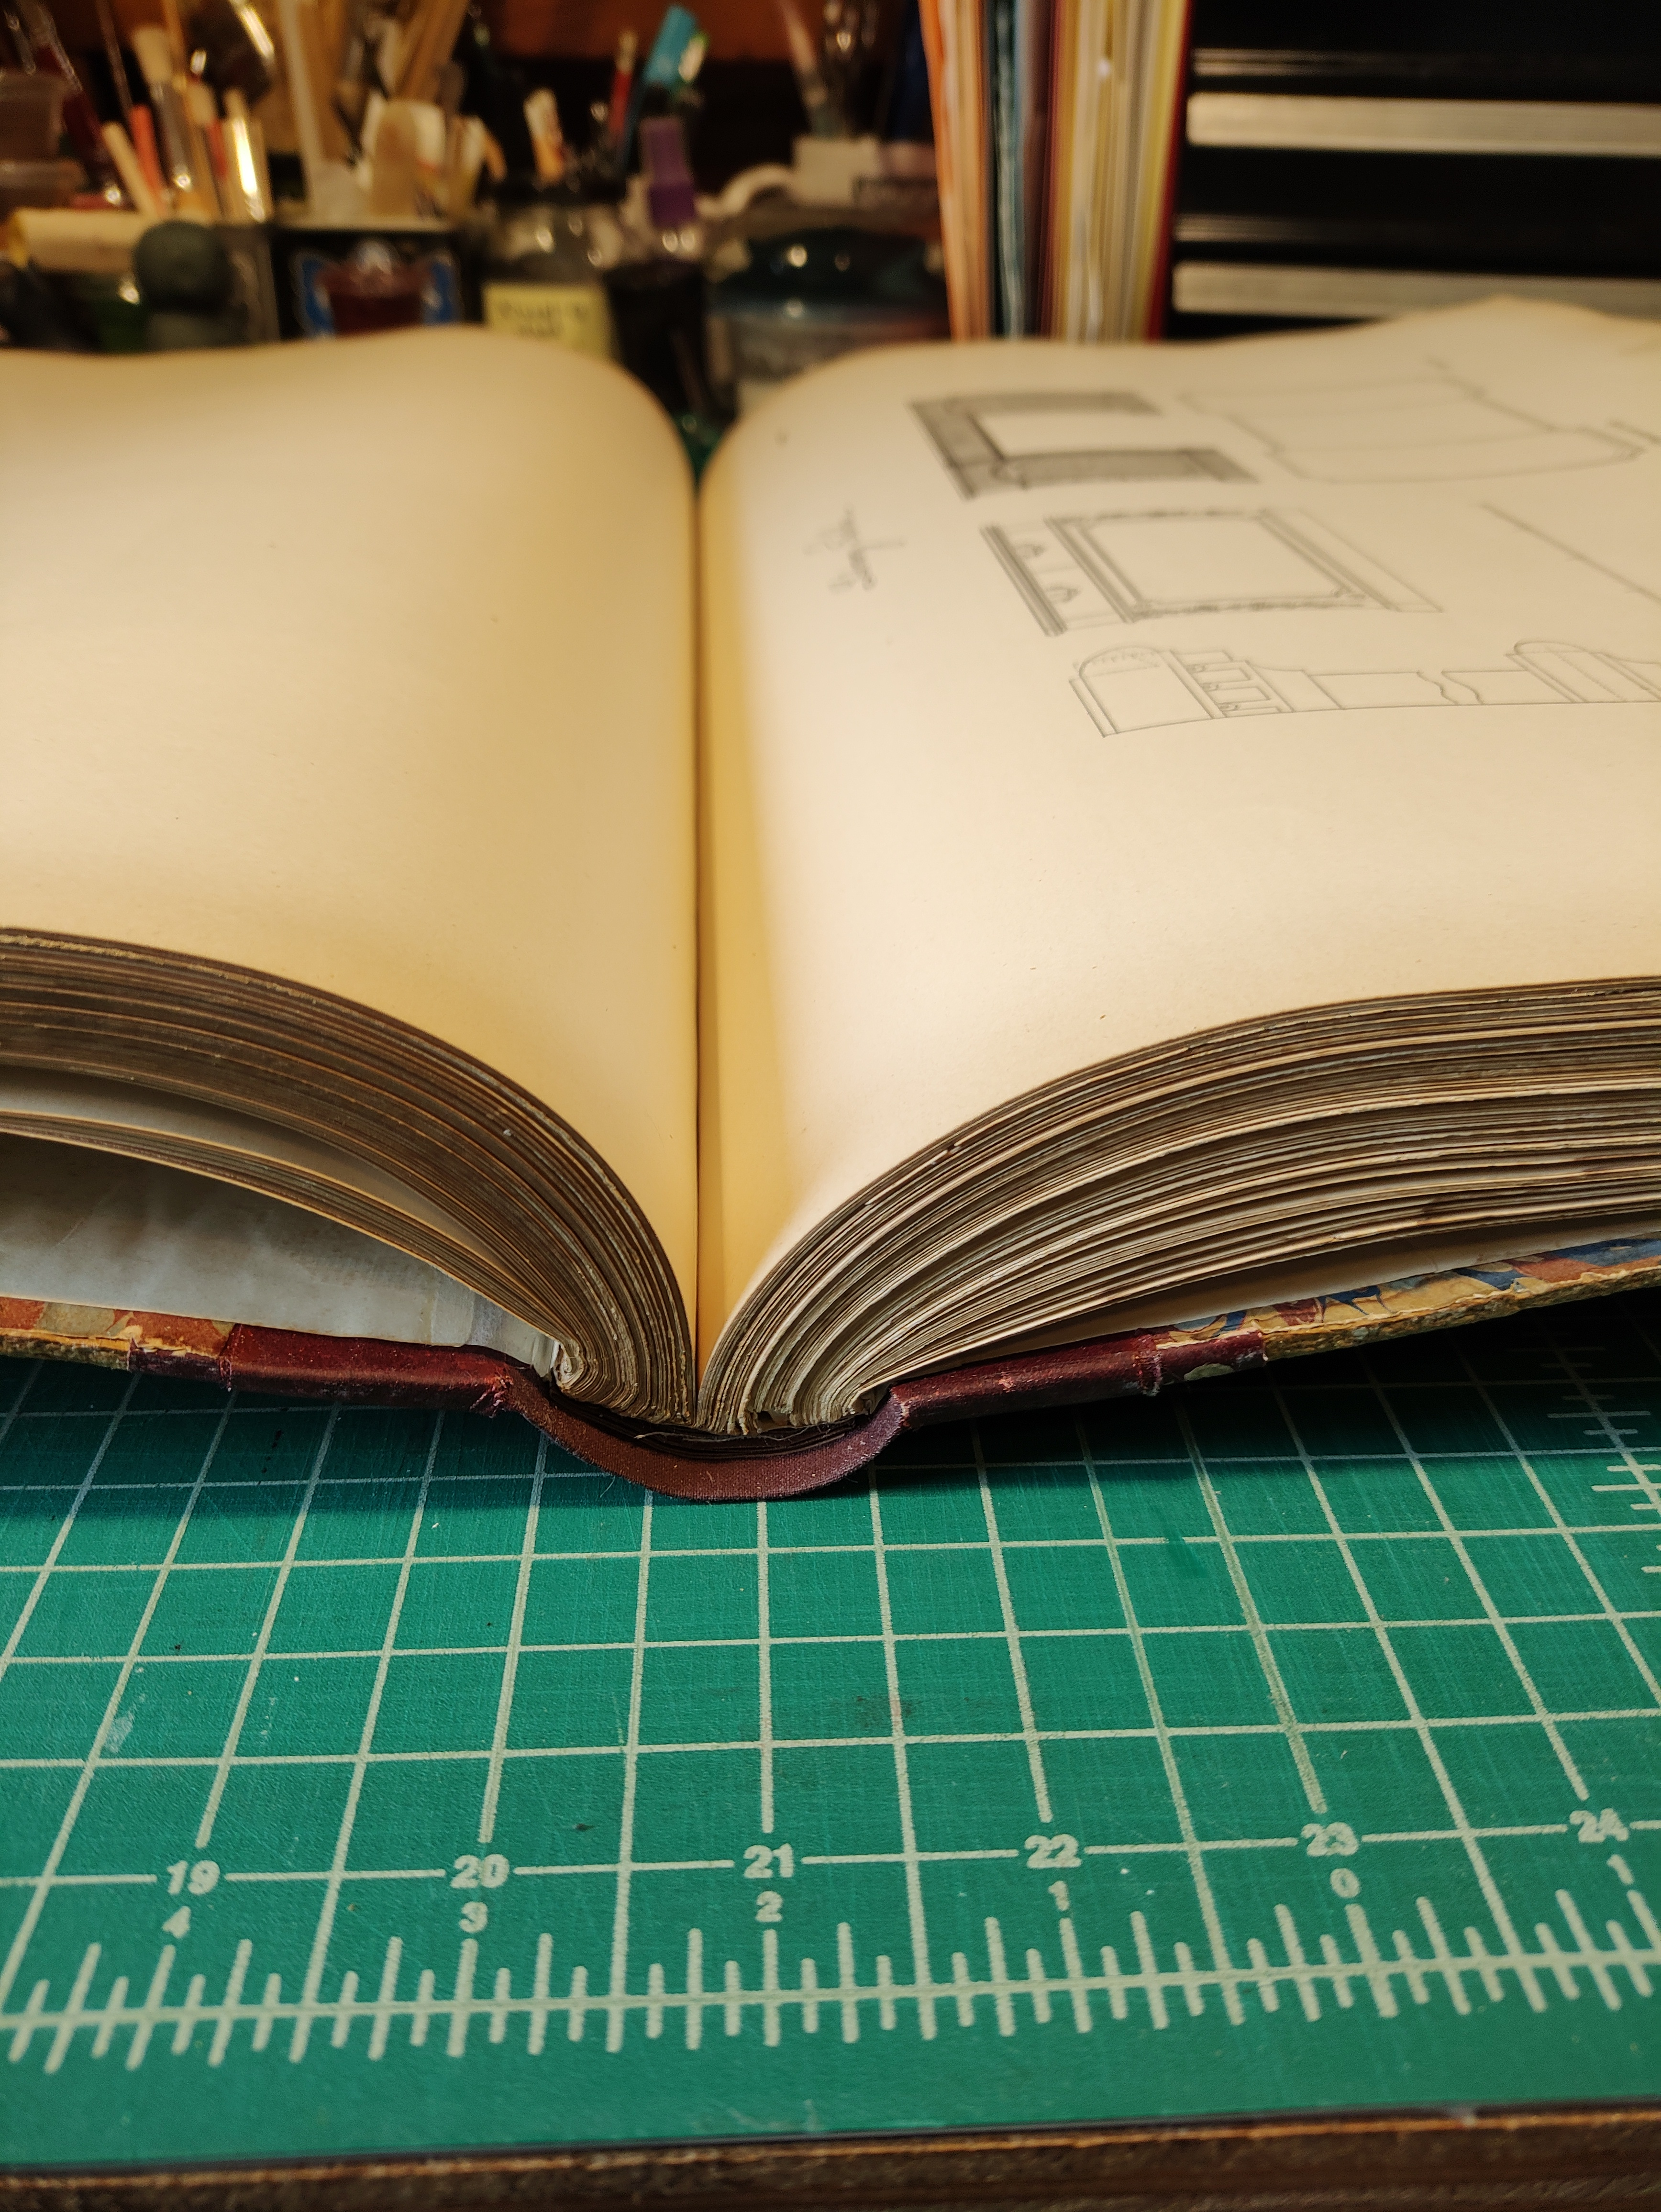
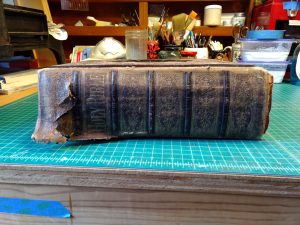
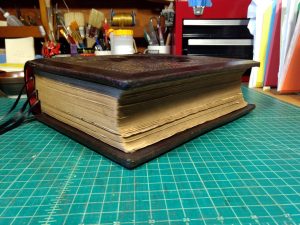
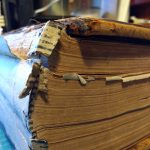
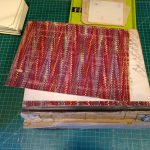
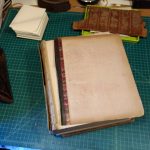
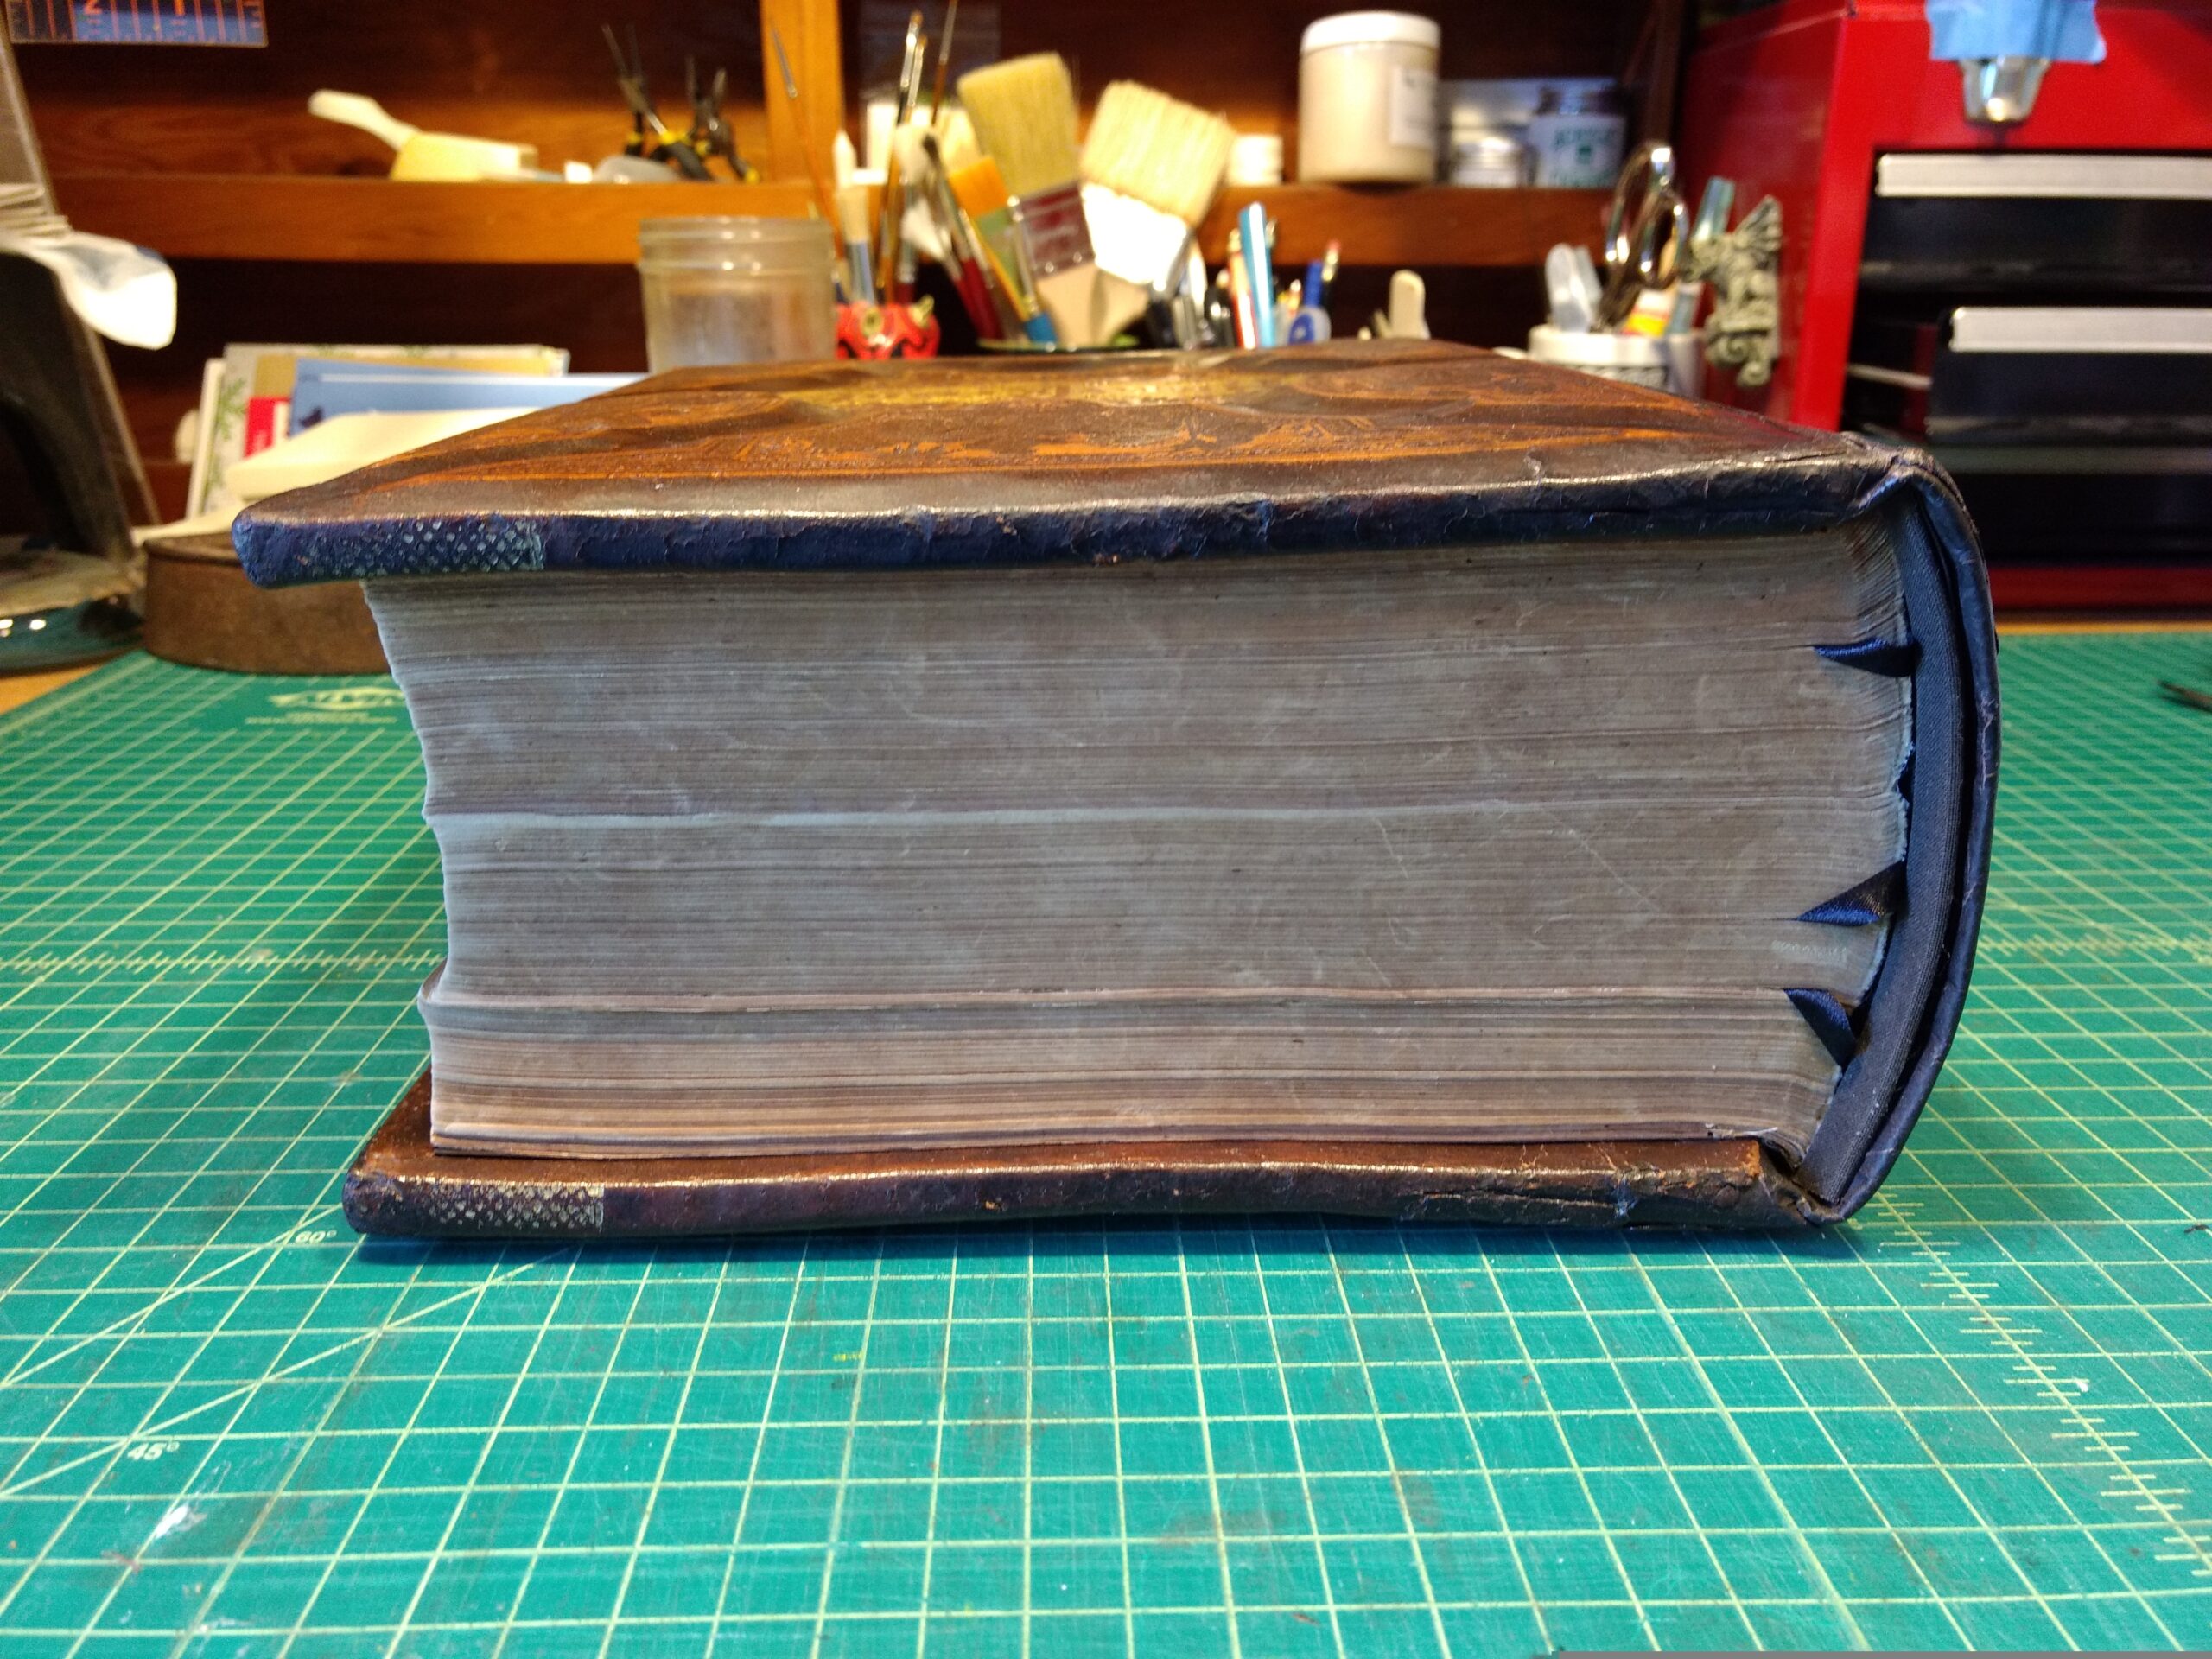
The book measures roughly 19″x13″, and the pages are in beautiful shape – minimal discoloration, and a beautiful, soft feel in the hand. There’s a bit of brittleness, but very little. The prints of the various designs are all in gorgeous shape. The rest of the binding, not so much. The glue along the spine had crystallized and shattered, leaving the pages as a stack of beautiful prints with grit along one long edge. Unlike most books from hundreds of years ago, this was essentially bound like a paperback book, just with boards for covers and a rounded spine.
Everybody loves a before-and-after gallery, right? Here you go!
Before
After
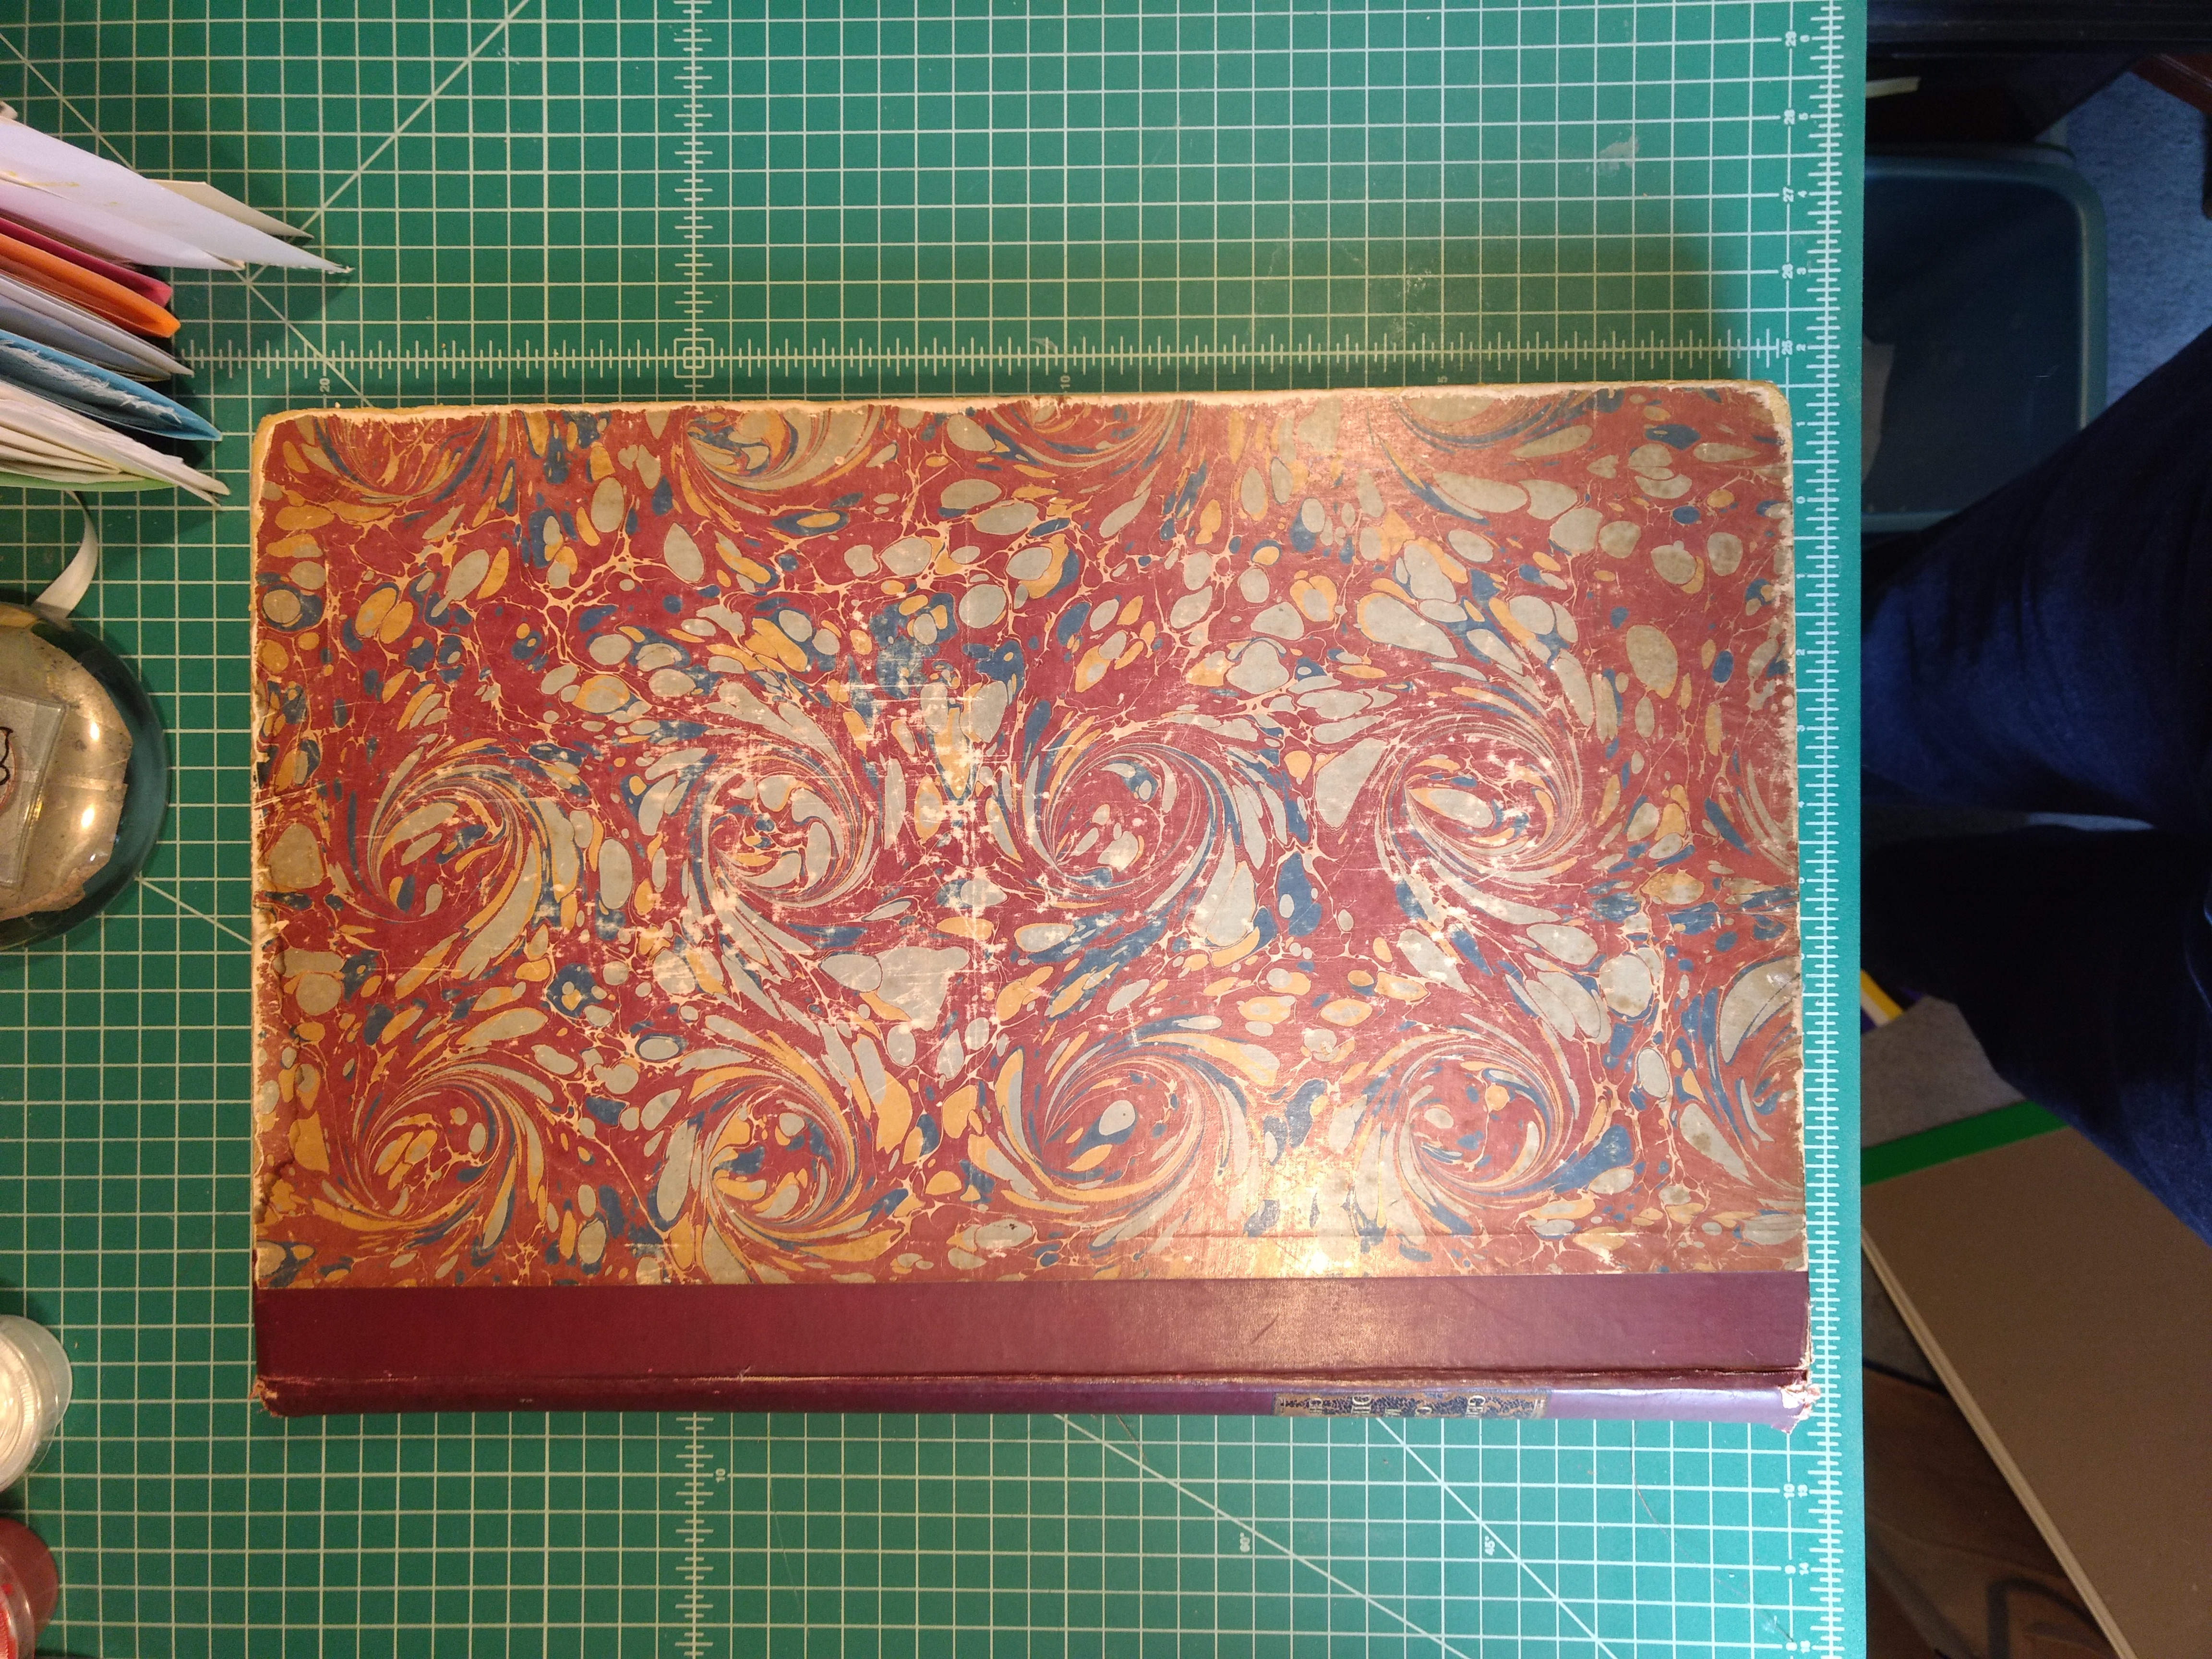
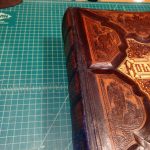
The front cover, before repairs.
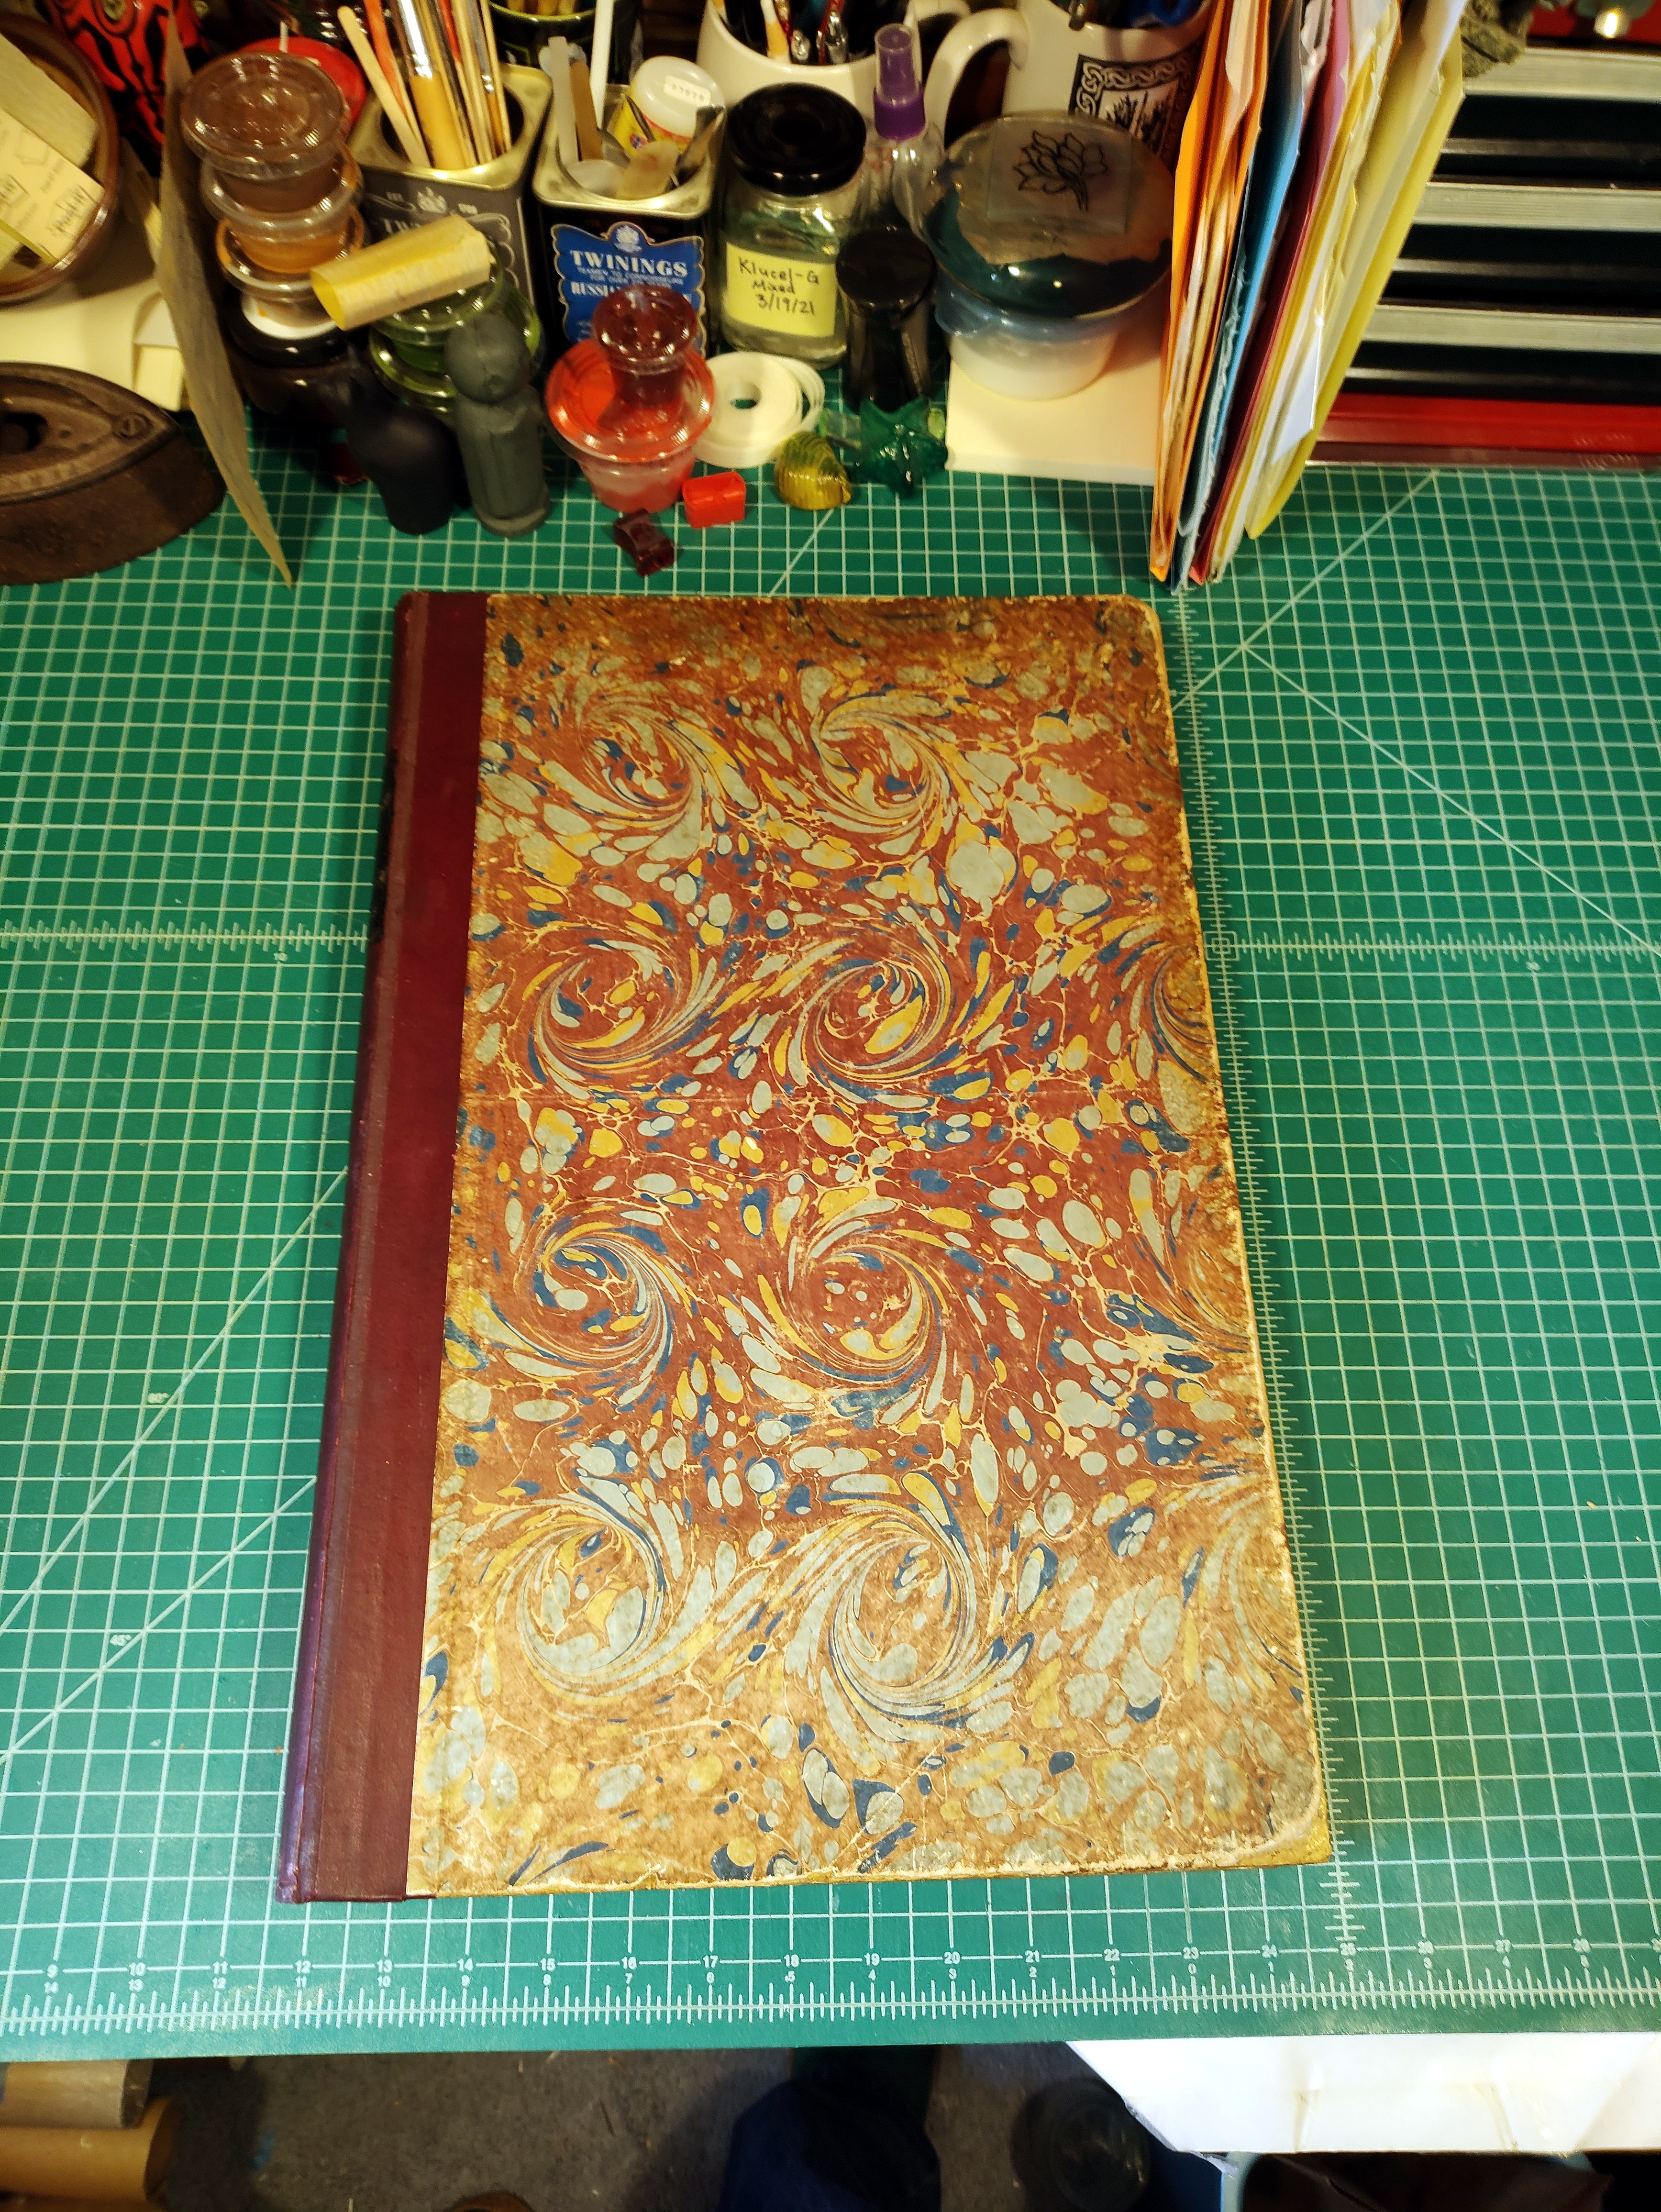
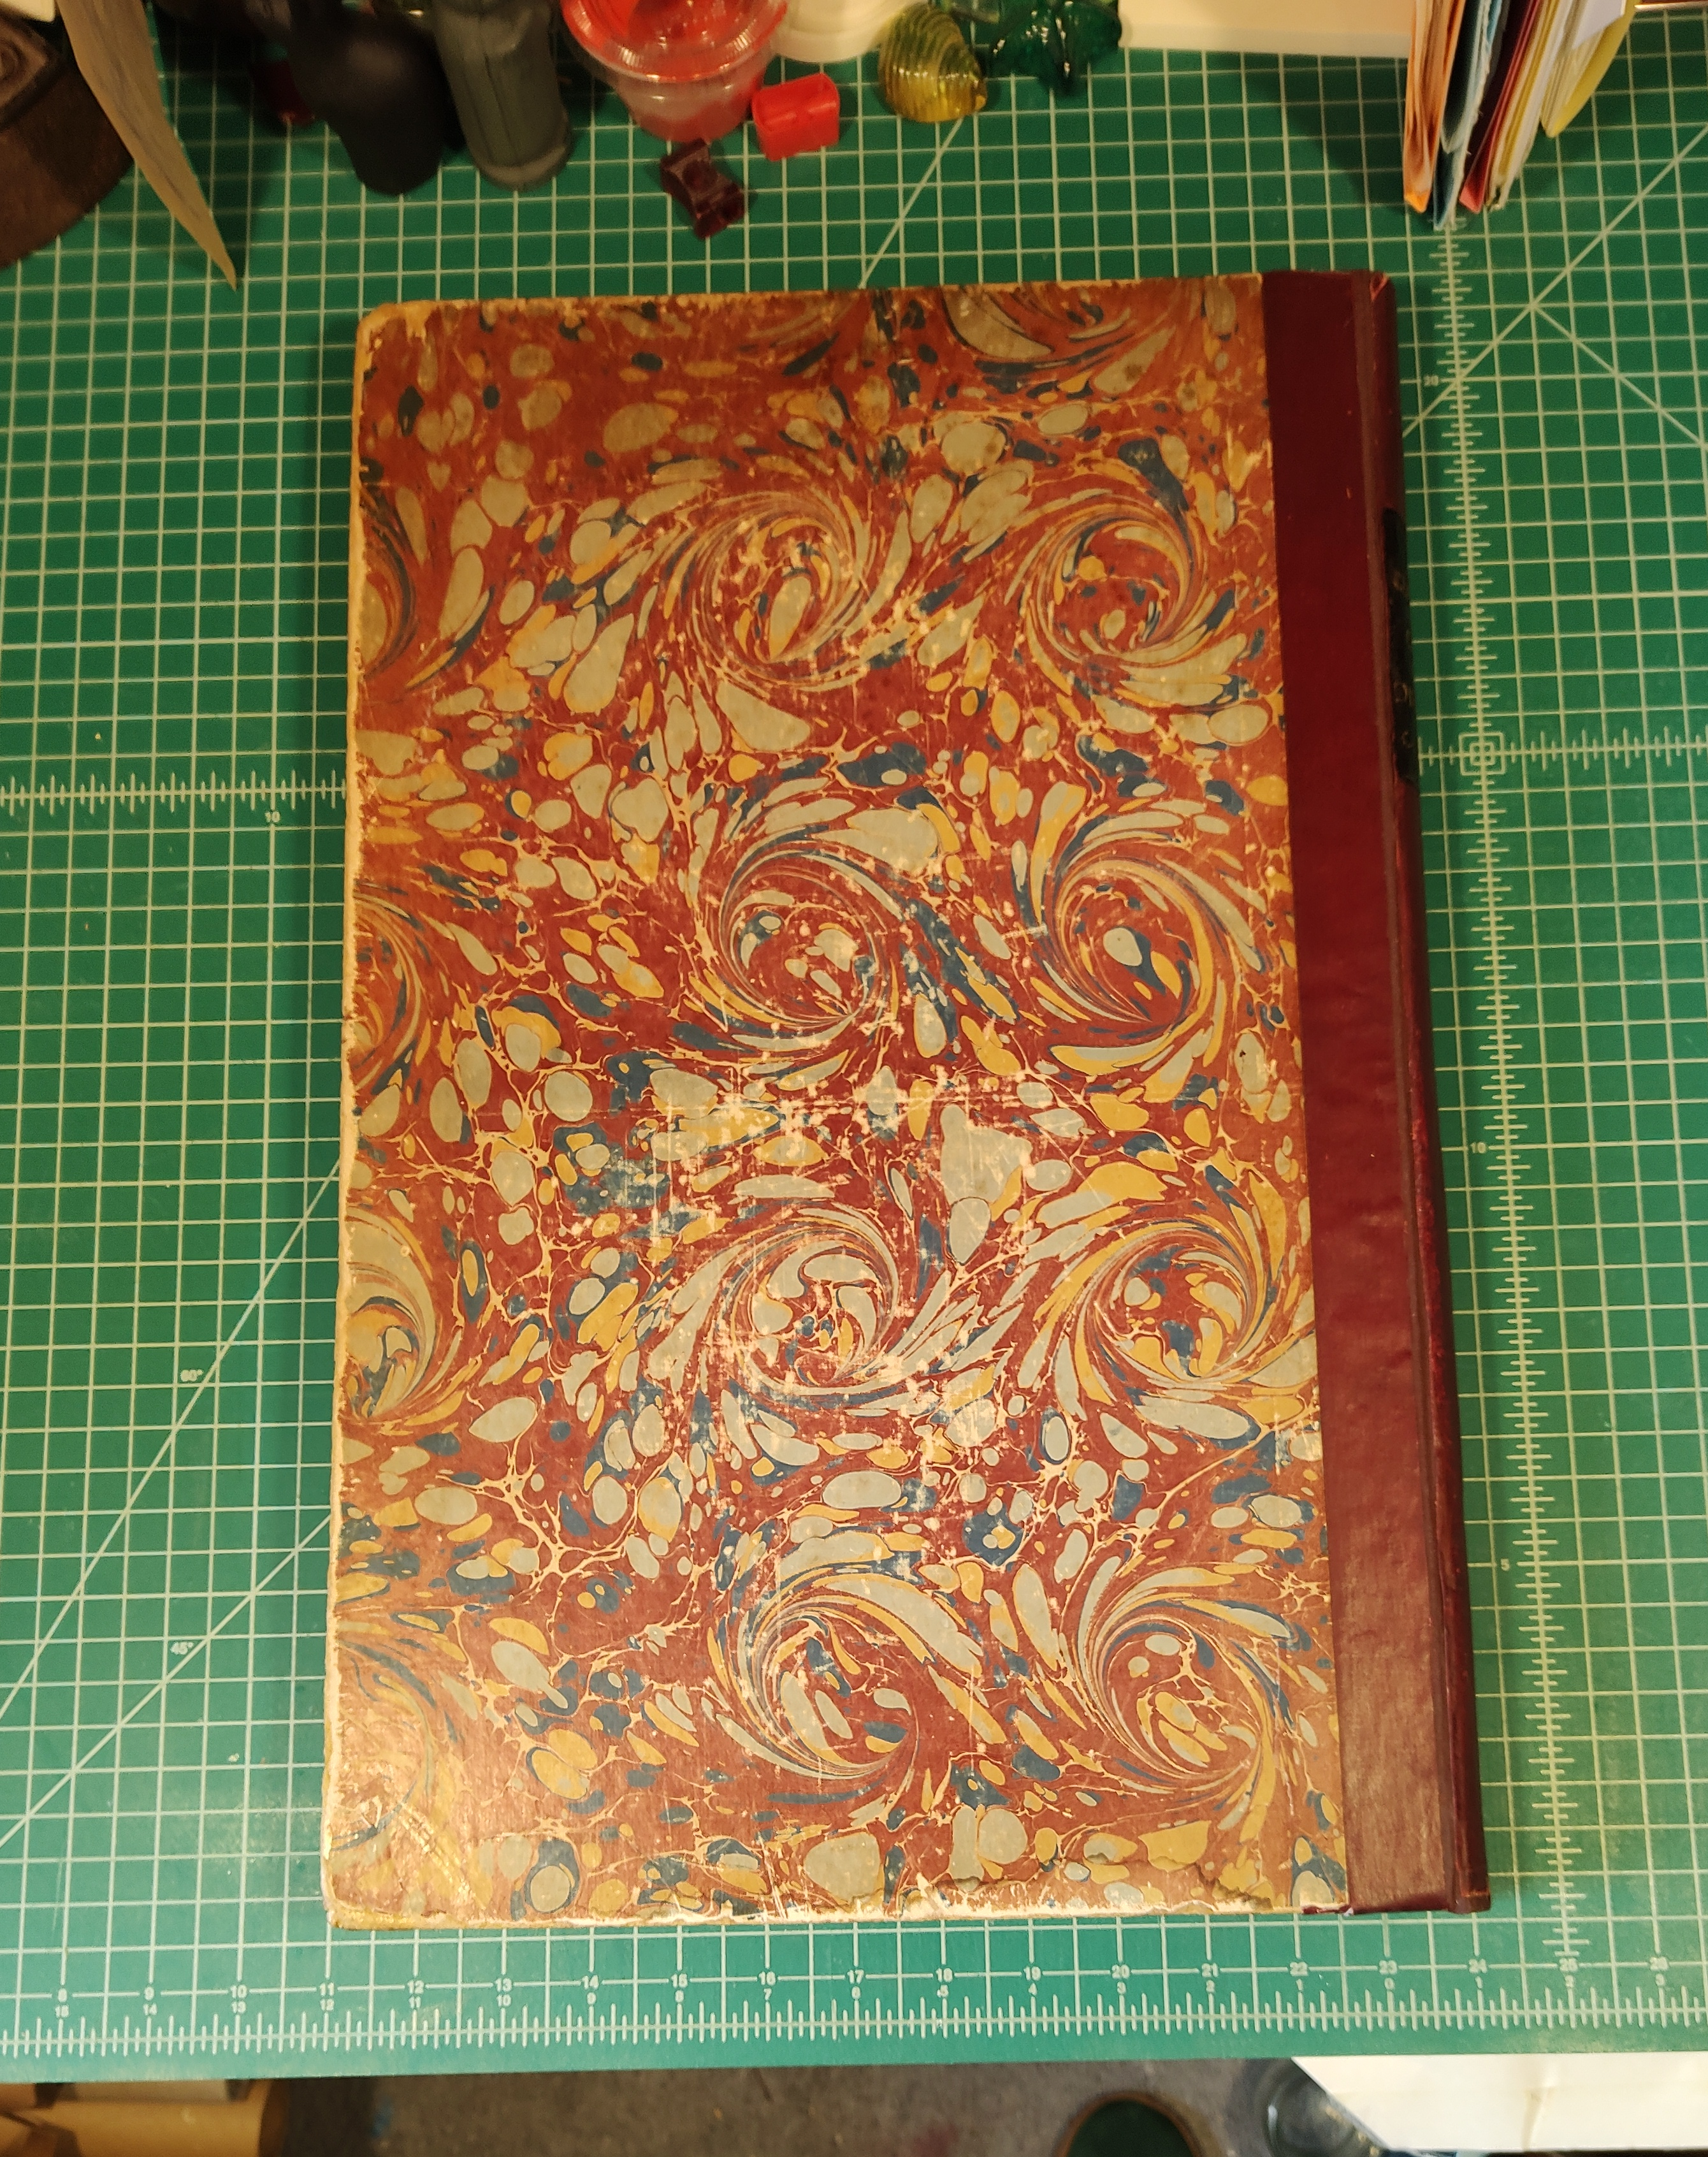
The front cover, after repairs.
The back cover, before repairs.
The back cover, after repairs.
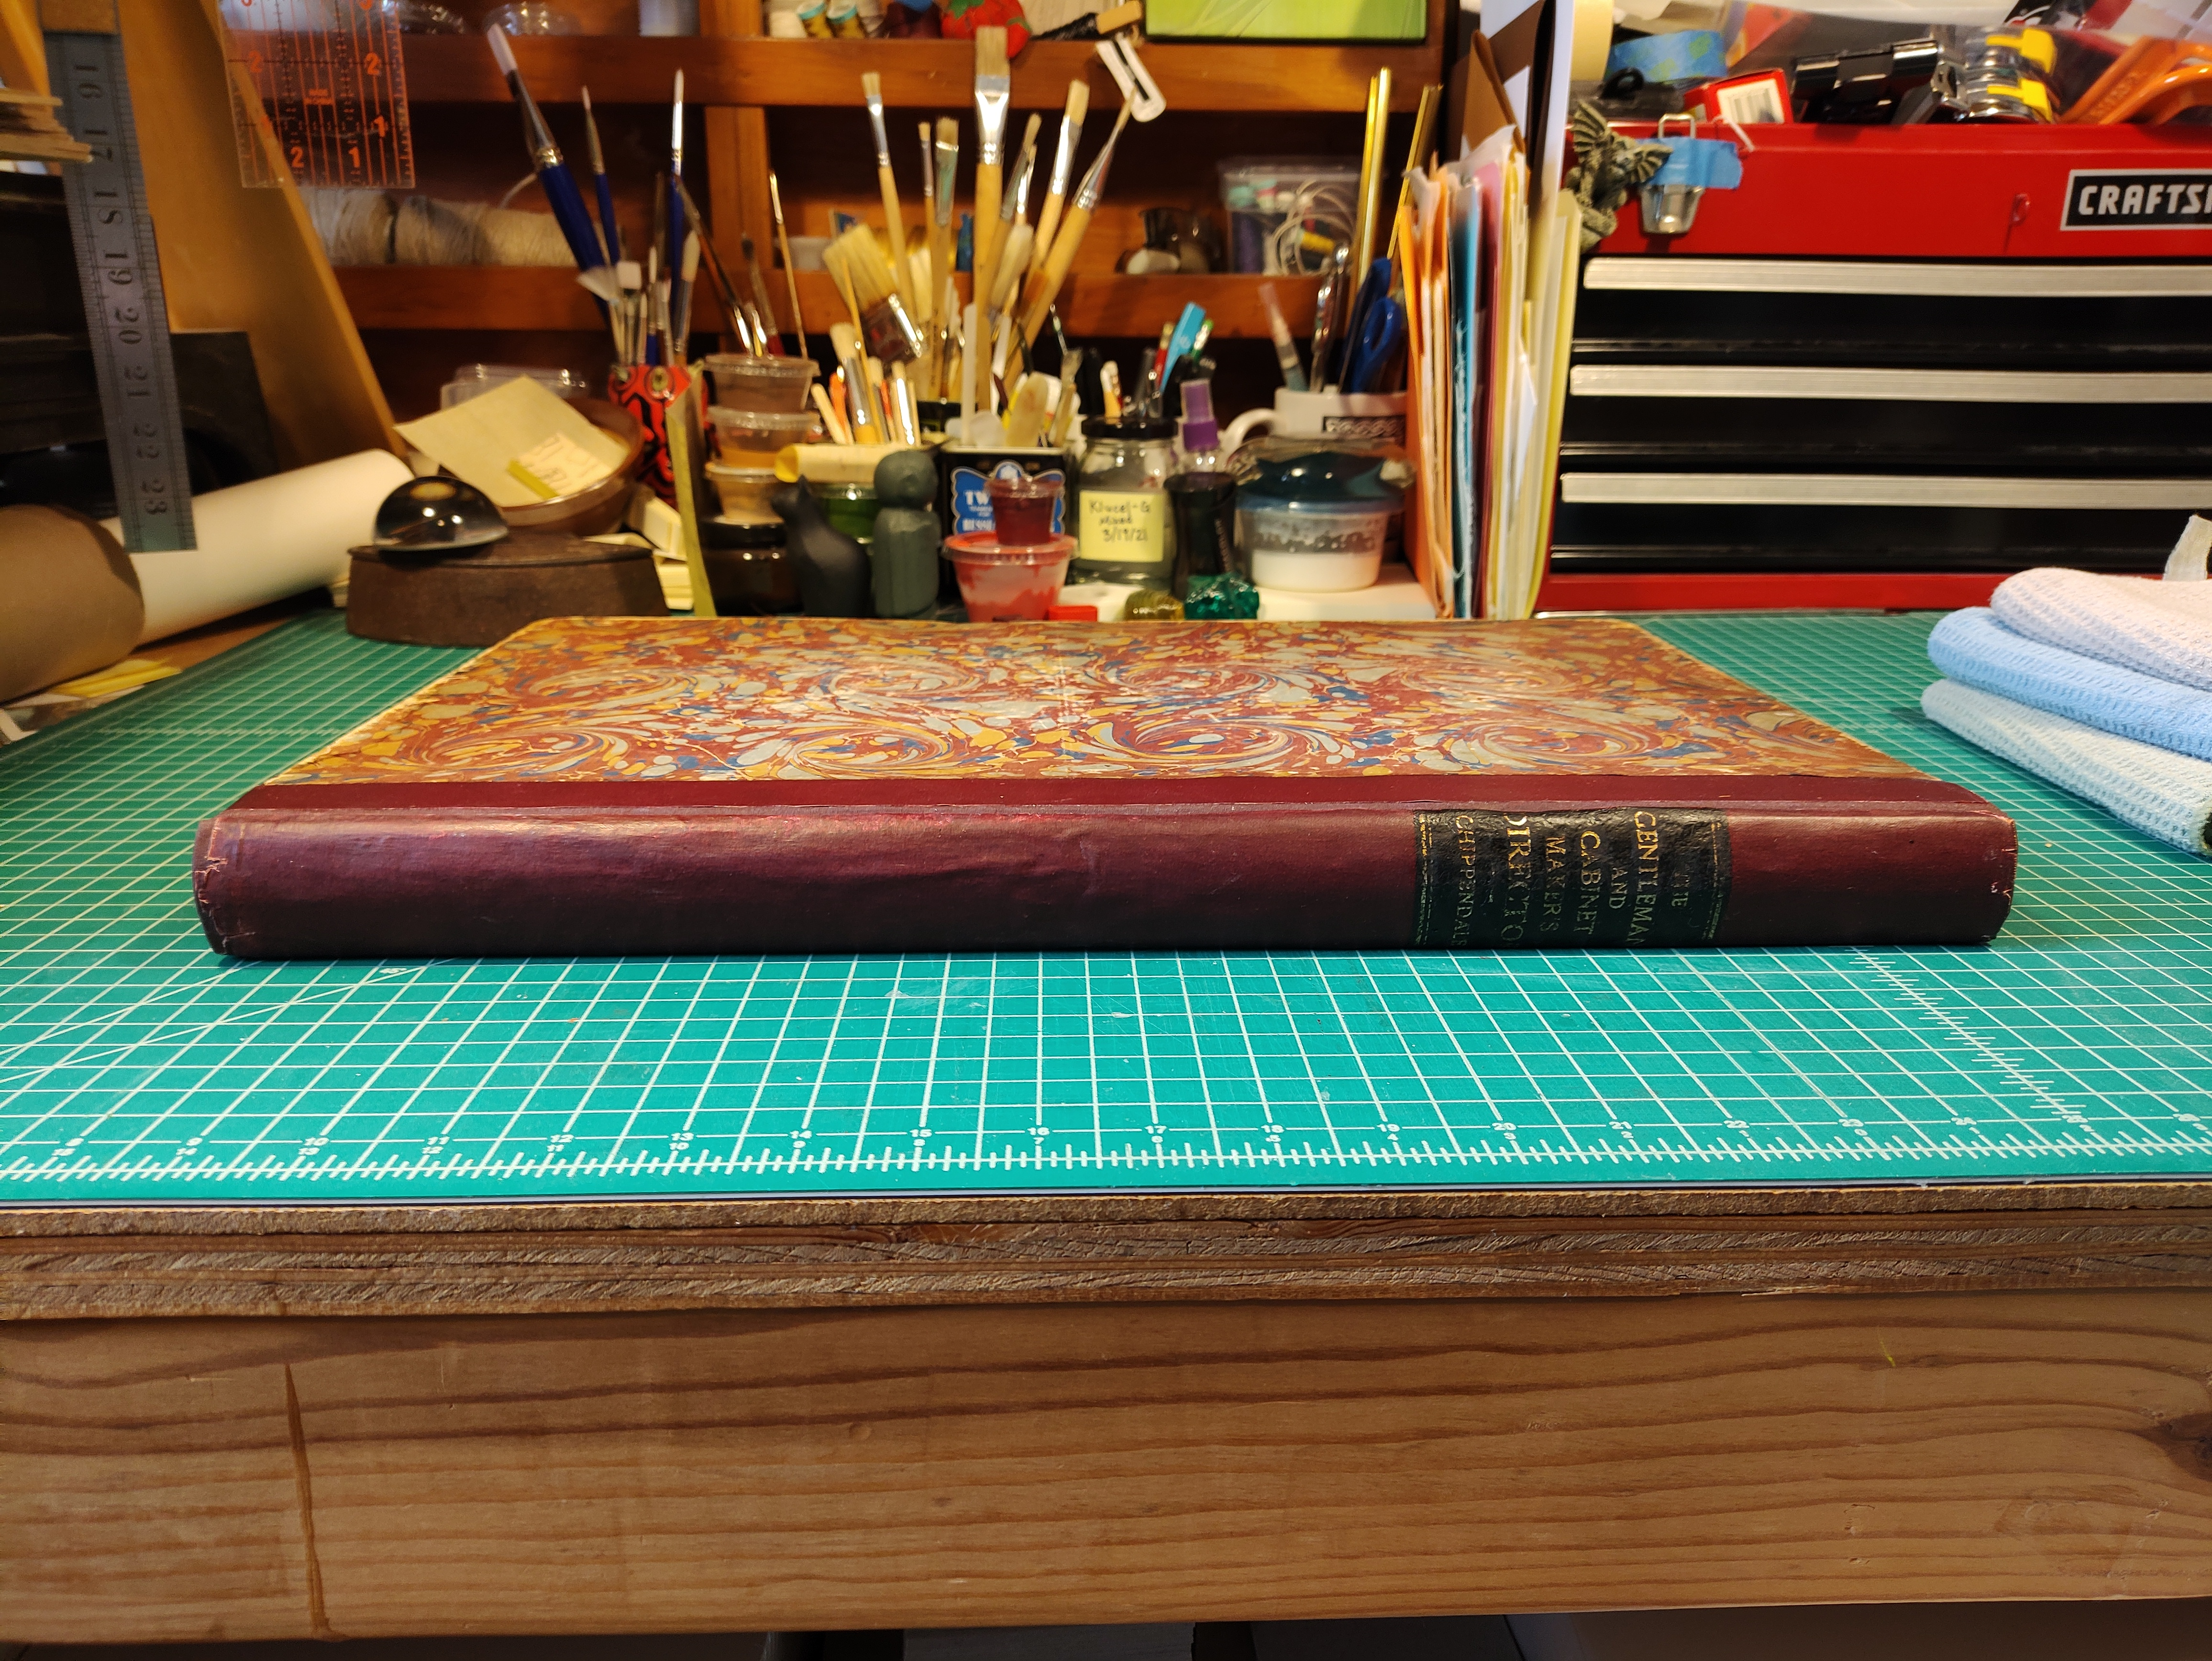
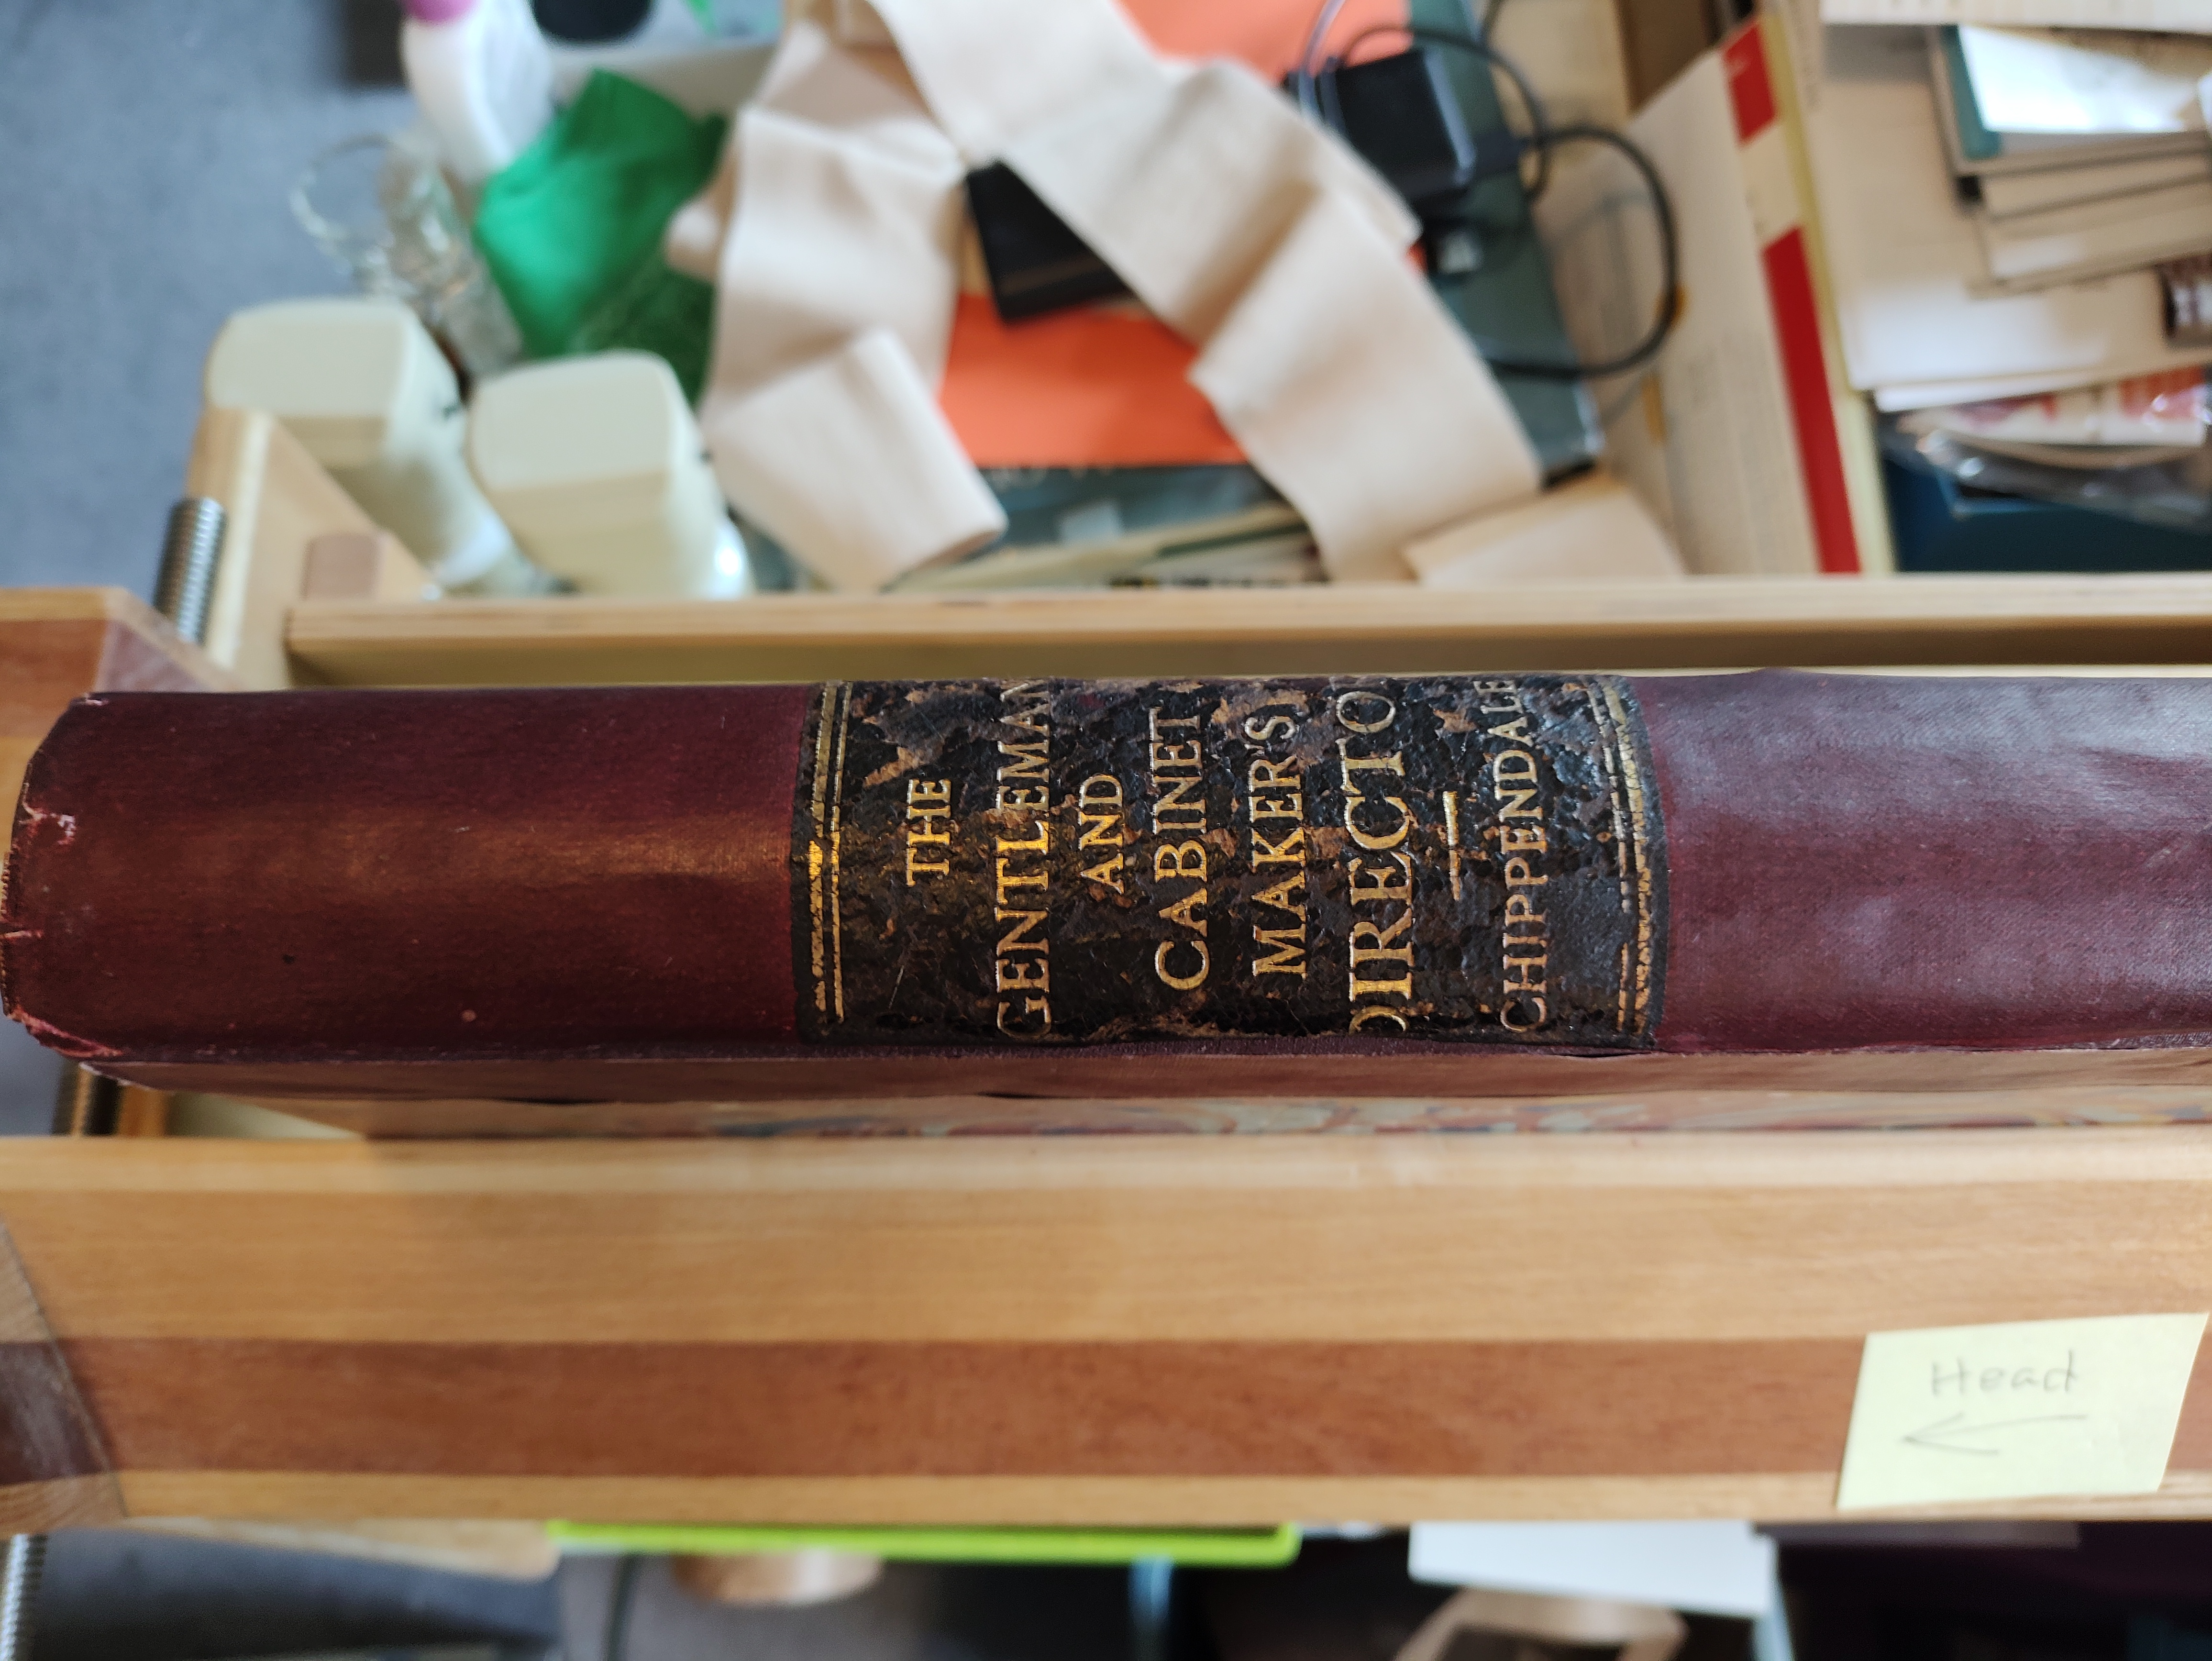
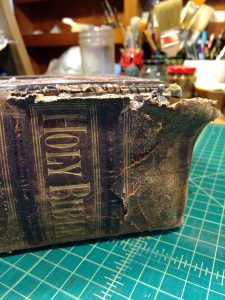
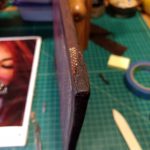
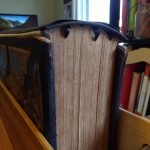
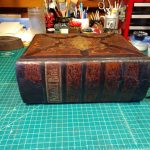
The spine, before repairs.
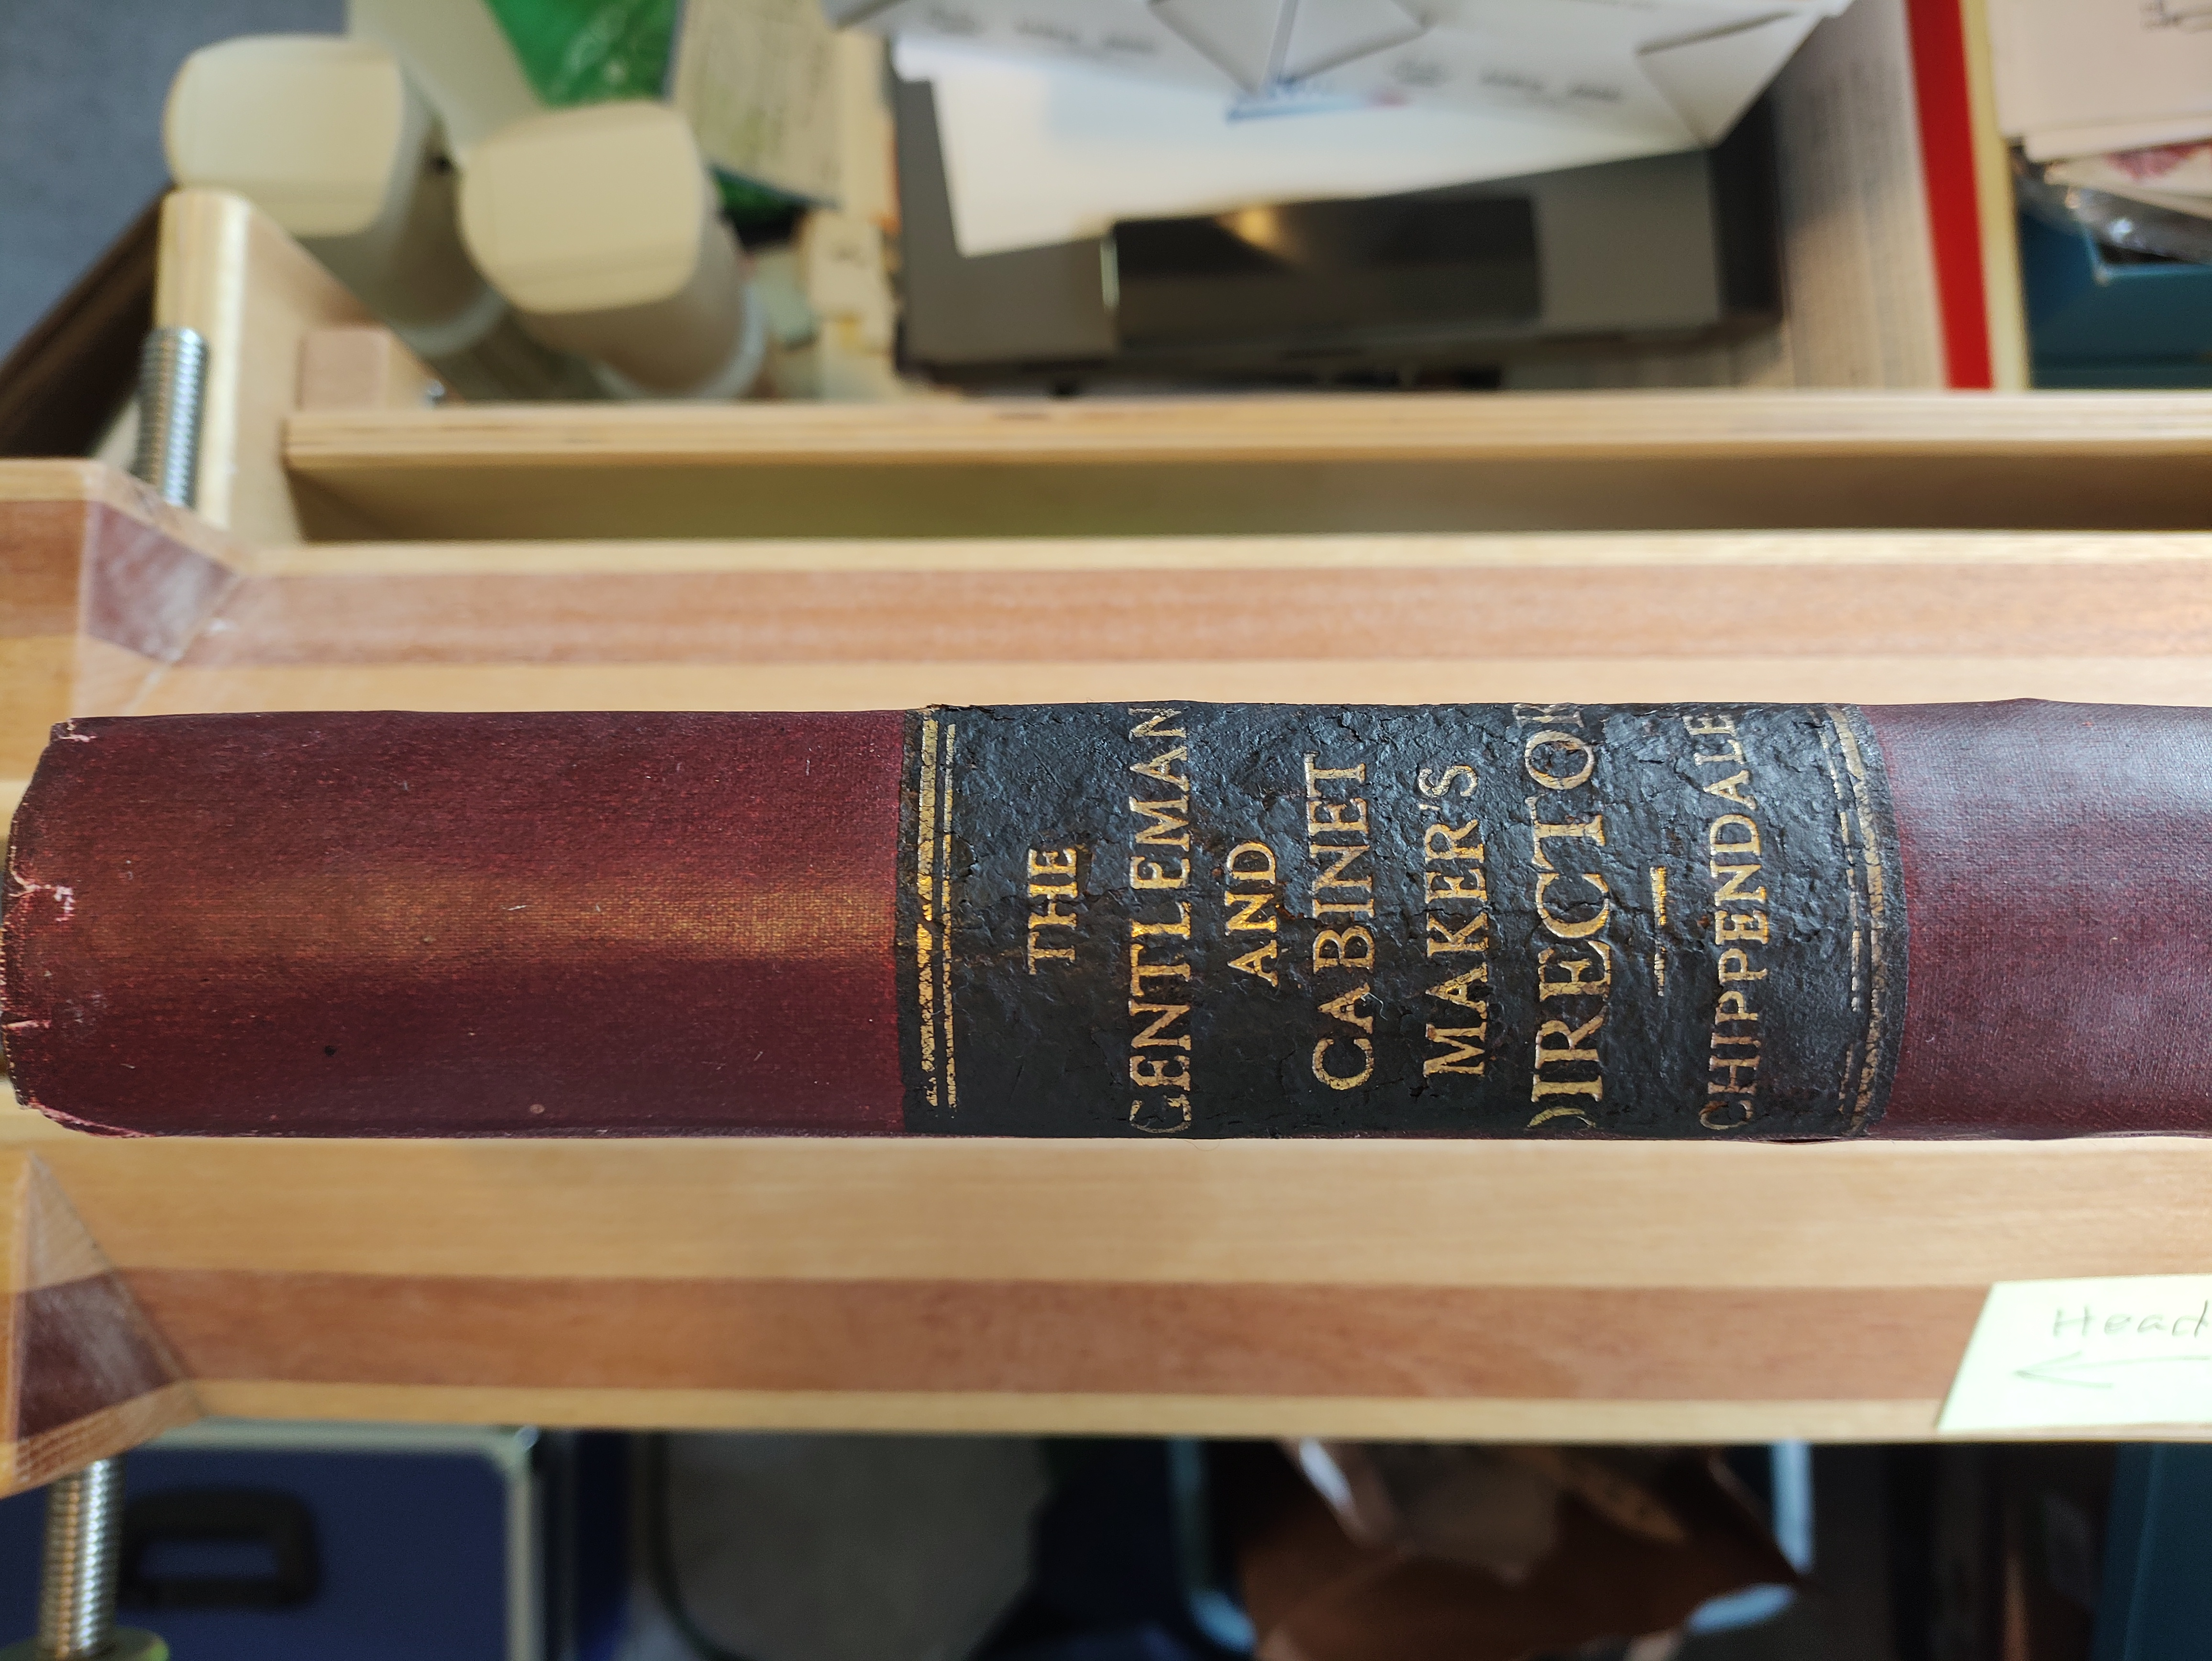
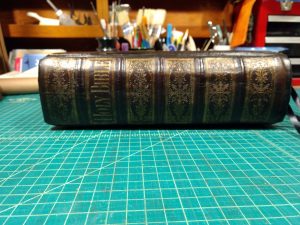
The spine, after repairs.
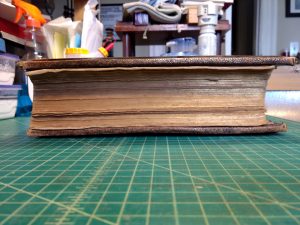
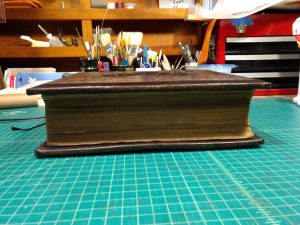
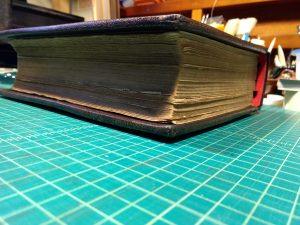
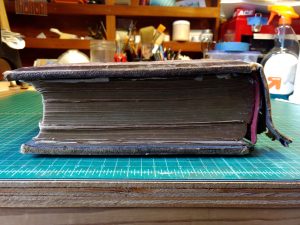
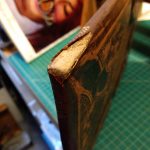
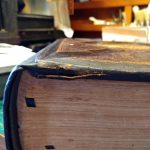
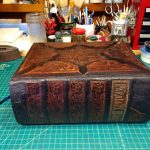
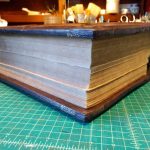
The bottom edge, before repairs.
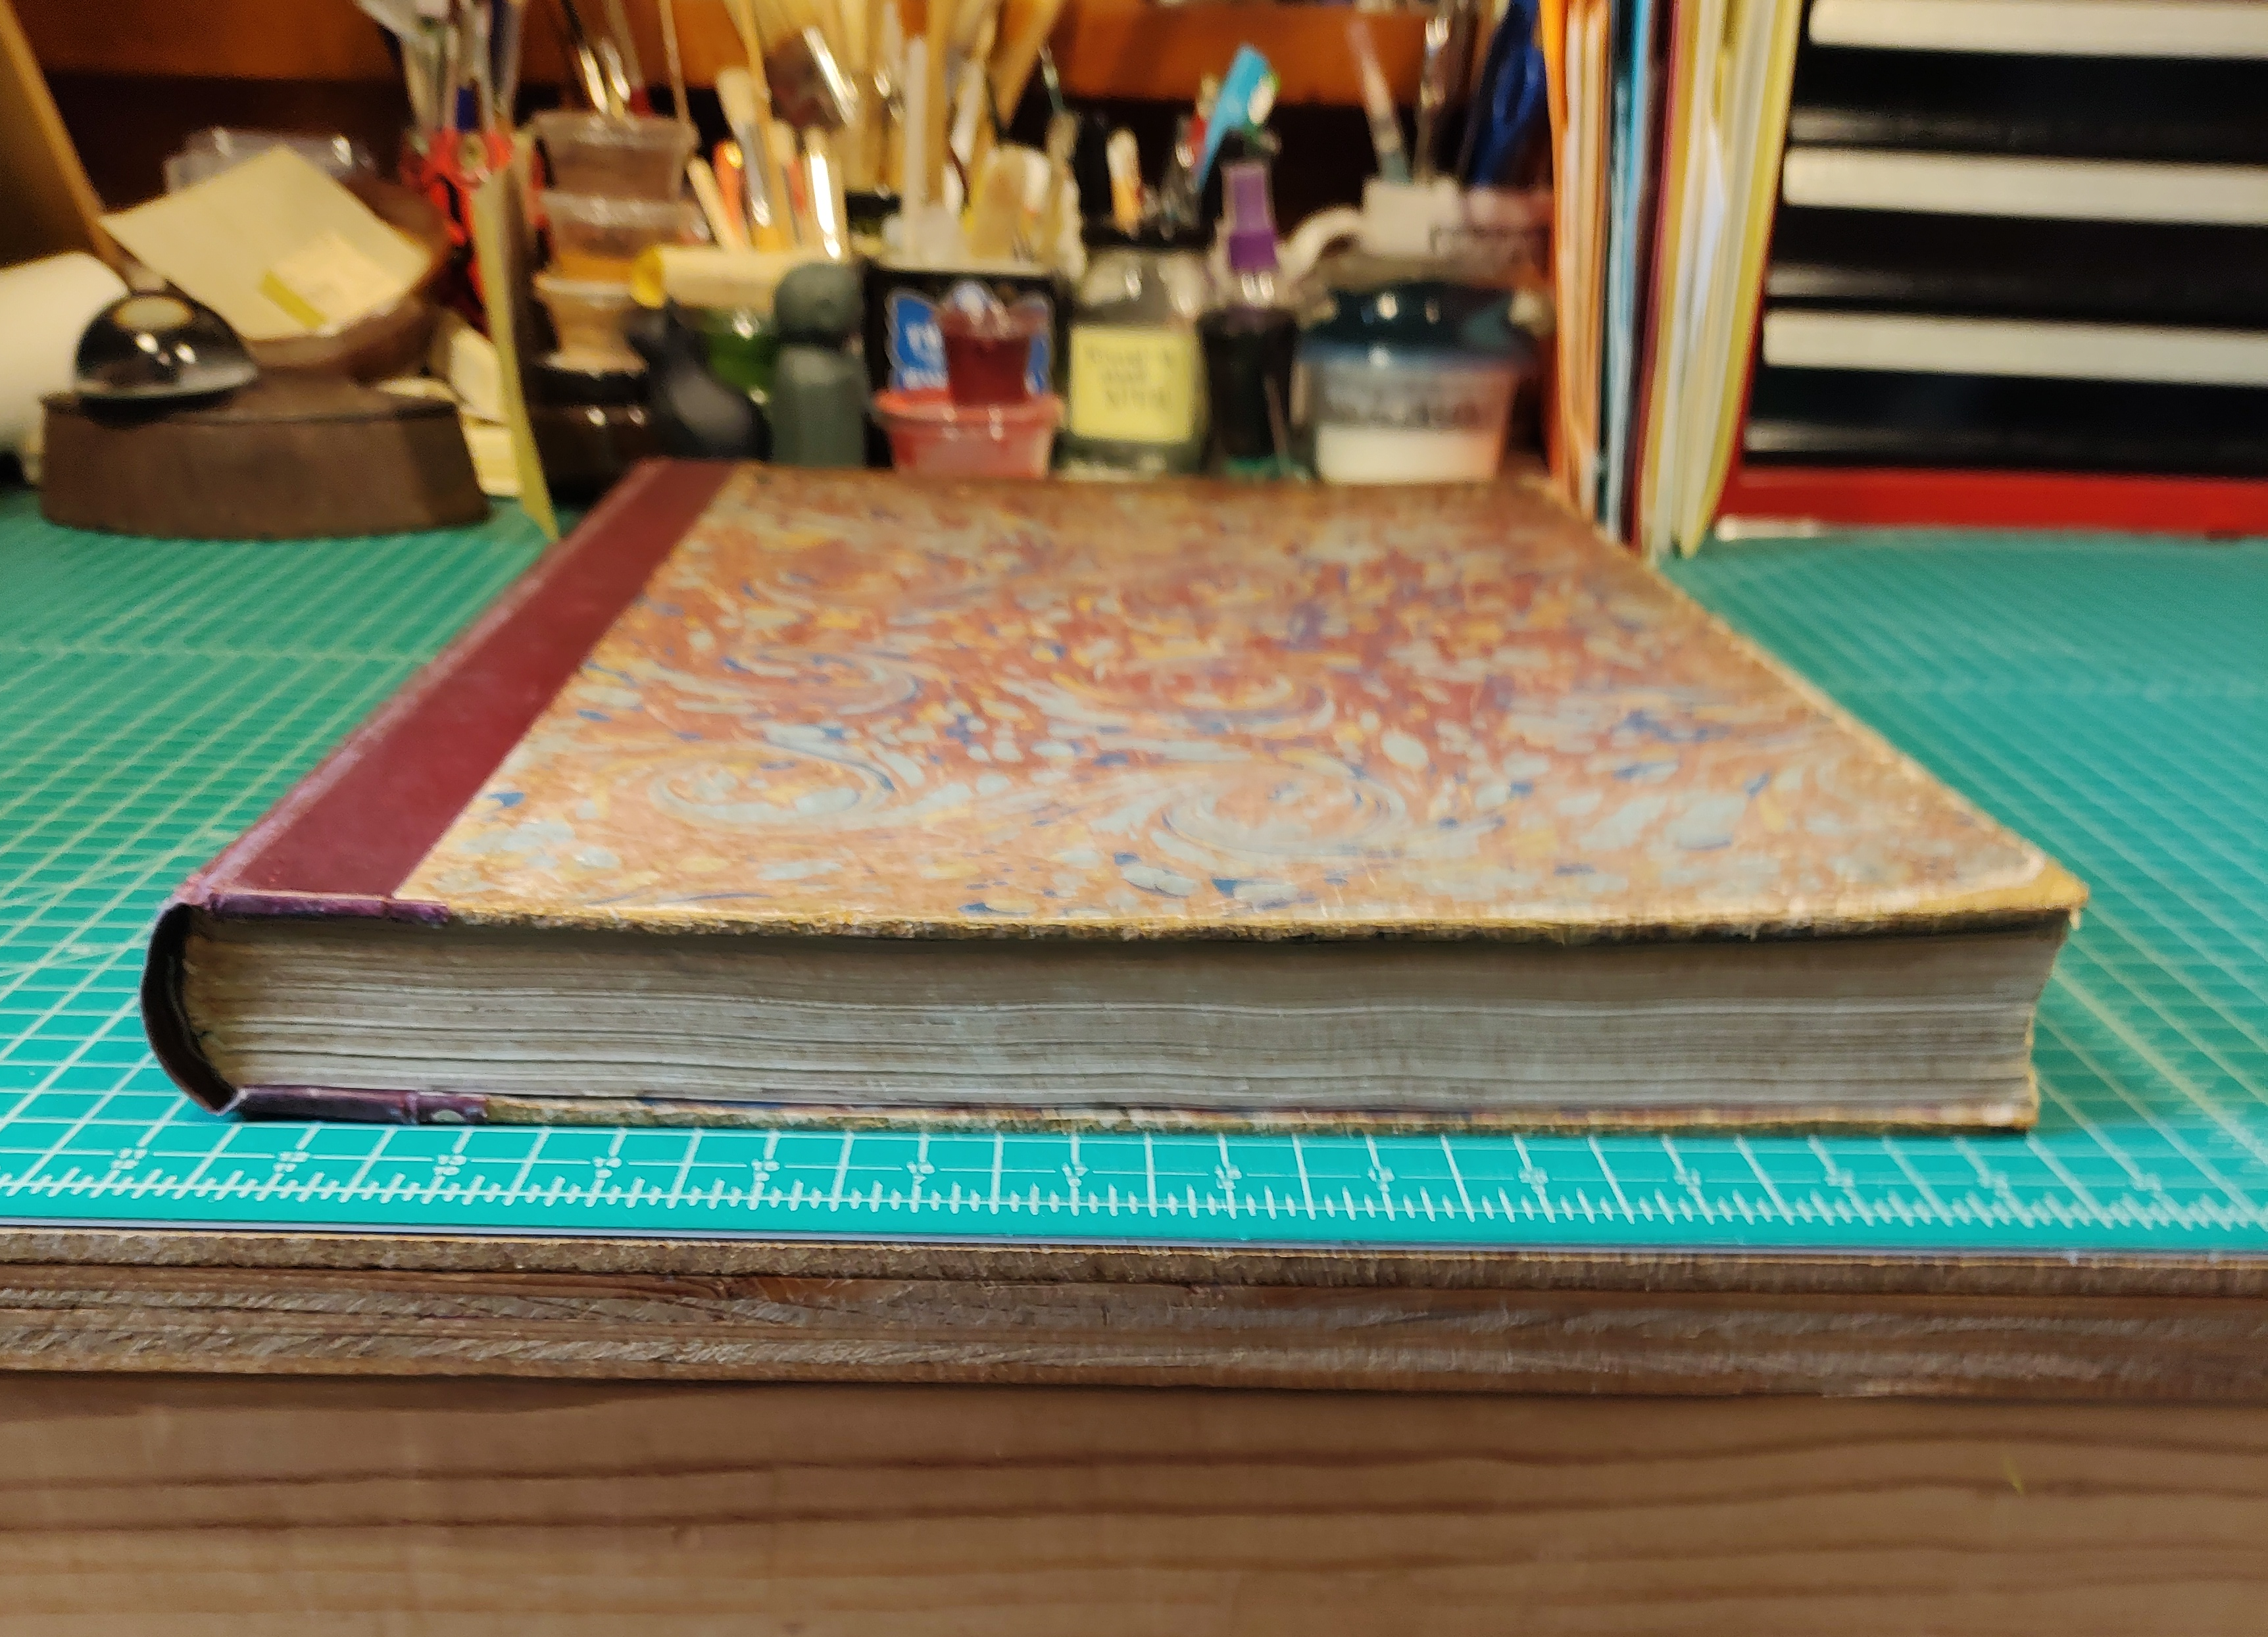
The bottom edge, after repairs. Please note: the lighting gave me more issues than I could fix in post, I promise I didn’t fade the cover!
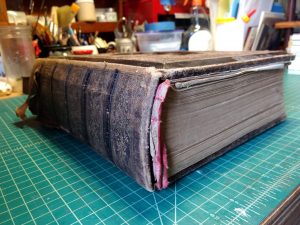
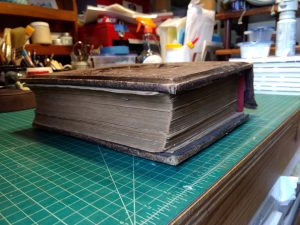
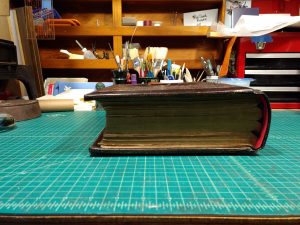
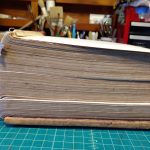
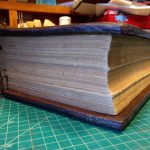
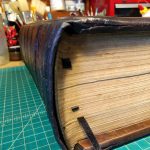
Bottom view of the text block, before repairs.
Bottom view of the text block, after repairs.
I kind of panicked when I opened it the first time, I’d never seen an old book bound this way! Thankfully Sophia (of SaveYourBooks.com) had some ideas and helped me be a little less intimidated.
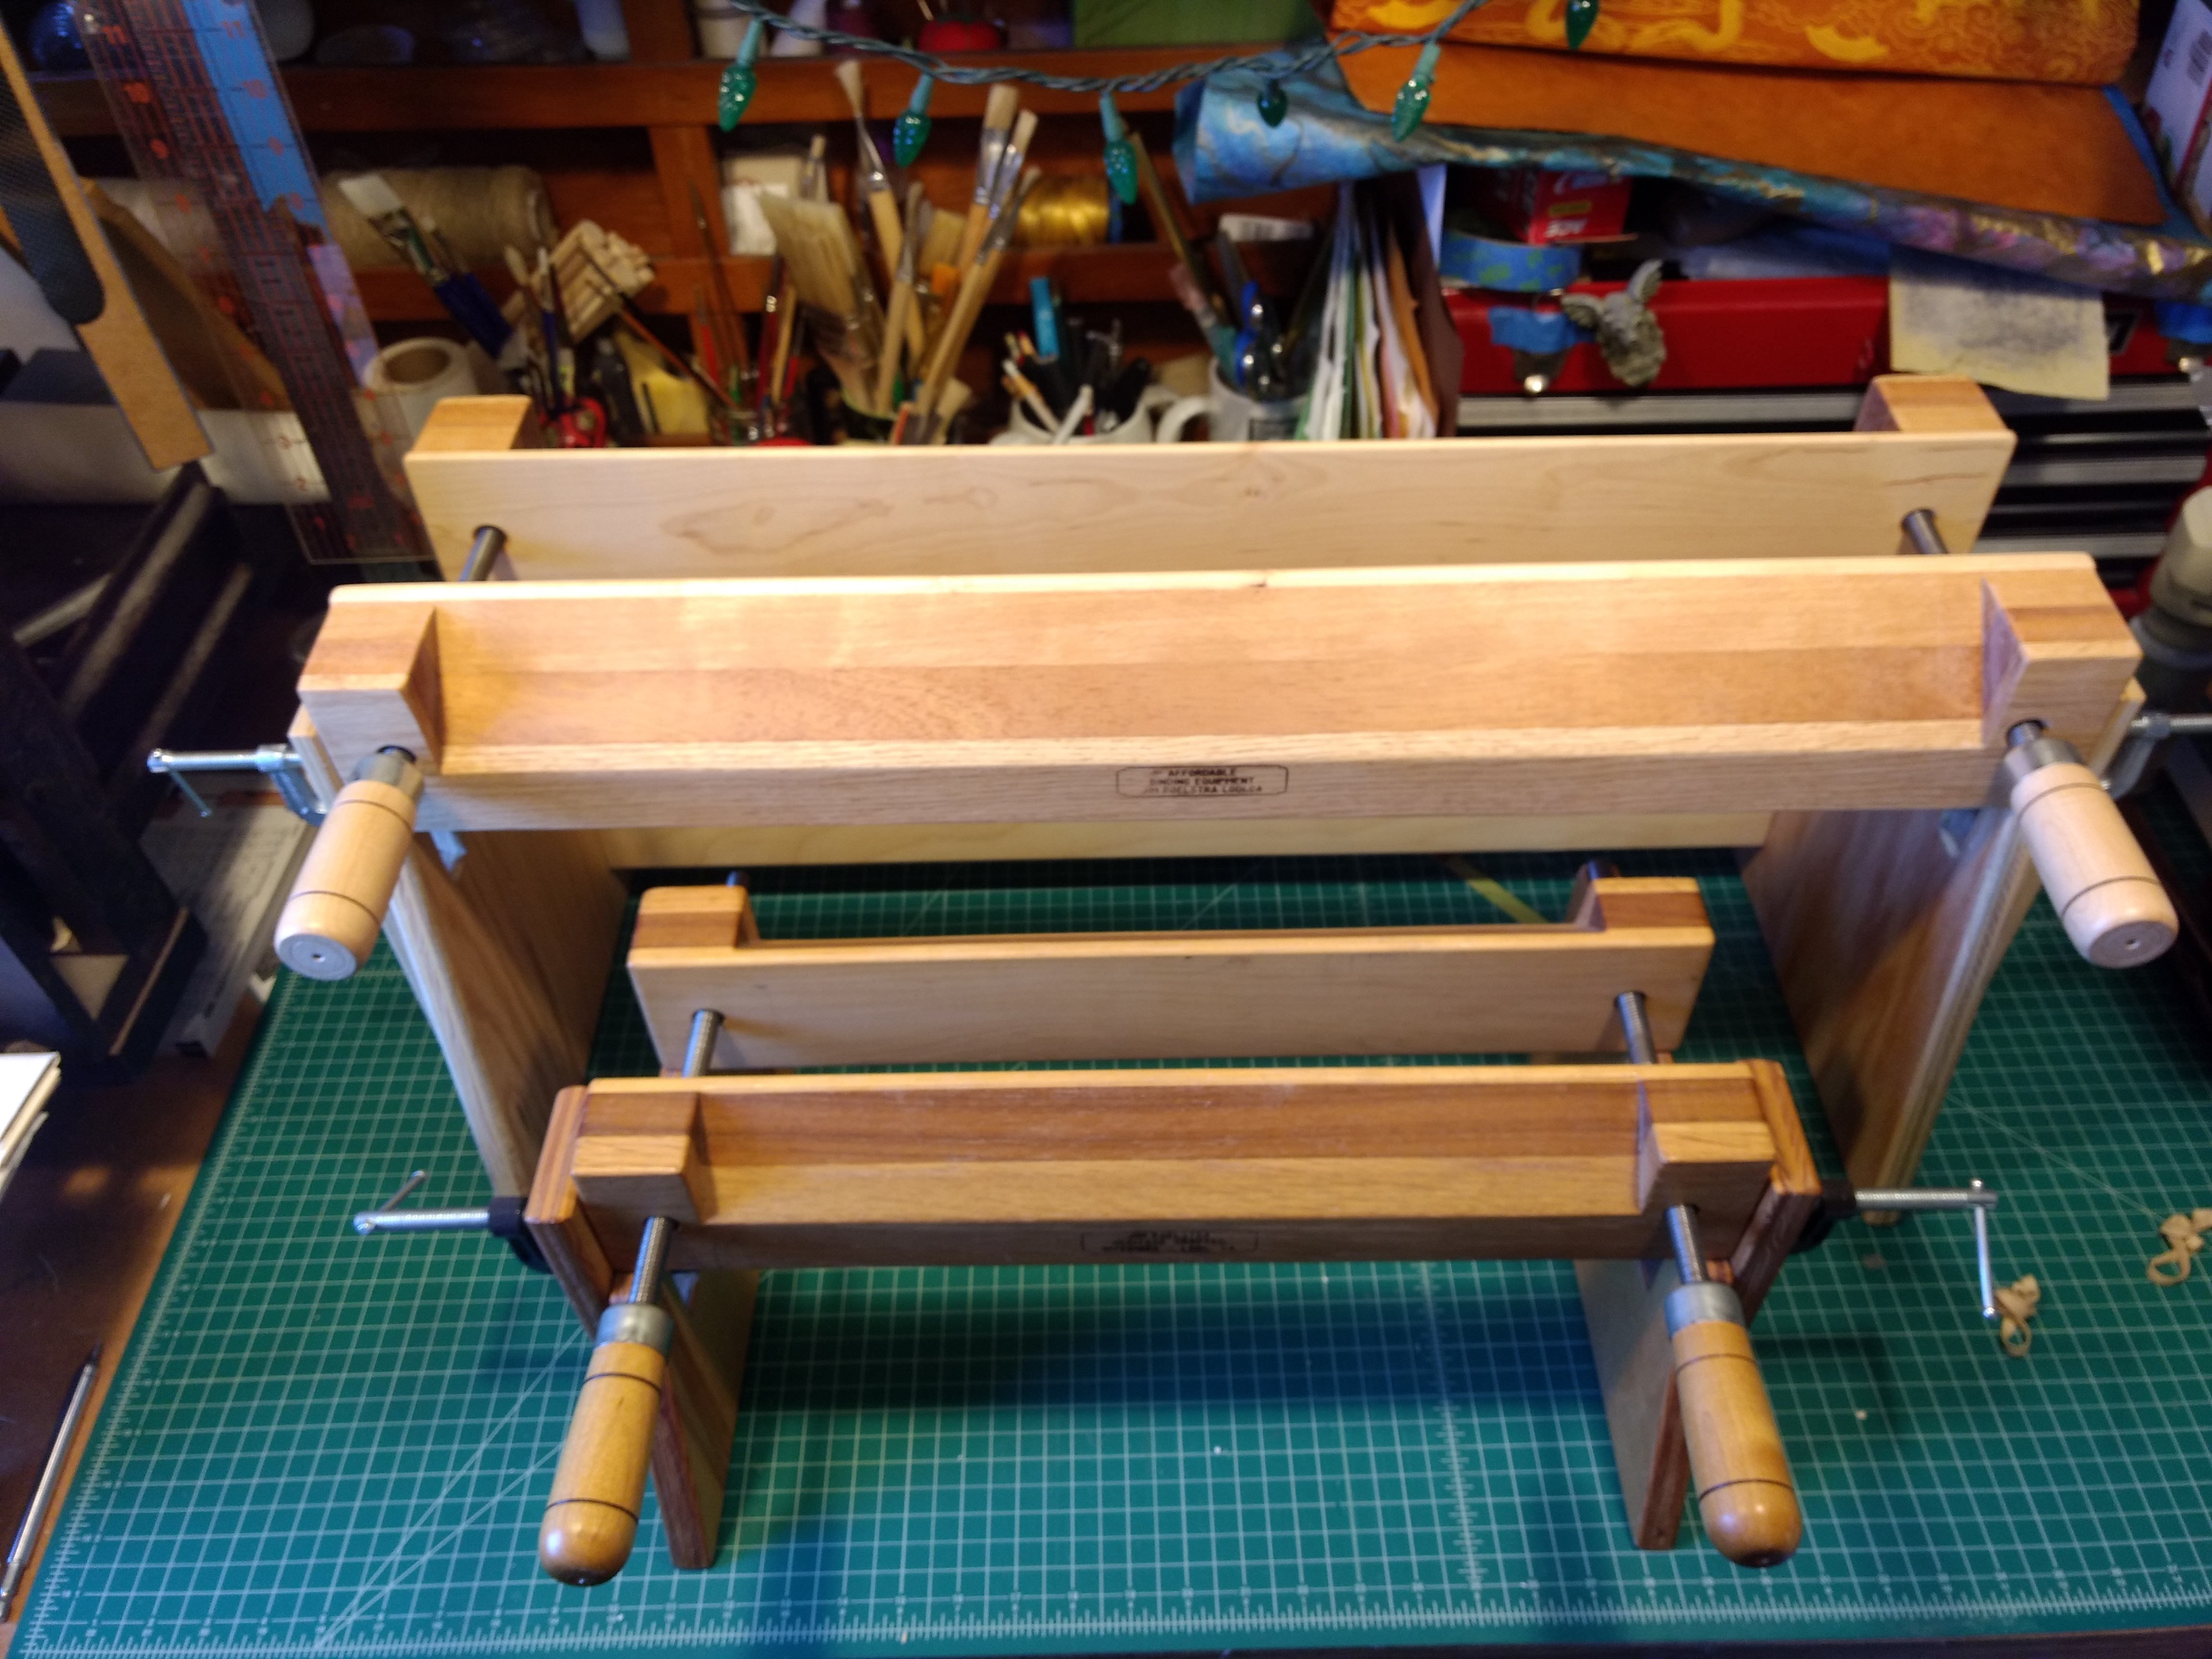
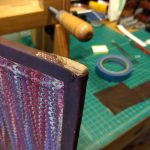
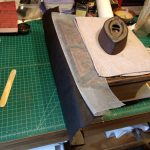
One issue I spotted the moment I accepted this book to repair was how tall it is. Folks who’ve seen my laying/finishing press in person in my booth know it is nowhere near big enough to hold a 19″ book. Thankfully Jim Poelstra of Affordable Binding Equipment takes custom orders and made me this behemoth (shown with my regular-sized one for scale):
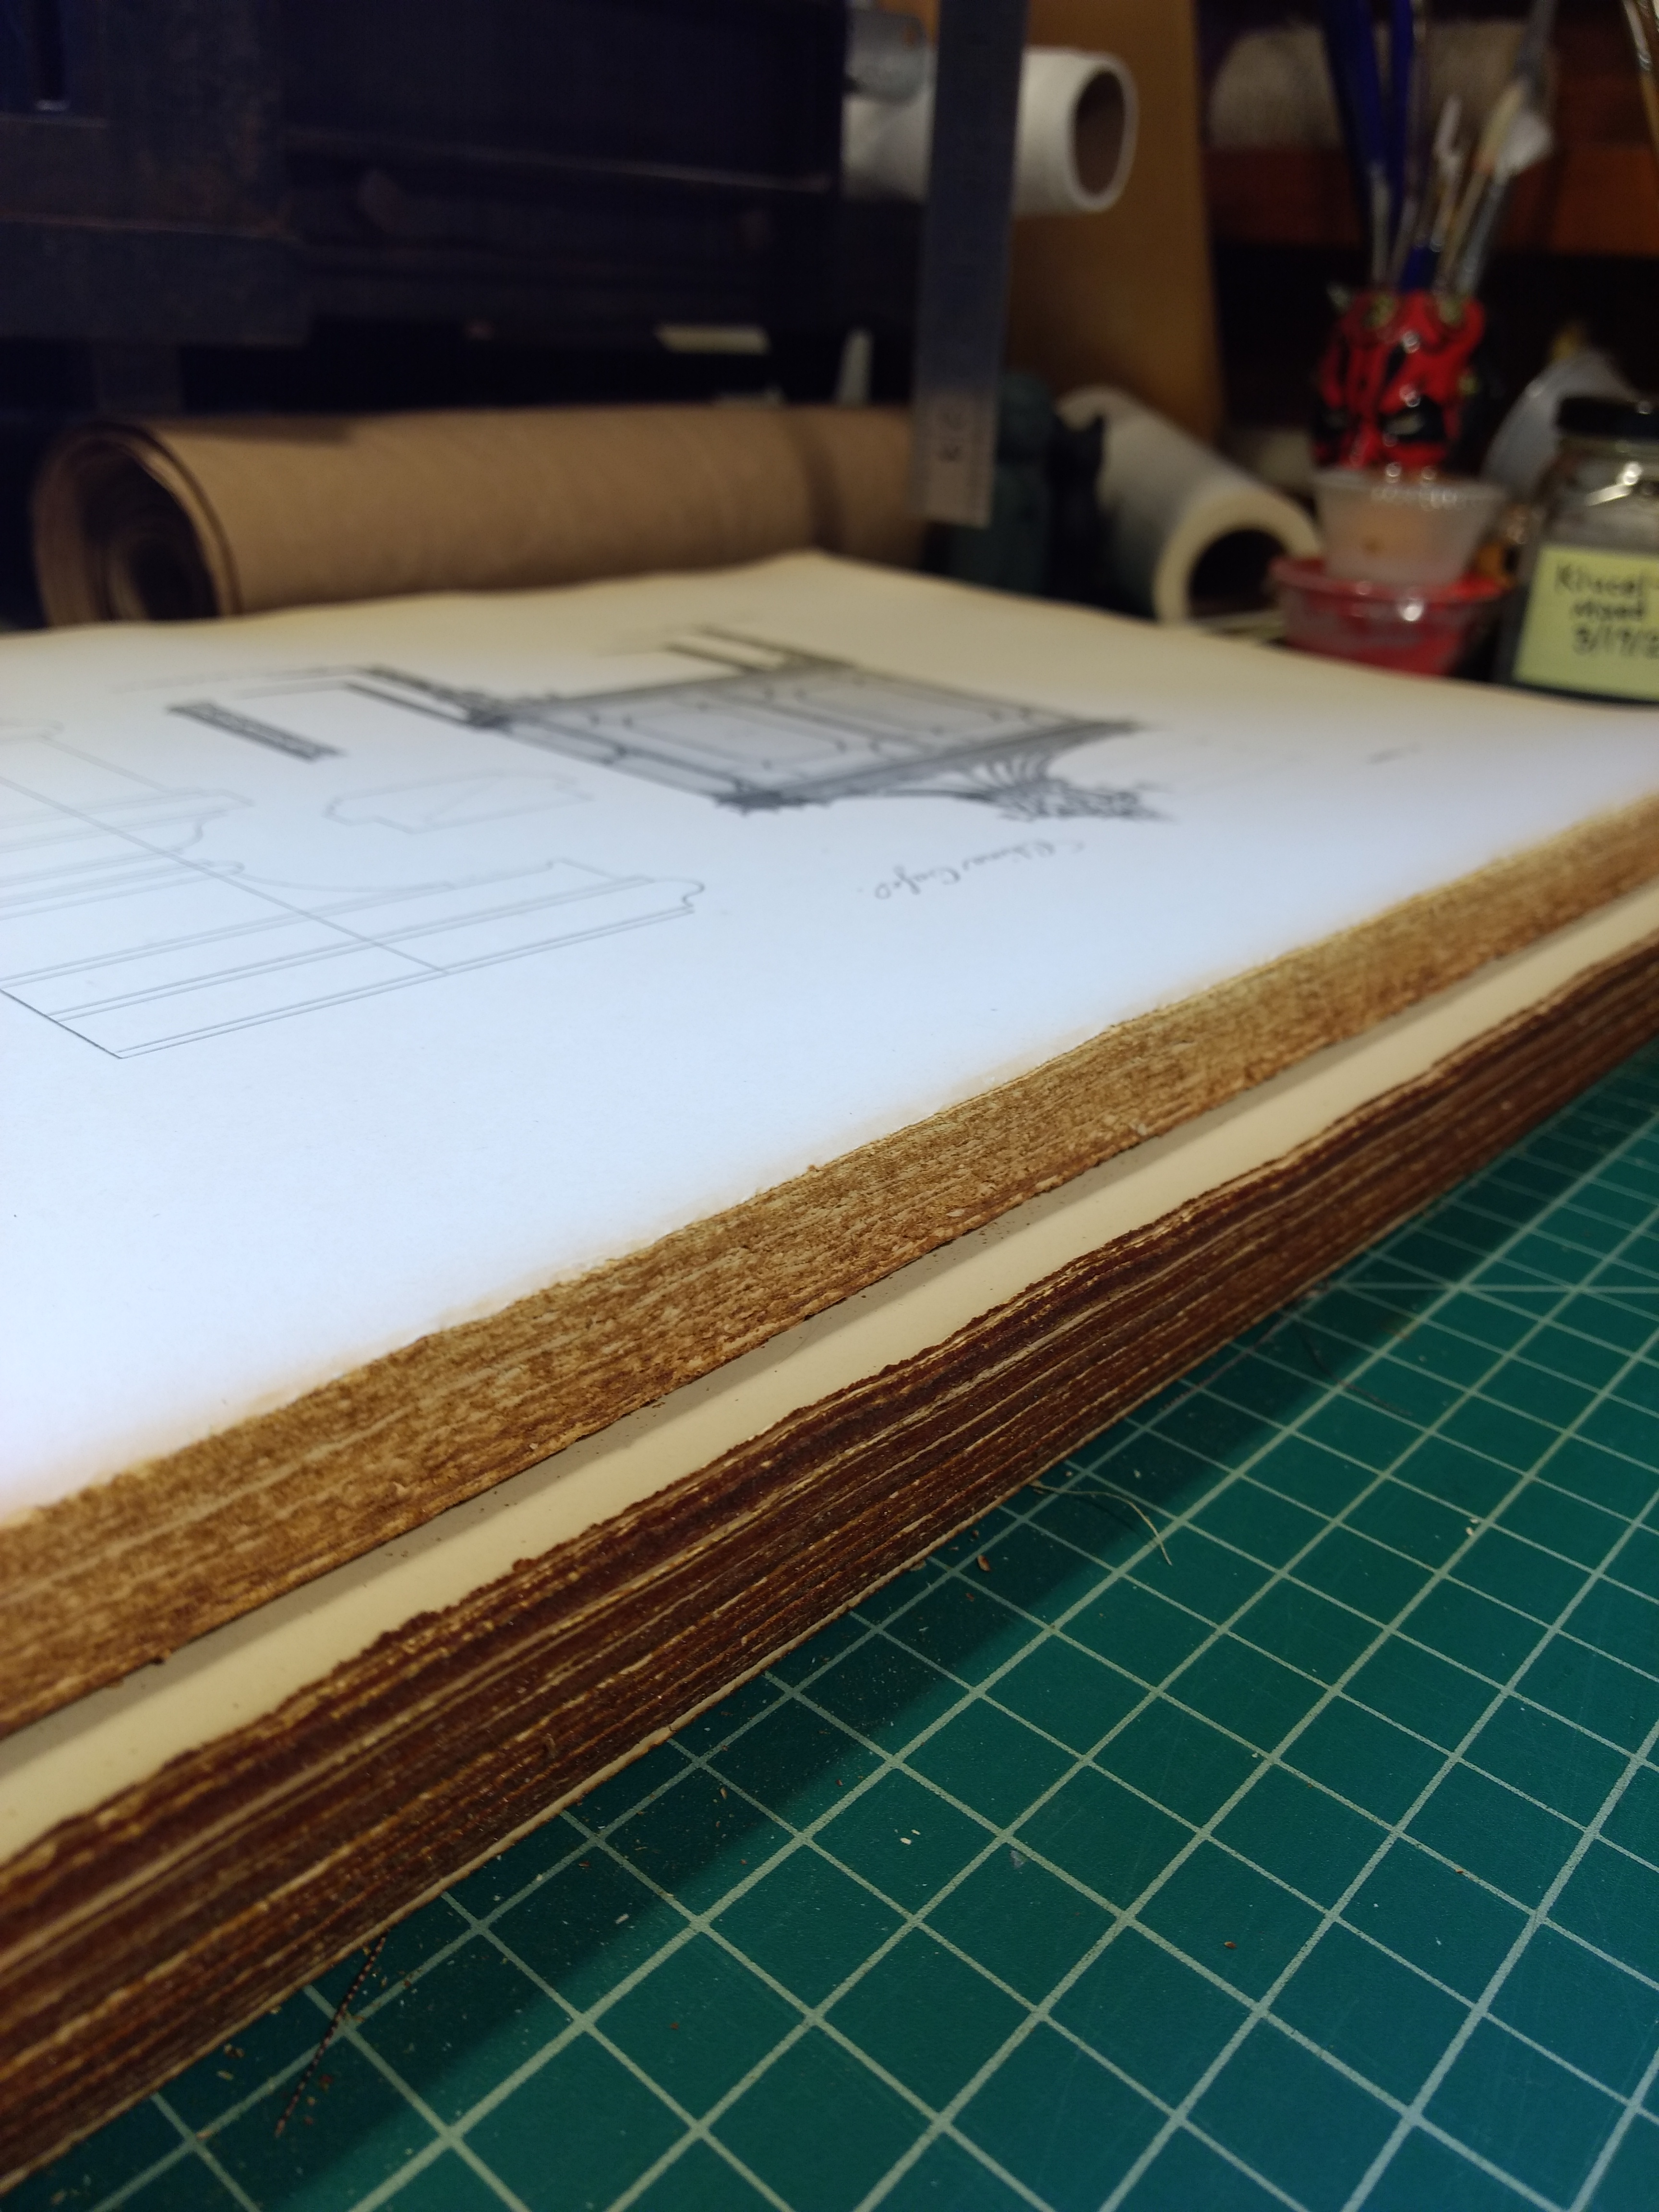
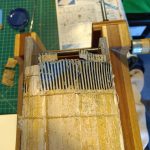
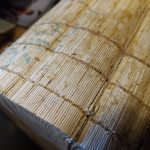
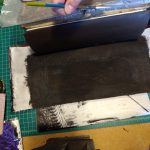
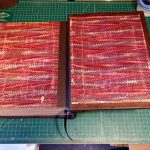
My first order of business was cleaning the glue off the pages. It had hardened and shattered, leaving a line of grit on the edge of every page. This took a while! I carefully scraped it all off with a lifting knife. I didn’t find any way to do it faster that wouldn’t damage the pages or involve just hacking the edge off. I really didn’t want to remove any more original material than necessary. Here’s an in-progress pic, with cleaned pages on top.
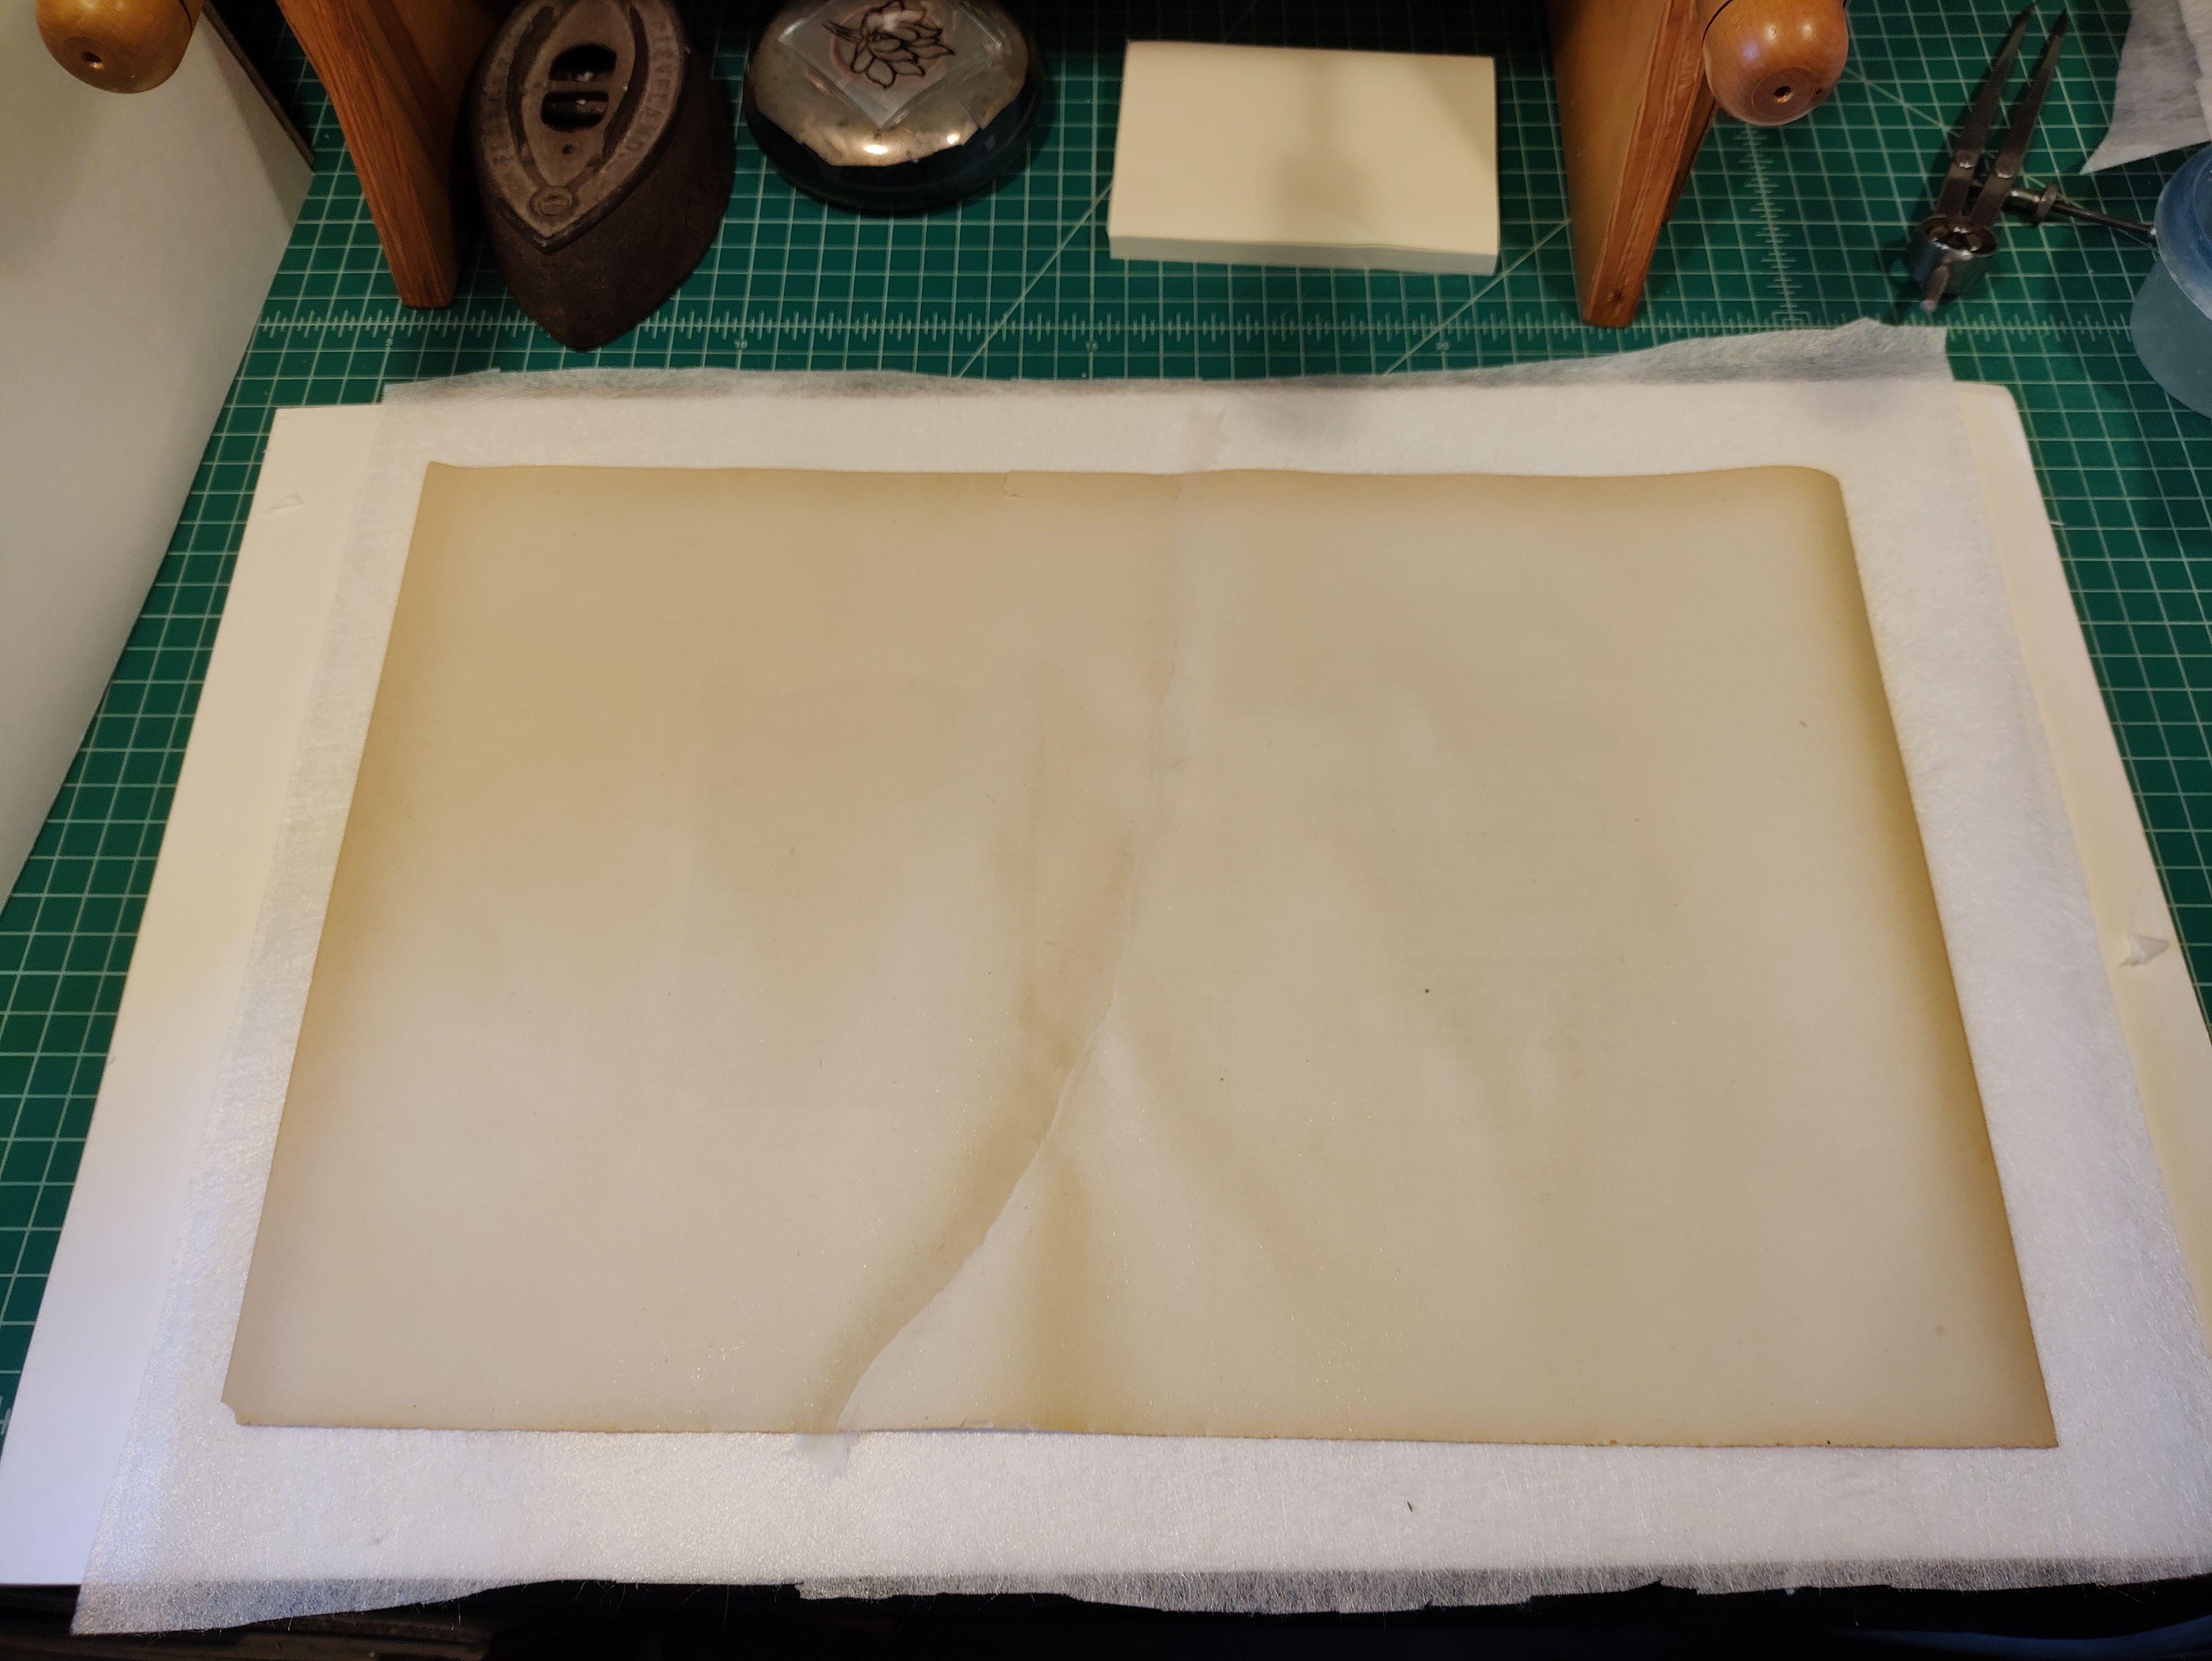
Another adventure I got to have was mending a page that had been torn completely in half! I took a paper mending course ages ago, but had never tried to mend this long a tear. Moisture (like in the paste) makes paper ripple – this isn’t too bad for small tears as the ripples aren’t very concentrated and can be minimized with pressure. This, however, was not a short tear: Once again, Sophia came to my rescue – but with a terrifying method. What you do to keep the paper from rippling when you paste on the mending material is get the entire page wet. She assured me that if I dried it sandwiched properly with hollytex (a non-woven synthetic material that won’t stick but lets moisture pass through) and blotting paper it would dry flat again. She was right! I still got a little rippling because keeping that massive a page equally damp with a mister rather than a fancy humidifier hood is really difficult. But, not much rippling all things considered! Here’s the sandwich (note the minimal rippling:
And here’s the finished page:
That was an adventure!
Other notable bits…
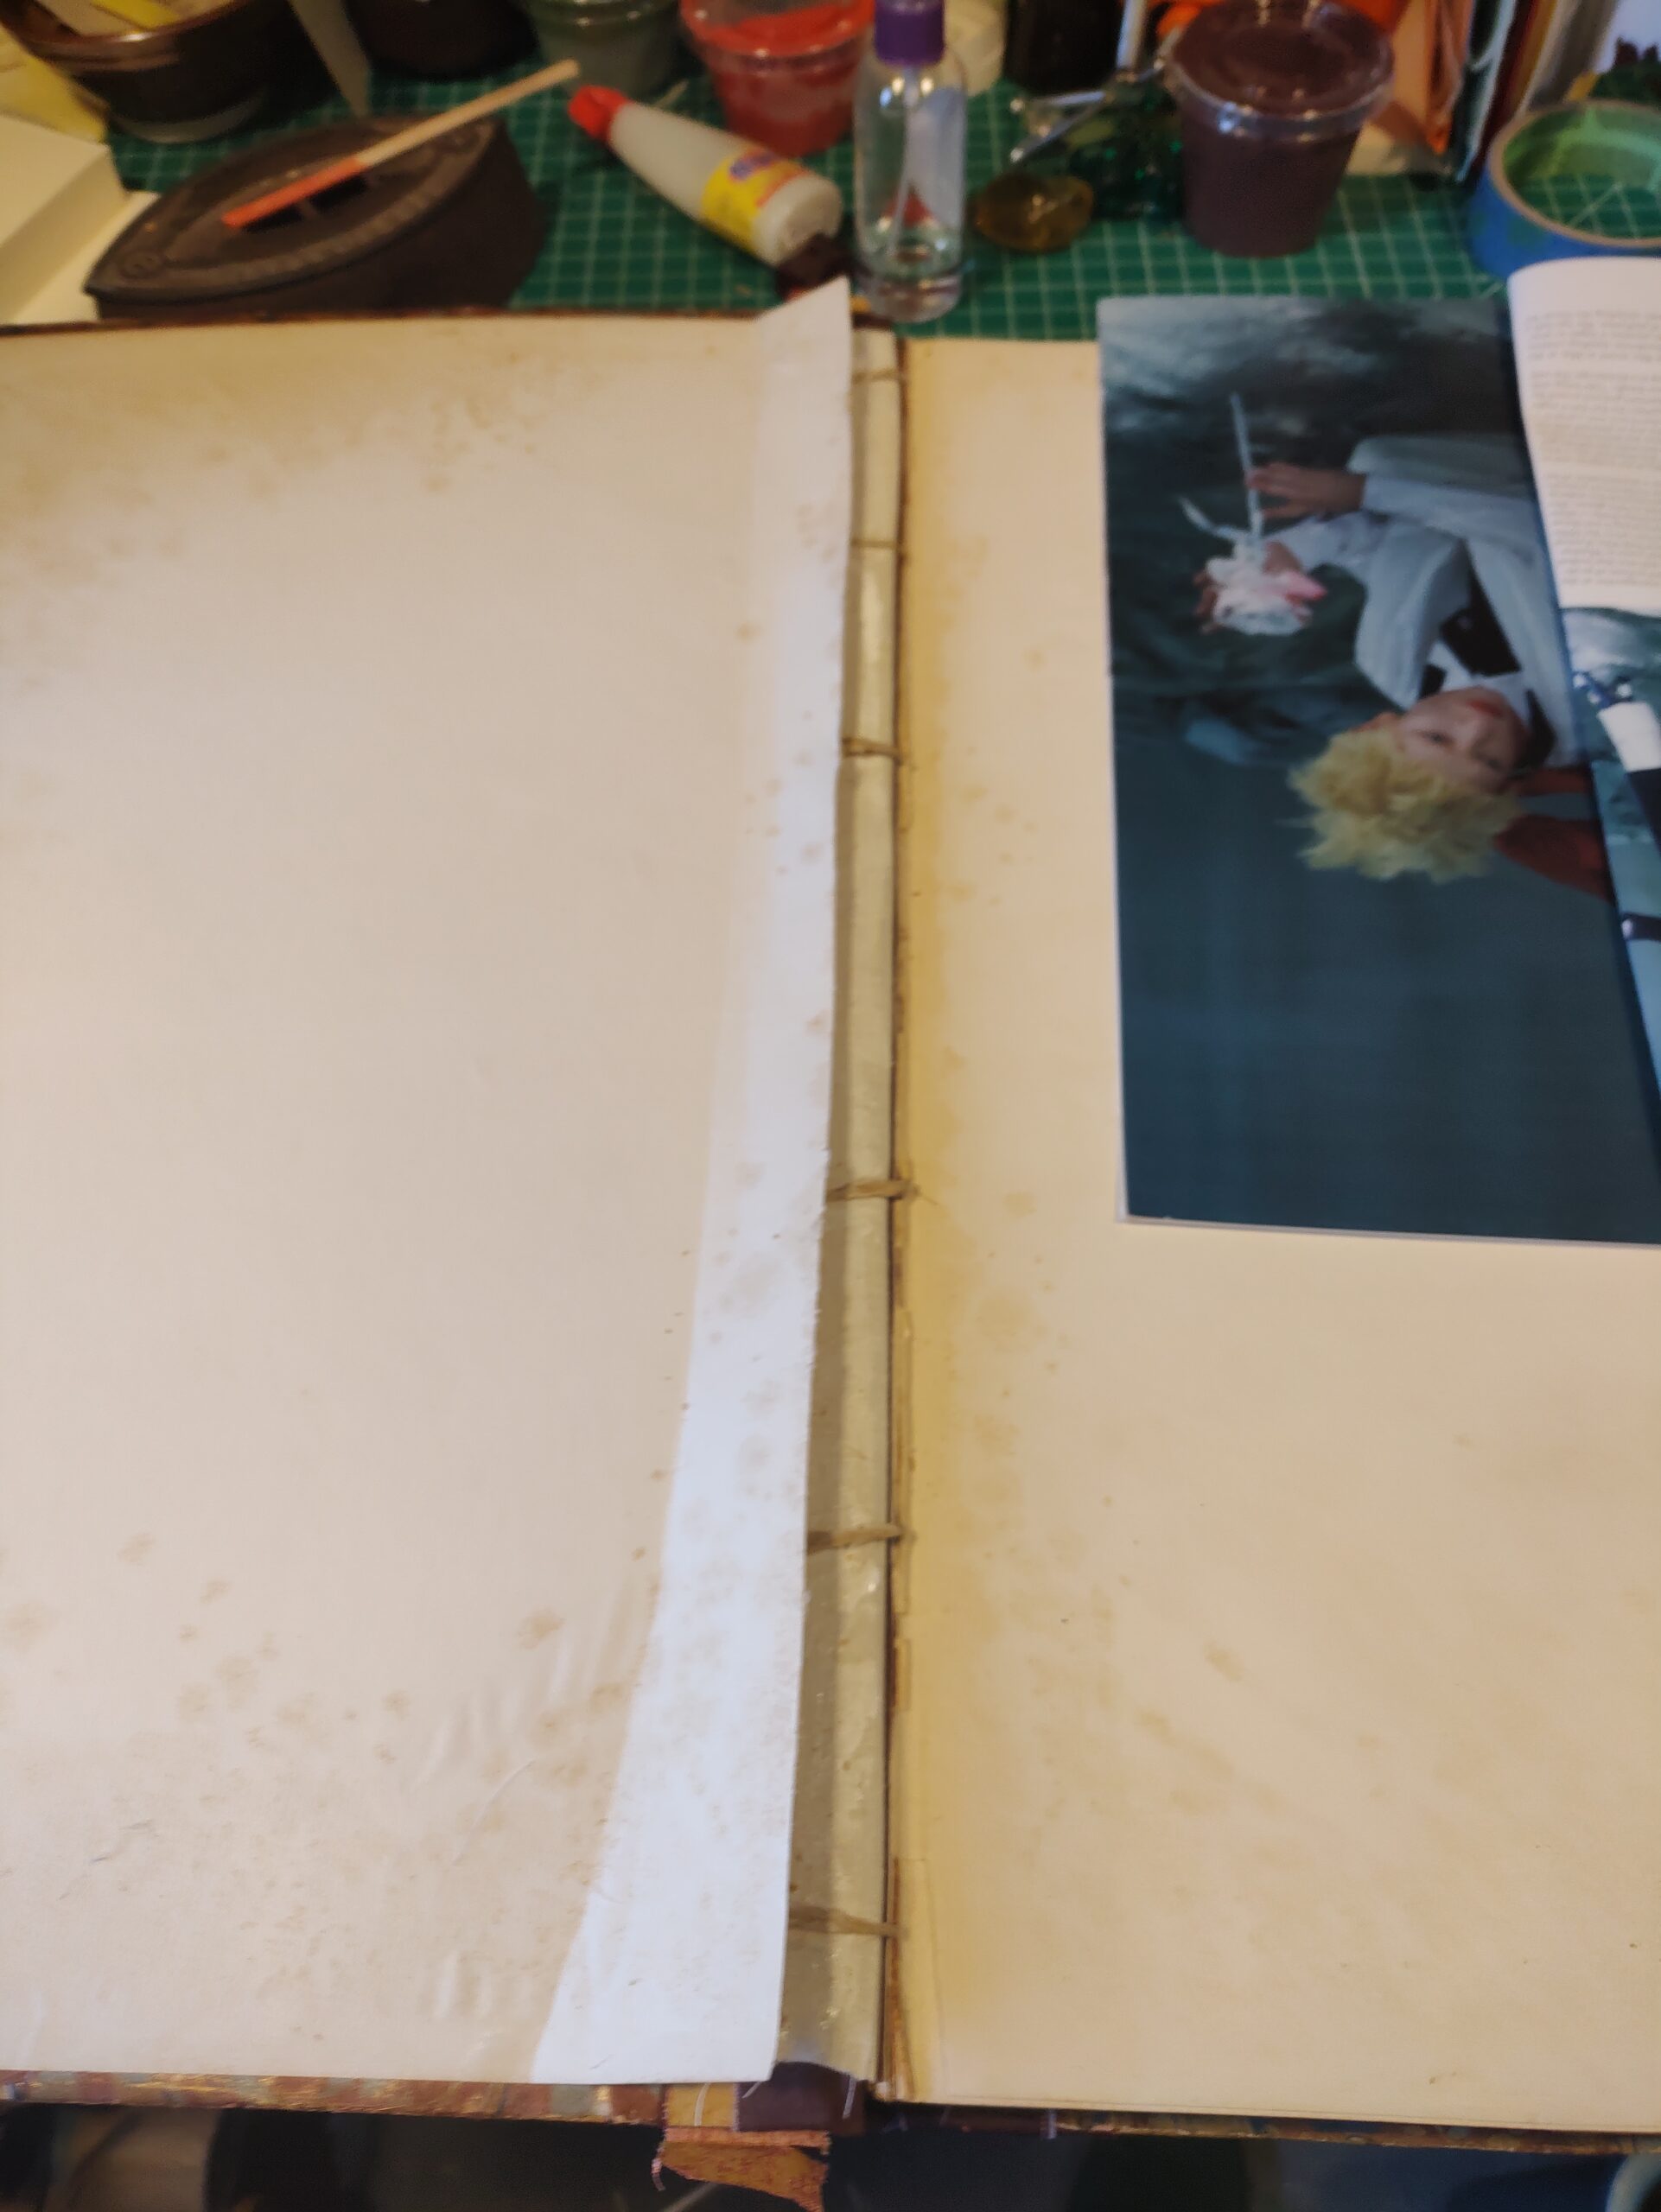
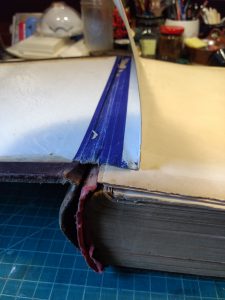
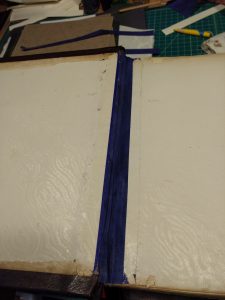
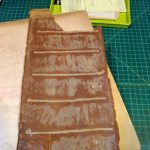
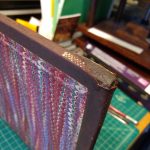
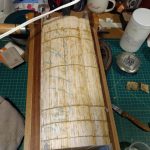
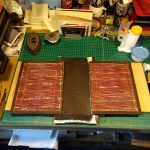
I unfortunately didn’t take any images of the main strengthening structure I used: I (very nervously and very carefully) used a small saw to cut channels into the spine, then laid cord into each one and glued everything up. You can see the cords here, where they’re tucked under the pastedown inside the cover:
The magazine page was used to help me only glue up the bits I wanted to as I tucked the cords and hinge linings under the pastedown.
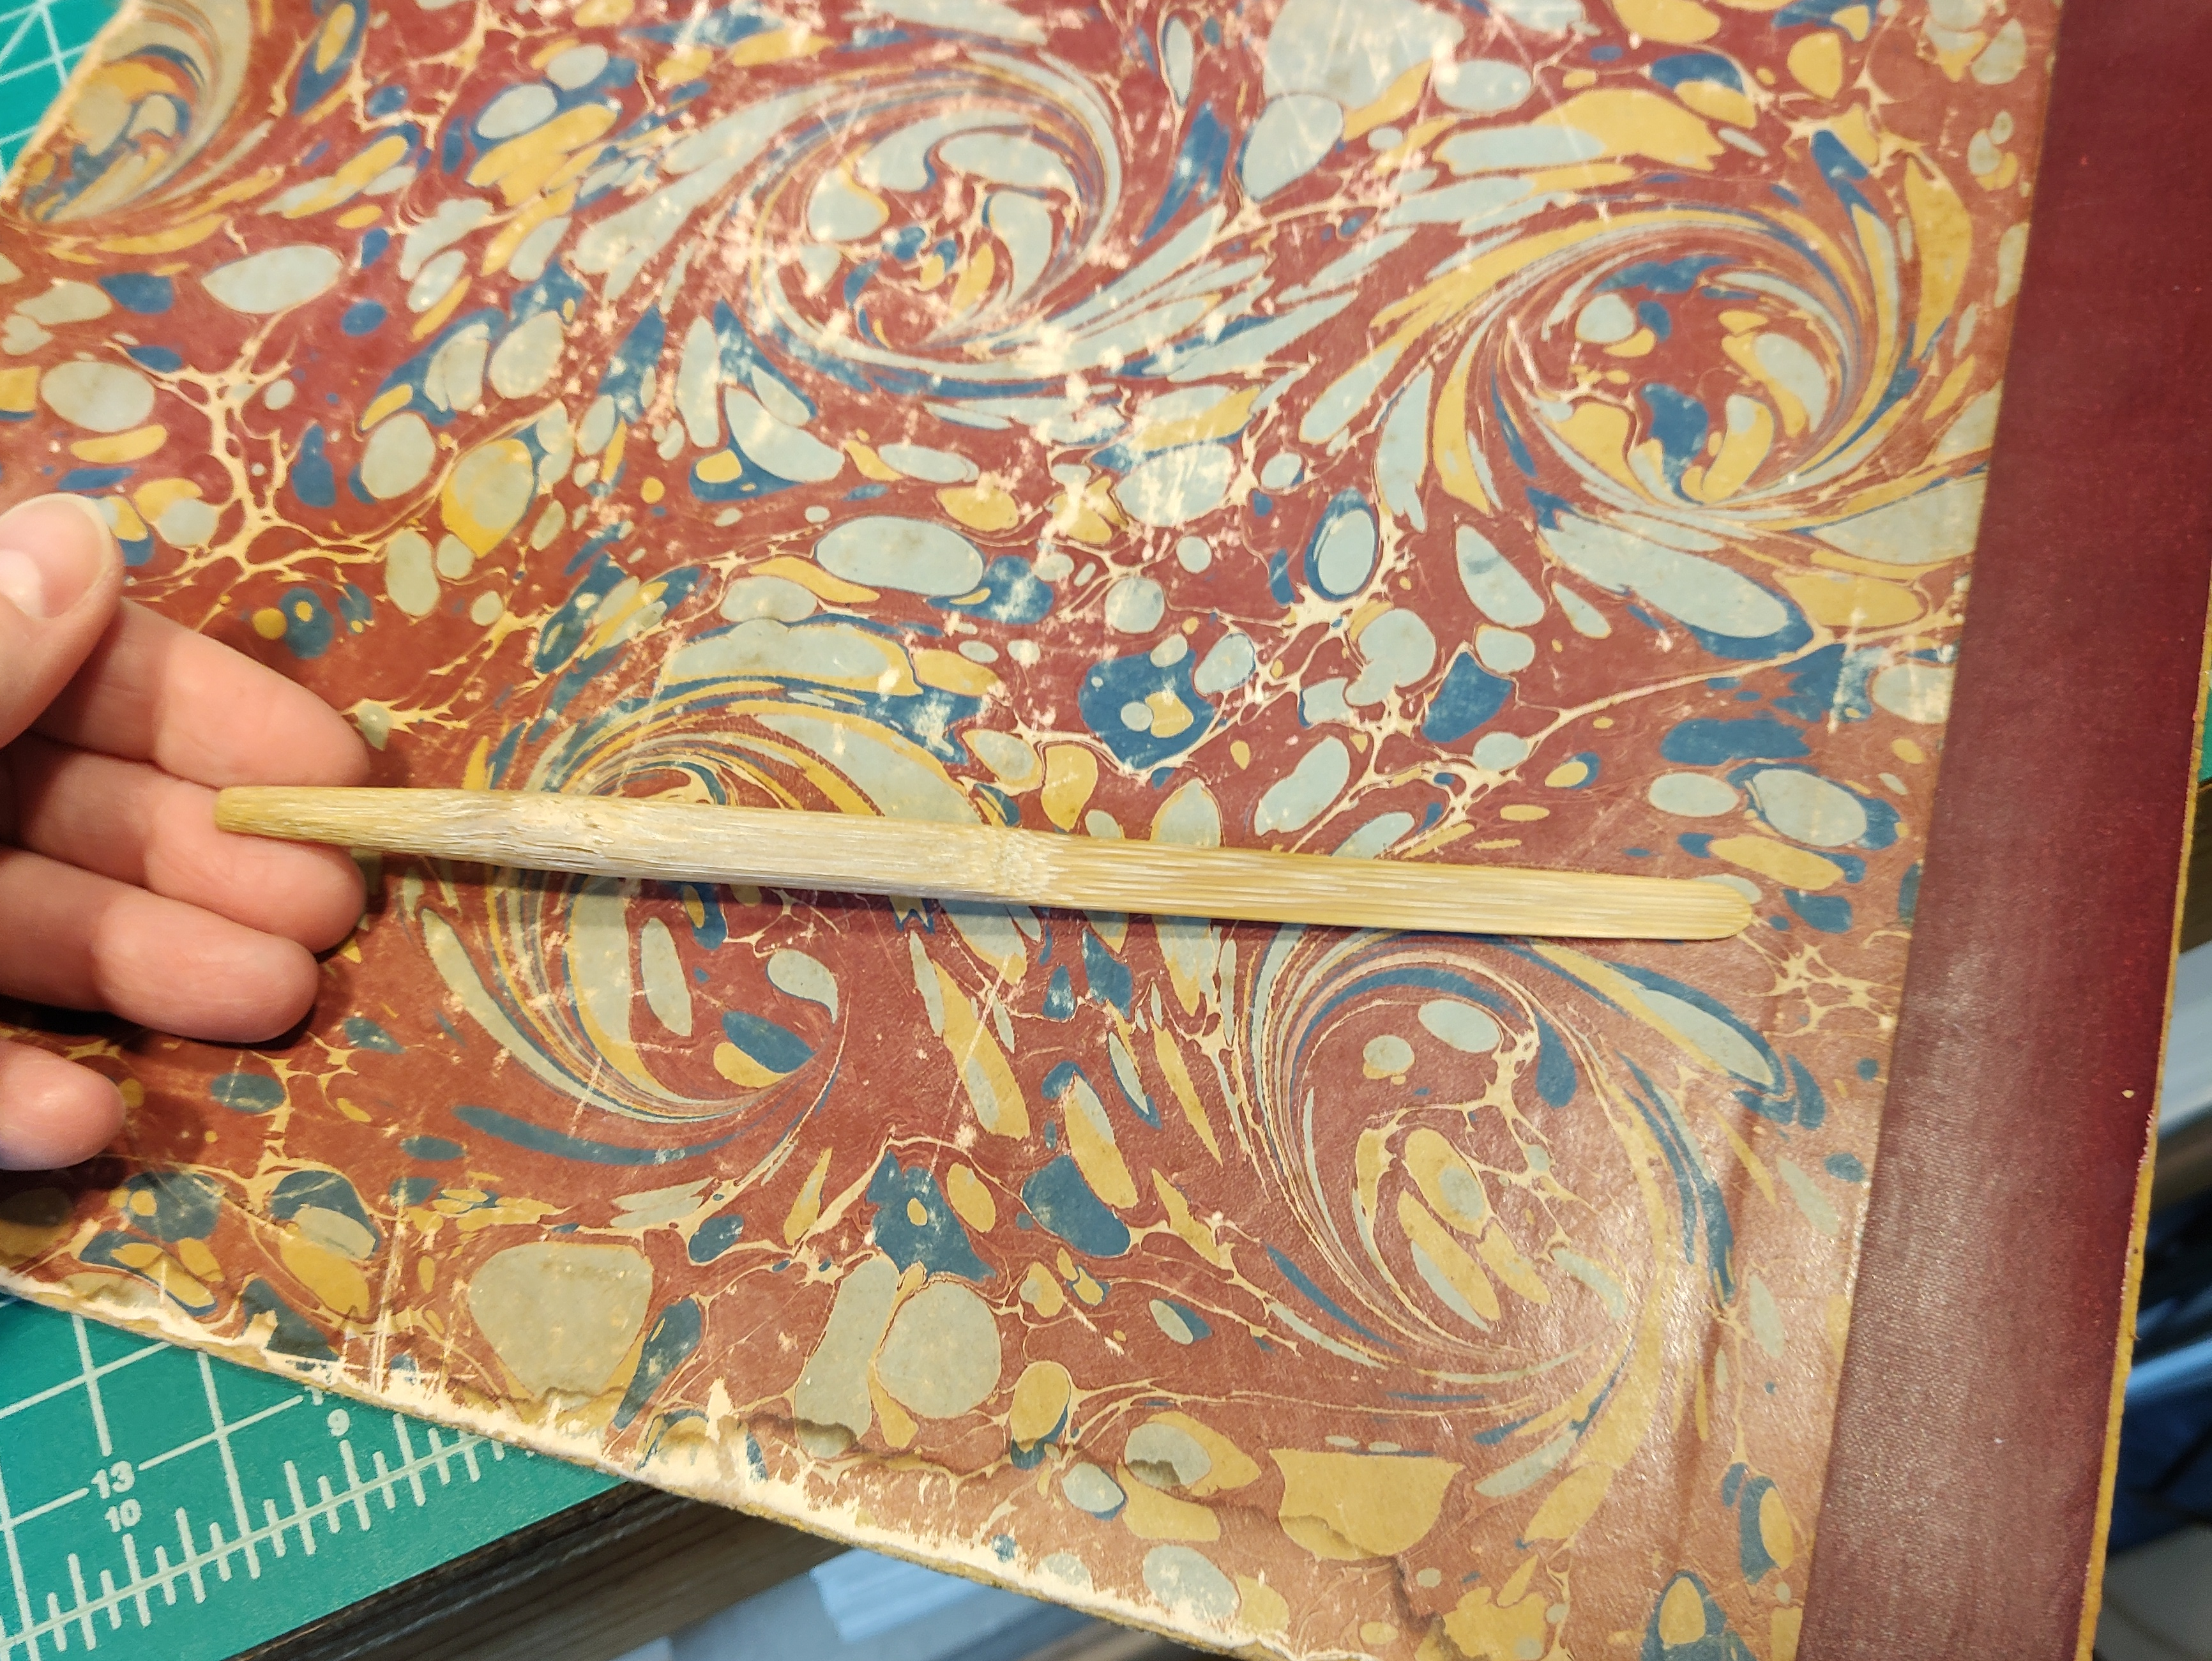
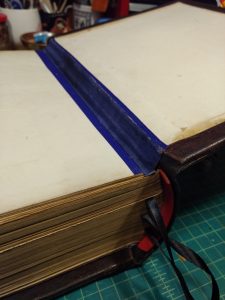
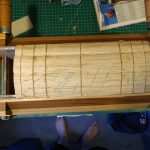
I took a workshop with Jeff Peachey on making your own tools, and made a bamboo lifter that worked great for gently lifting the cover material on the boards! Here’s a quick look at it:
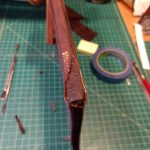
I also touched up the leather label on the spine with black shoe cream before giving it a coat of Klucel G to protect it.
Before
After
I learned a lot, and it was a real privilege to work on such a large, old, unusual book!
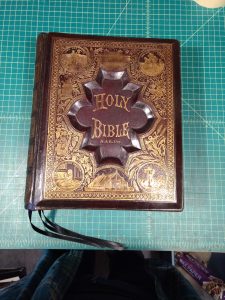
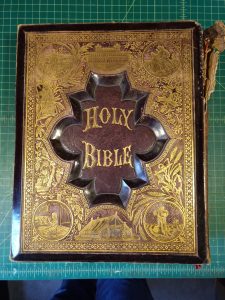
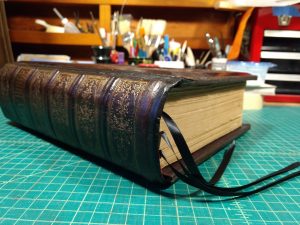
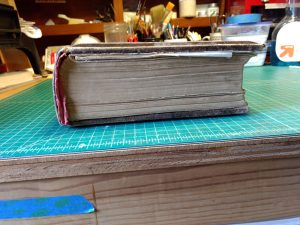
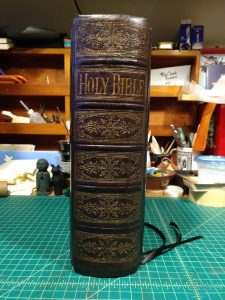
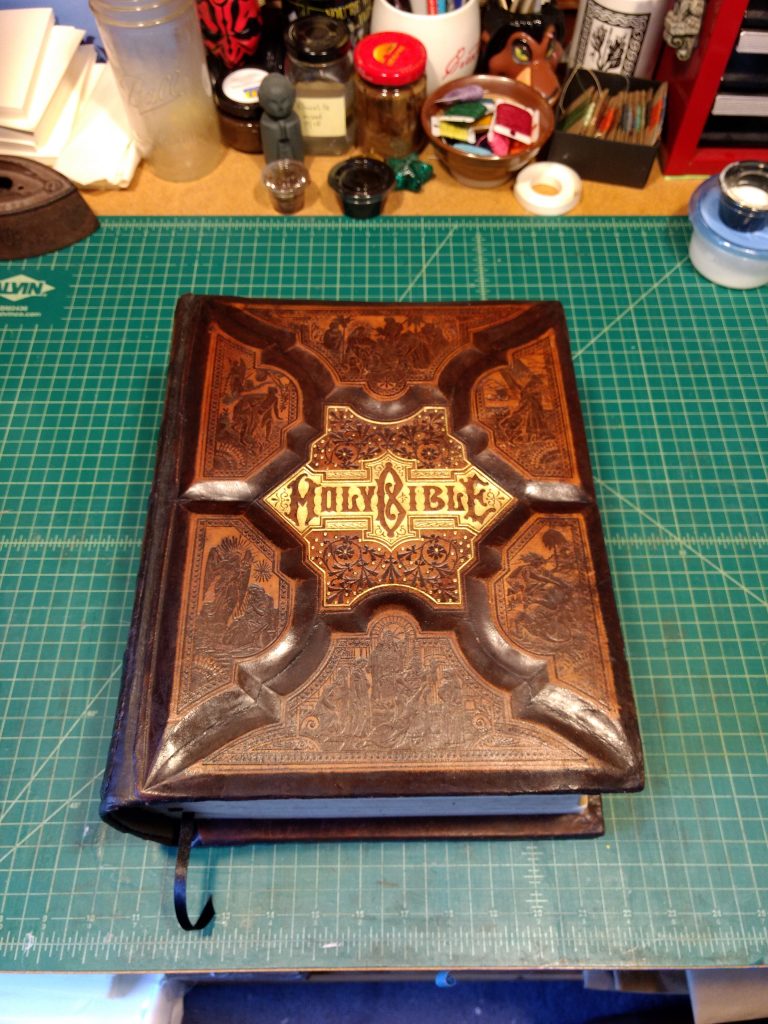
After last year’s Bible repair project, I was a little less nervous taking on a second one. Sophia was very encouraging, and I finished in about half the time, which is great – mostly because I had fewer questions and was a lot less anxious (anxiety = procrastination). I’m really happy with how it turned out, take a look:
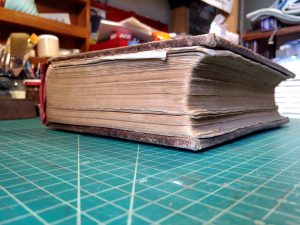
Before
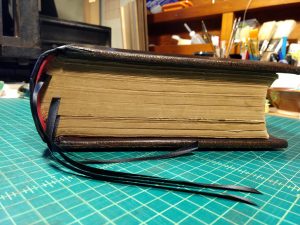
After
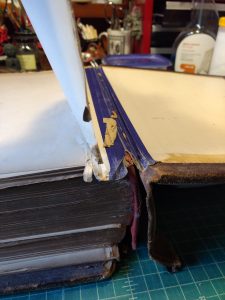
I think my favorite detail is the top of the spine where some brave soul attempted to mend the splitting shoulder by spiral-binding a tear back together (you can see it in the last row of photos). Sadly, the spiral binding didn’t hold and made a big mess of the leather on that shoulder. Thankfully, most of it was removed when I trimmed the shoulders for the new spine, and you can barely see where it was.
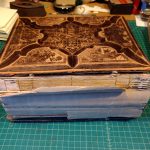
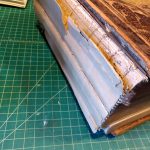
There’s something incredibly satisfying in repairing these huge old Bibles. Sophia taught me to do multiple layers of reinforcement on the spine, including a hollow (basically a flattened tube of heavy paper that is glued to the spine of the text block and to the spine of the cover. The inside of the flattened tube is not glued, so the spine has flexibility but also a lot of support), so the finished version is much, much stronger than the original and should last a very long time with a bit of care.
If you have a big old family Bible (or other book!) that needs repair, check out my Bible Repair page and get in touch!
In the summer of 2018, I sat in for a day with fellow Guild of Bookworkers member Sophia Bogle, of Save Your Books at the Rose City Book & Paper Fair. A customer brought Sophia a massive Bible to repair – he didn’t want picture perfect restoration, he wanted it to be functional again. Sophia proposed that rather than her doing it (which would cost quite a bit, as she’s a restoration expert), I would do the repairs with her coaching me (for a lower fee).
So began a digital apprenticeship! She wrote instructions in a shared Google Drive document, we had video calls, and periodically I’d text photos or a video with a question or update. It took almost a whole year (I started a new dayjob, among other things), but we did it! Sophia was really supportive and patient, and I learned a ton.
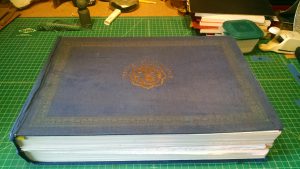
Here’s what the Bible looked like when we got it:
I did the corners like so:
Before
Before
Carefully tucking glued up and painted Japanese paper under the leather
Almost done
Voila
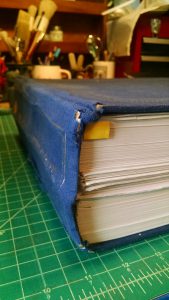
Here are some pix of cleaning the spine of the text block. This involves applying paste to moisten the old glue, then scraping the paste and glue off – very carefully so as not to damage the paper or sewing. It takes for everrrr but is very gratifying to finish.
Before. Check out the badly trashed headband
Making progress
Making more progress
Clean!
Here are a few in-progress shots from when I was working on the new spine. Once it was on, I attached the original spine over it.
The text block and boards are ready for the new spine
Getting the new spine positioned and trimmed to fit
Carefully applying glue to the boards
Almost done! Just needs the top and bottom turned in.
Turned in and positioned around the text block
And eventually it was all done!
It was amazing to actually finish the whole thing! I really appreciate all of Sophia’s guidance and help, and am excited to report that this year’s RCB&PF also brought us a new Bible to restore. Hopefully I’ll have learned so much from this project that the new one will take less time.
As an aside, if you look at the first image in the Done set, you’ll see why we nicknamed this project the Moly Bible – that H sure looks like an M at the right angle! 🙂
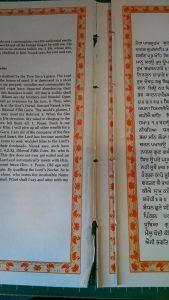
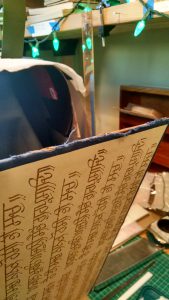
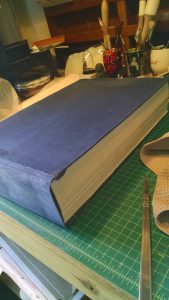
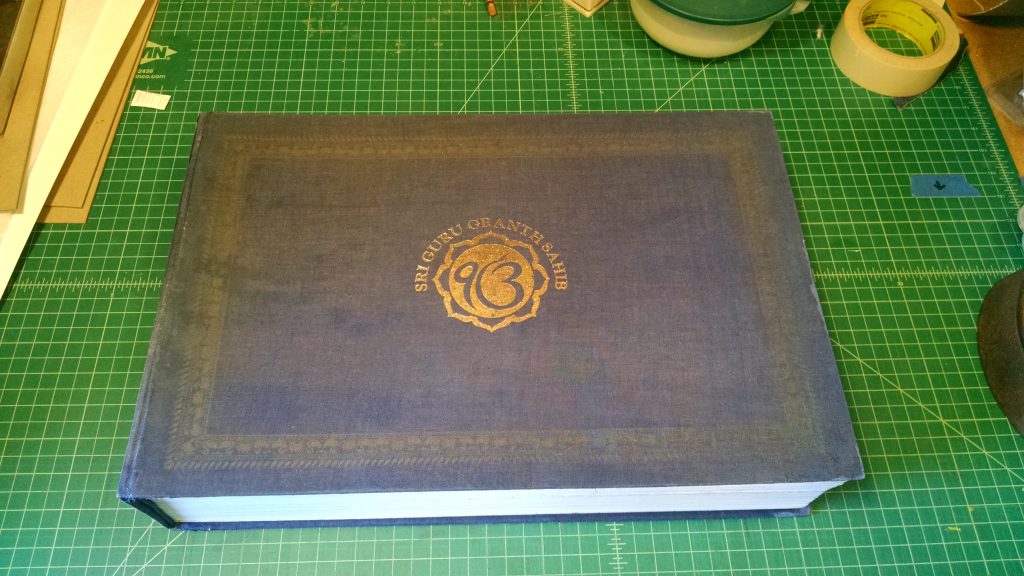
I was recently commissioned to rebind a beautiful copy of the Guru Granth Sahib, the Sikh scriptures. (For more information about Sikhism and modern Sikhs in America, check out SALDEF.org) Its owner is very attached to it, and with good reason: it contains the entire text in three versions, side-by-side! The original, a transliteration of the original, and an English translation. This isn’t an easy book to replace, so he sought me out to repair it. I took one look at it and said yes. It’s beautiful!
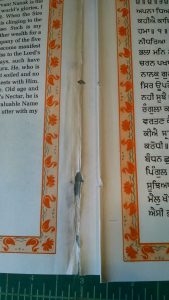
As you can see in the images below, the book had basically split apart into two halves, with only the bookcloth at the spine holding them together. Pages on either side of the split had been damaged with continued use and were starting to come apart as well.
Click any of the photos on this page to enlarge them.
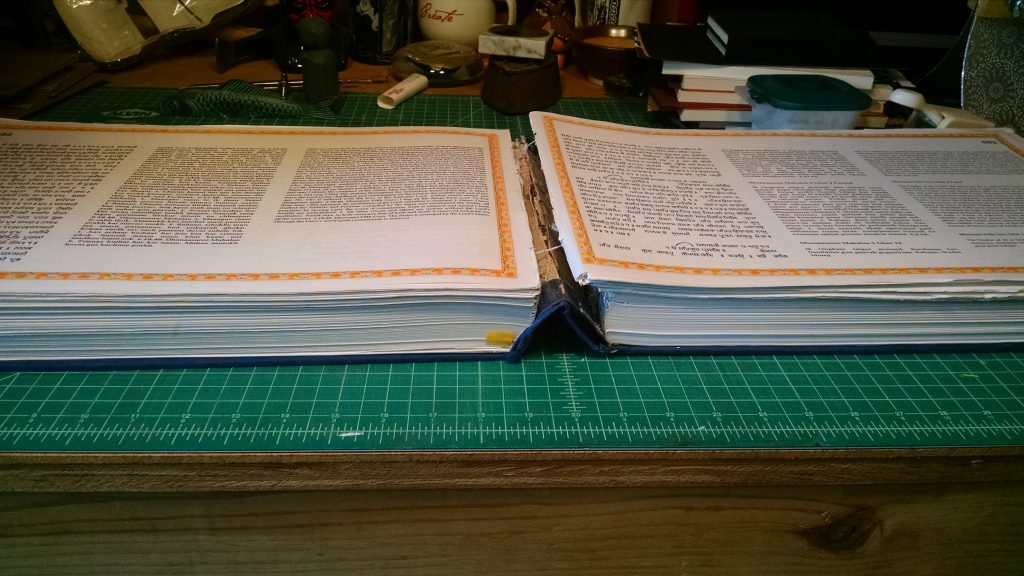
You can see how badly the middle pages of the book are coming apart, but the cover looks okay.
Here you can see the middle signatures are really coming apart.
The split is really visible in this shot – it almost looks like two separate volumes. You can see that while the cover looks okay, the structure under the spine covering is badly disintegrated.
After a careful examination to make sure I knew exactly what needed doing, I cautiously disassembled the book, separating the cover from the text block (and the cover boards from the badly damaged spine). I then disassembled the text block and meticulously examined each individual signature (more than 80!) to see which ones needed repair. Here are a couple closeup before-and-after shots of this process:
It’s pointless to sew this back into the text block without repairing the tear.
You can just barely see the very thin Japanese kozo paper I pasted along the outside of the fold. I carefully kept as much of the original paper as possible, to lend strength.
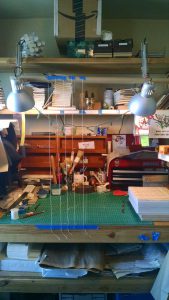
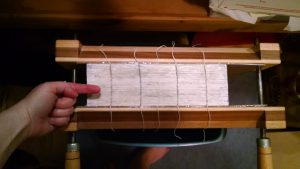
Once that was finished (this was the most laborious part of the whole process, and took me several days), I resewed the text block. Since I don’t have a proper sewing frame on hand, I improvised one, as you can see below. Once done with the sewing, I moved the book into my laying press to be re-consolidated.
Hey, whatever works, right? The text block is on the right side of the image, waiting to be sewn.
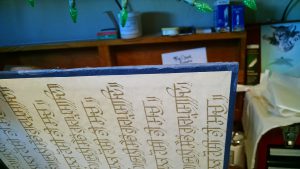
My hand here gives you a hint of the scale of this book. SO BIG!
As a side note: You can just barely see in the right-hand photo that the press is not on my workbench. In fact, the book is so wide, it was wider than my press is tall! I worked around this by cleaning out a recycling can and carefully putting the press on top. It was tall enough that the pages were able to hang freely like normal. It did mean, however, that I couldn’t work with it on my workbench. I meant to take a photo of the setup, but appear not to have done so.
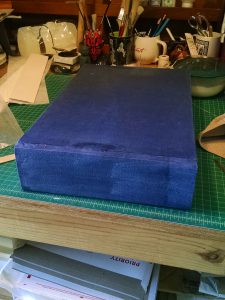
While waiting for layers of paste on the spine to dry, I worked on the cover. Here you can see a quick before/after of an edge of one of the cover boards.
There was a lot of wear on the cover boards, especially along the outside edge.
I carefully matched the color of the cover, and painted thin Japanese kozo paper with it, then used that to repair the damage.
Once the cover boards were ready to go, I reinforced the spine (I used two layers of Japanese kozo, a layer of unbleached linen, made-from-scratch endbands, and finally a one-on-and-two-off cardstock tube, which allows the book to open with less stress to the spine), then covered it with painted-to-match fabric. As you can just barely see in the photos below, the fabric is tucked under the cloth of the cover. In addition, I gently split the bookboard a little, so the fabric is actually inside the cardboard of the cover. This allows for much better holding strength than if I just tucked it under the fabric.
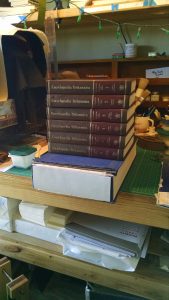
Sometimes it’s really handy to have an old Encyclopedia Britannica around. The book is far too big for my standard press, so I used several volumes of the EB.
All it needs is the original spine cover!
Another shot of the almost-finished new spine.
And finally, it was done!
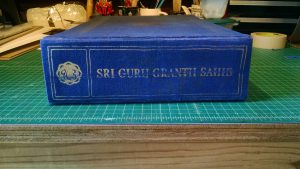
The spine, now with the original decorated covering reapplied.
A view of how the reattached cover board looks from the inside.
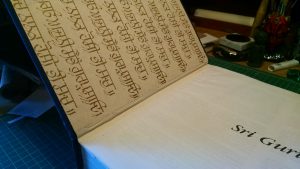
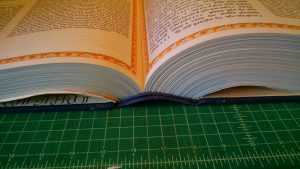
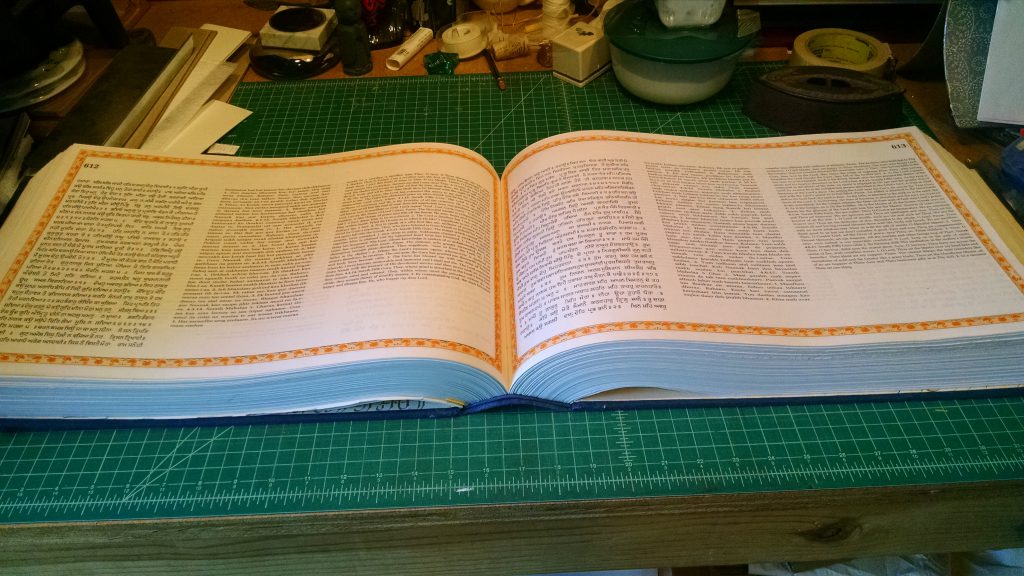
The real test: it now lies open like a single book!
A closer look at the spine.
All finished.
All together, the hinges where the cover meets the spine are held together by two layers of linen and a layer of paper, and the thorough spine reinforcement will reduce stress on the hinges significantly. As a result, the book is much stronger than it was before.
In closing, a quick before/after comparison!
You can see how badly the middle pages of the book are coming apart, but the cover looks okay.
All finished.
The split is really visible in this shot – it almost looks like two separate volumes. You can see that while the cover looks okay, the structure under the spine covering is badly disintegrated.
The real test: it now lies open like a single book!
If you have a book that needs rebinding, or even just some basic repair, please get in touch! I really love repairing books.
The blog’s been quiet, but if you follow my Instagram (or Facebook, or Tumblr) you know I’ve been busybusy, getting ready to vend at Rose City Comic Con (9/19 & 9/20) If you’ve never been, it is an amazing con. Fans of comics or of scifi/fantasy in general, it is 100% worth the price of admission ($50 for both days or $30 for one). Plus, you’ll get a chance to buy some of my blank books with comic-book covers! I am not listing them on Etsy before the con.
Other news: The super awesome Two Artsy Gals podcast had me on as a guest! We hung out and chatted about bookbinding for over an hour, and the episode is going to go live on 9/10, so be sure to check it out! (I’m sure I’ll be posting about it everywhere on the day as well, heh.) It’s a great podcast, so if you are irreverent and dig DIY/crafts, go check it out.
Here are a few pix from my Instagram feed over the last couple weeks:
If you follow my Twitter, Instagram, or Tumblr accounts, you know I’ve been busy bookbinding lately, even if I haven’t been blogging about it.
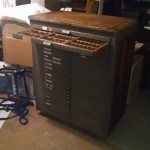
It’s been a trippy few months. Last month, I found and managed to buy a Hamilton type cabinet full of lead type from a fellow member of the Guild of Book Workers – lead type is a bit tricky to use in my Kwik-Print hot foil stamper, but I can do it if I’m careful, and this means I have WAY more options when stamping book covers! I’m still getting the hang of using the Kwik-Print, it’s more of an art than a science.
My Hamilton type cabinet, with one drawer open
Me with my Hamilton type cabinet
I’m going to be vending at Rose City Comic Con, which is next month. As in, I have about thirty days to get together a reasonable amount of stock to sell at a huge event. Thankfully, I have a bunch of materials and ideas! I’ve been binding up a storm, and will continue to do so pretty much right up to the last minute. Woo!
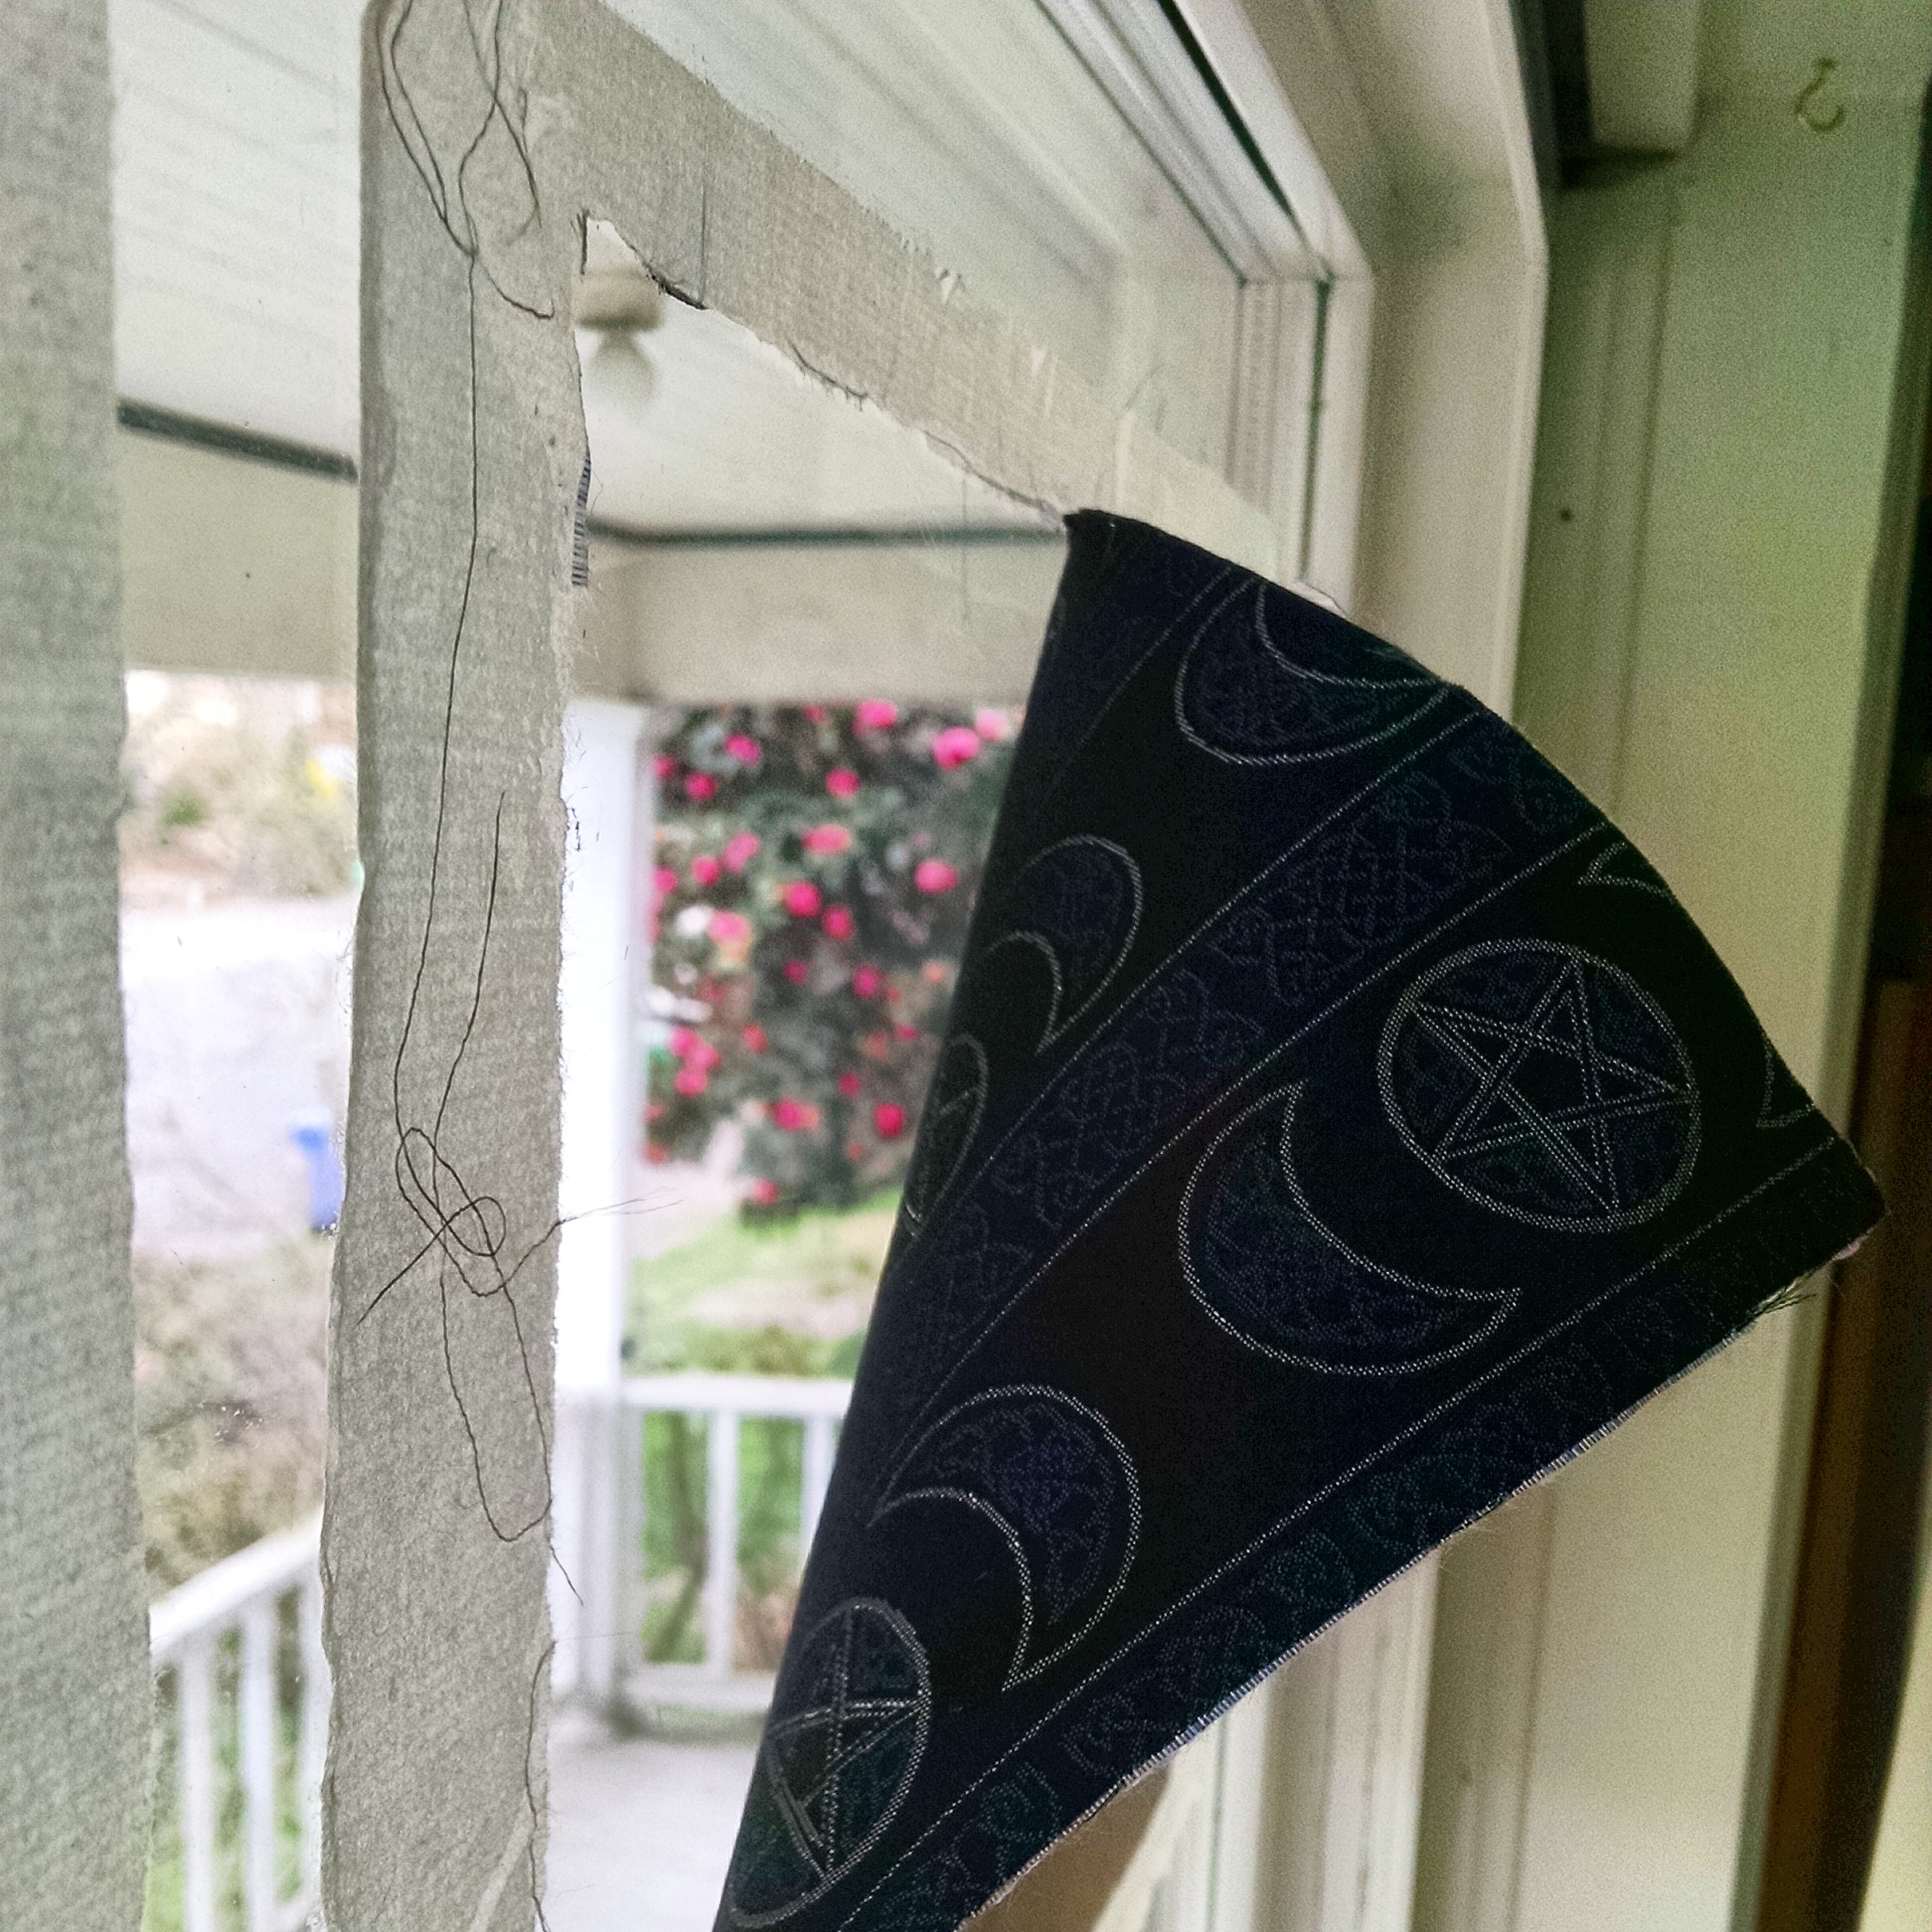
I posted a tutorial on making your own bookcloth on Instagram a while back, and thought it’d be fun to offer it here, as well! (I’ve also edited it and added more commentary than I felt like typing on my phone.)
To make your own bookcloth using this method, you will need:
A large, clean work surface
Fabric
An iron and ironing surface
Japanese paper
Wheat paste
Paste brush
Waste paper to cover your work surface
Scissors
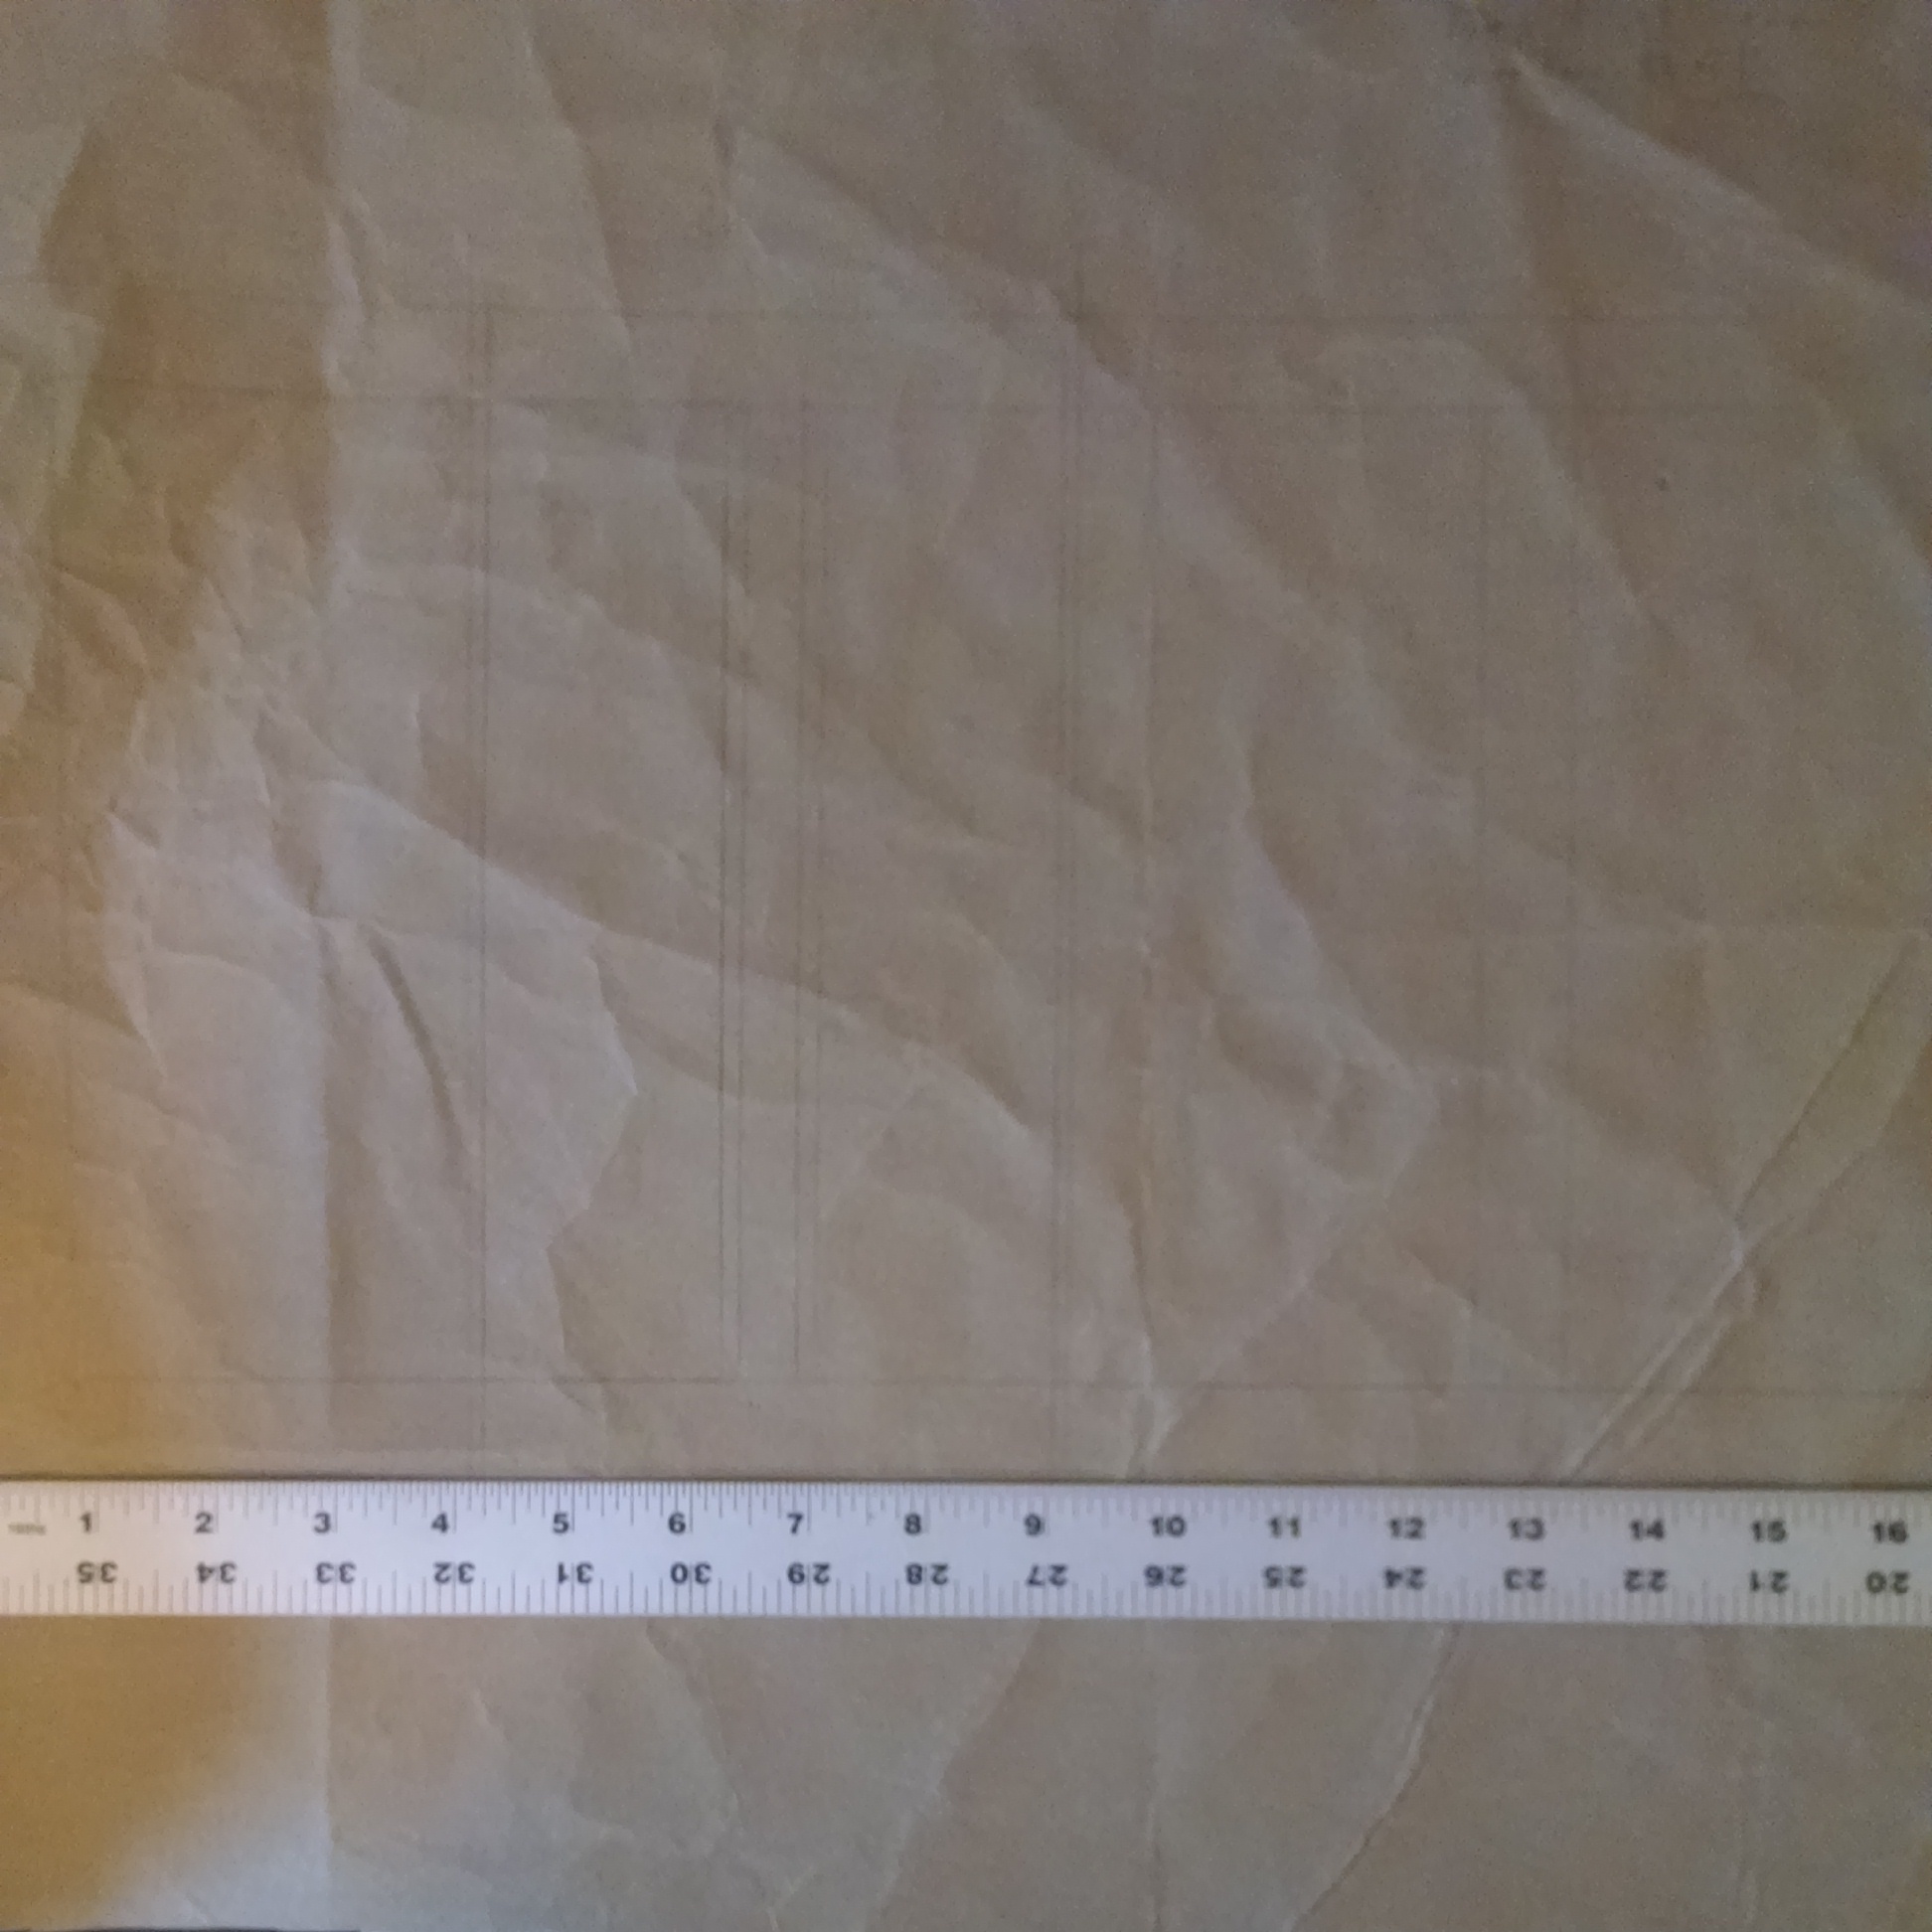
The measurements for how much bookcloth your project needs
A ruler or yardstick
A large, clean pane of glass (windows work great for this!)
A utility knife, x-acto knife, or similar
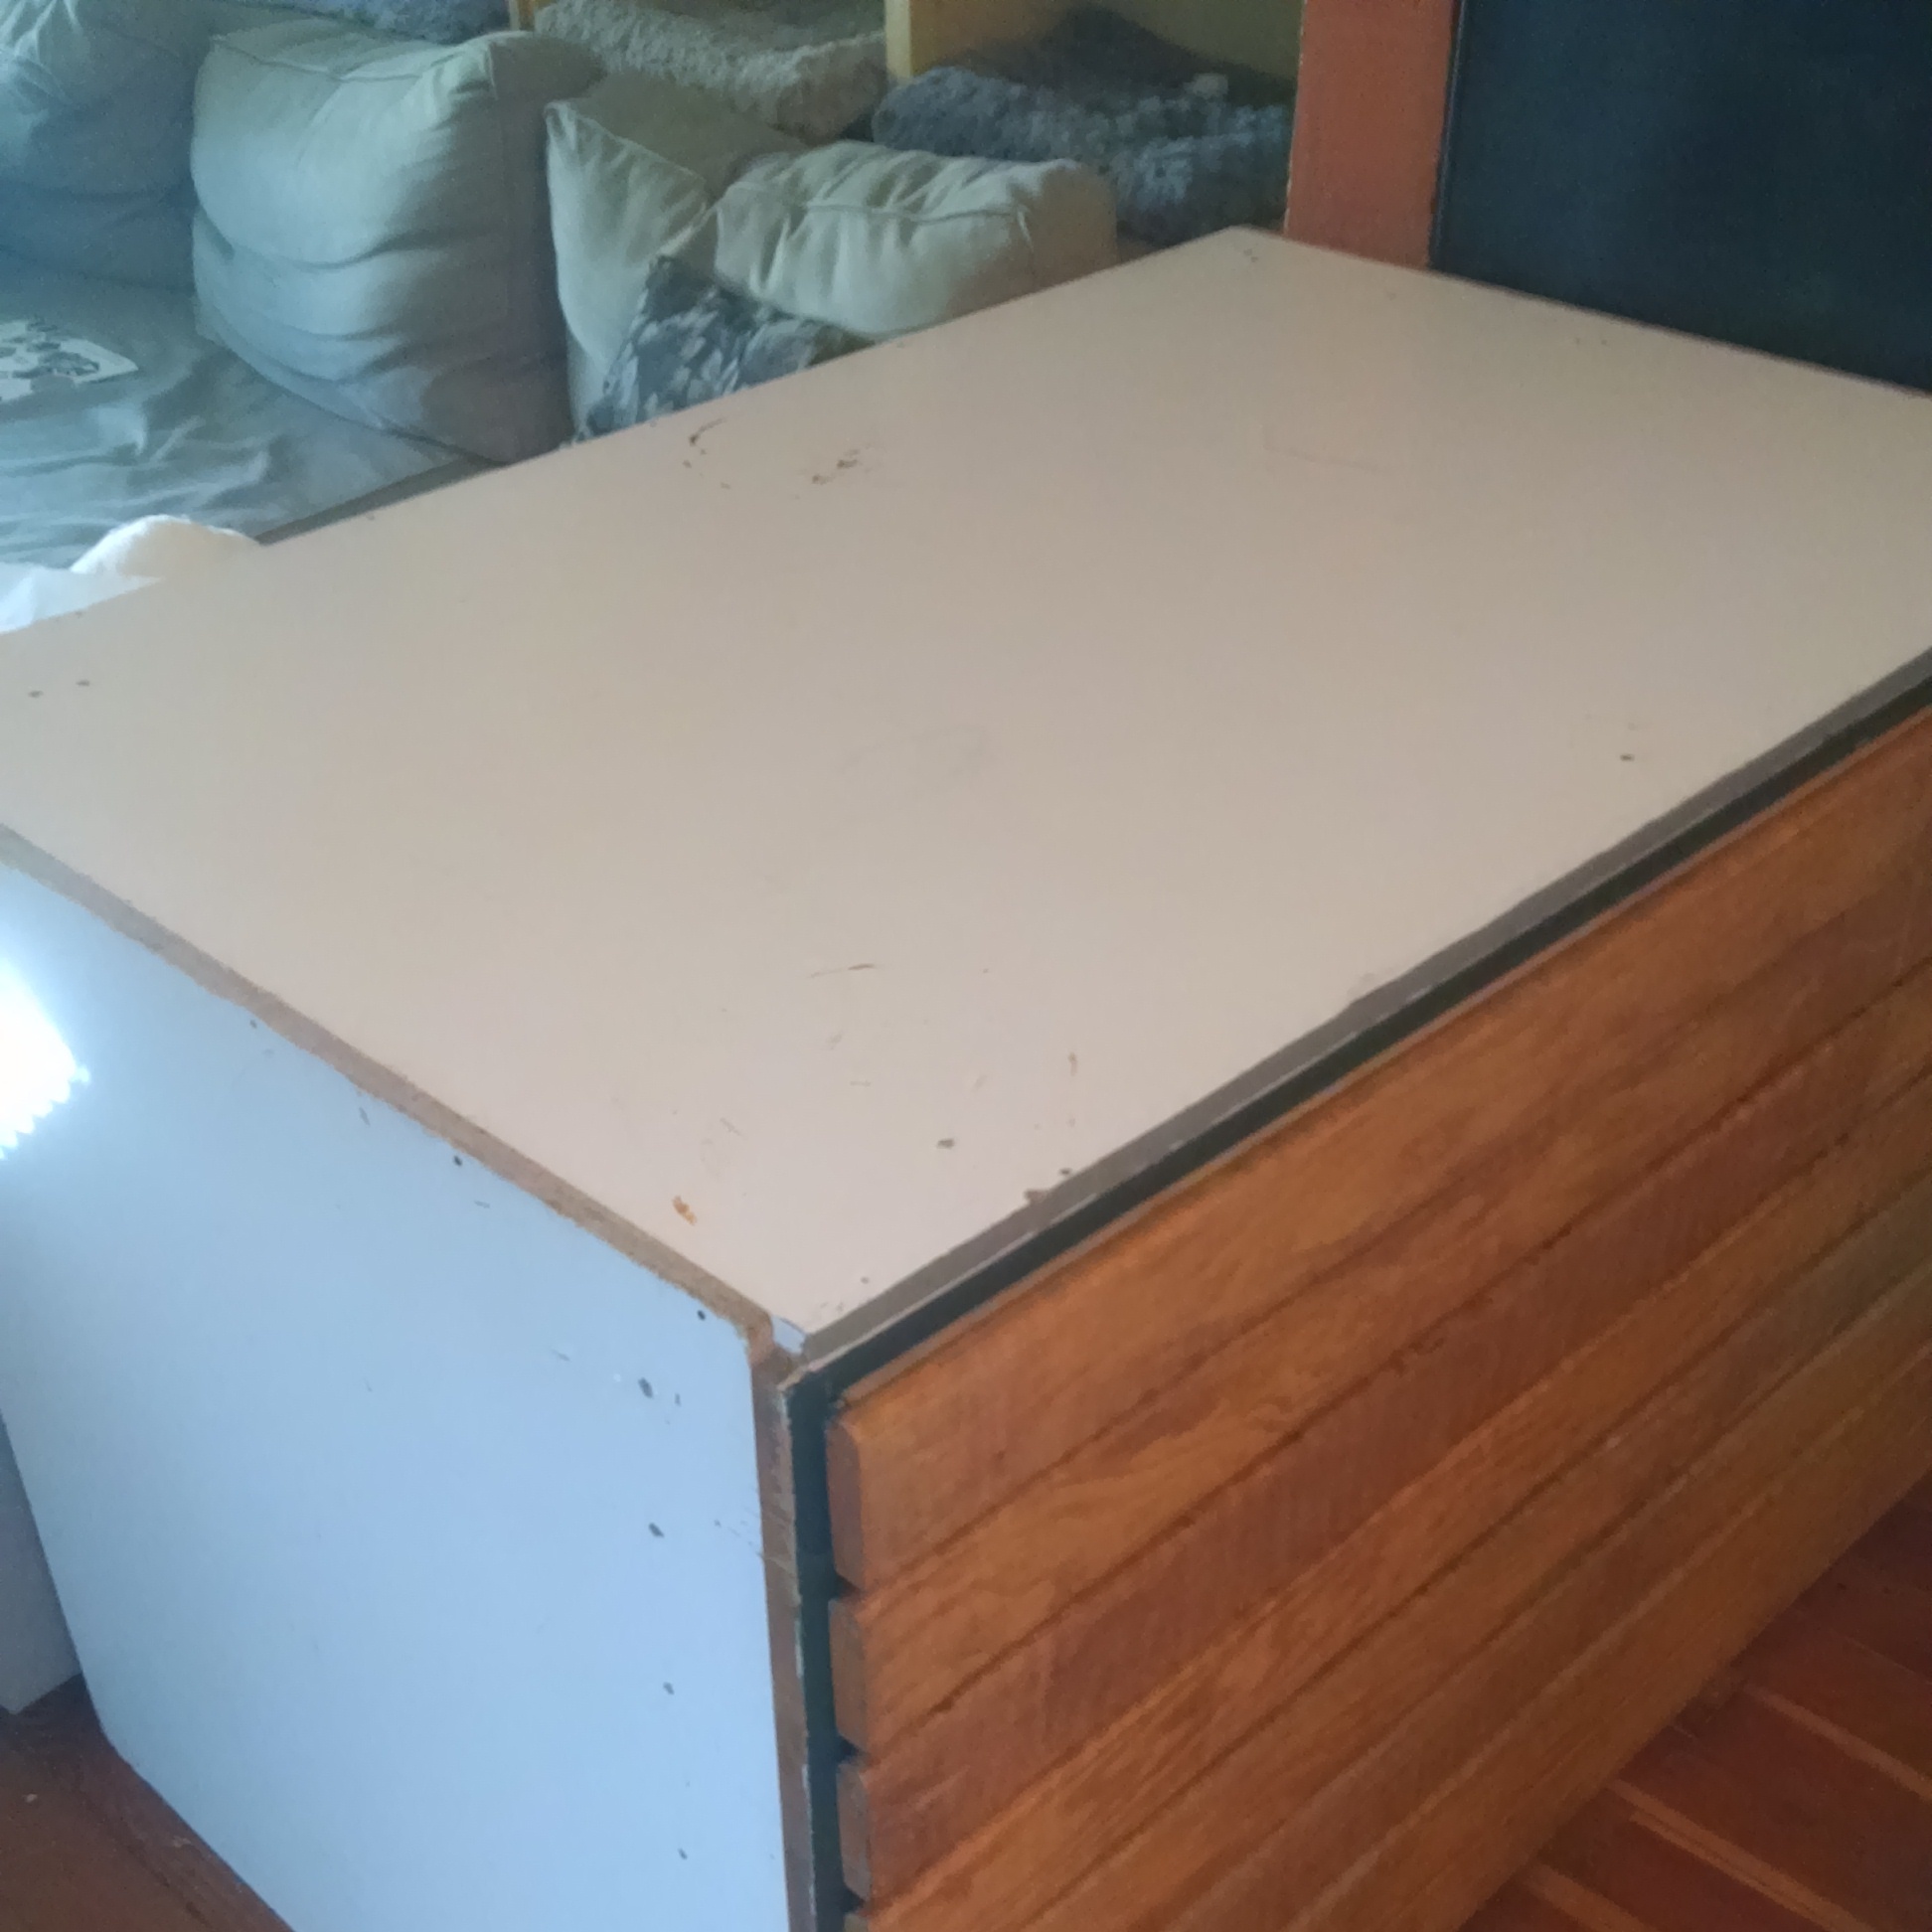
Clean your work surface (in this case, my flat file downstairs).
Figure out how much you need. In the picture you can just barely see my book map, which is what let me know how much bookcloth I needed.
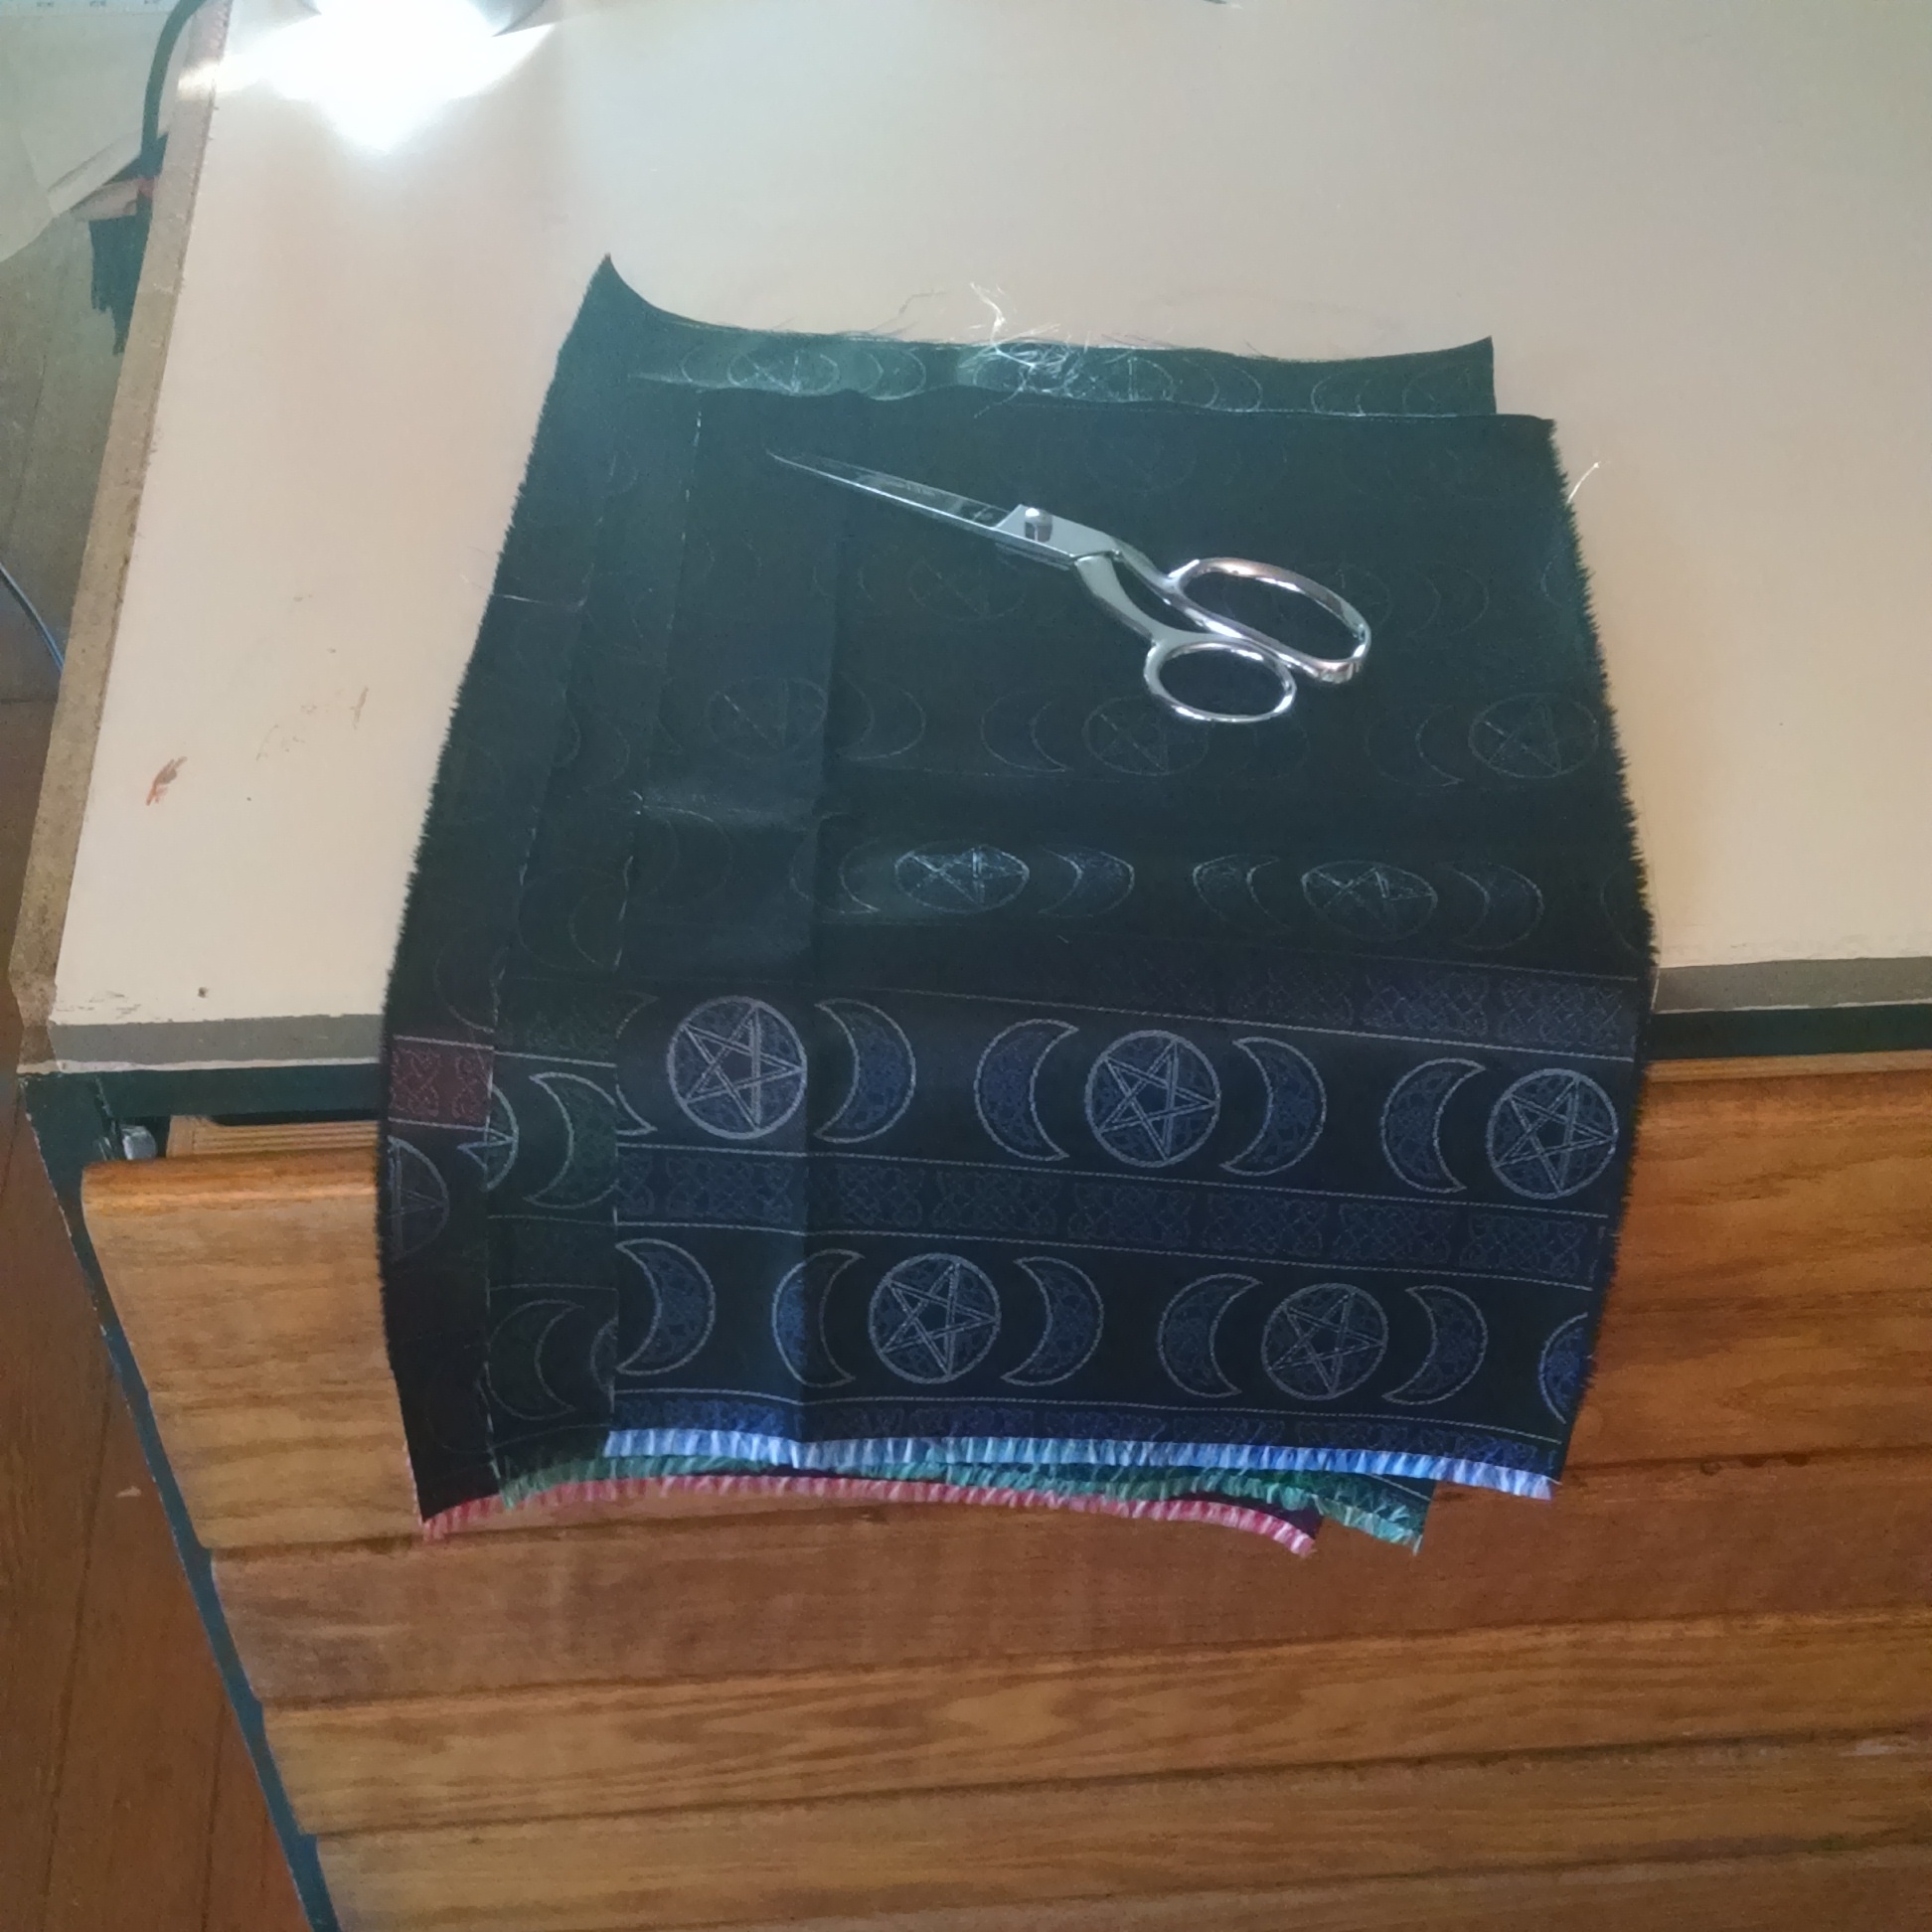
Cut out the amount you need (with some extra just in case).
Also: thanks to the fabulous Xcentricities (corset.net) for the fabric! It’s unique to them and they very kindly sold me some.
Iron the fabric.
Cut Japanese paper to size. I did this by laying the fabric out on the paper and cutting around it. You’ll need about a 1″ margin on all sides. Don’t forget to line up the grain! (note: fabric grain runs parallel to the selvage, the rough edge on either side of full yards of fabric)
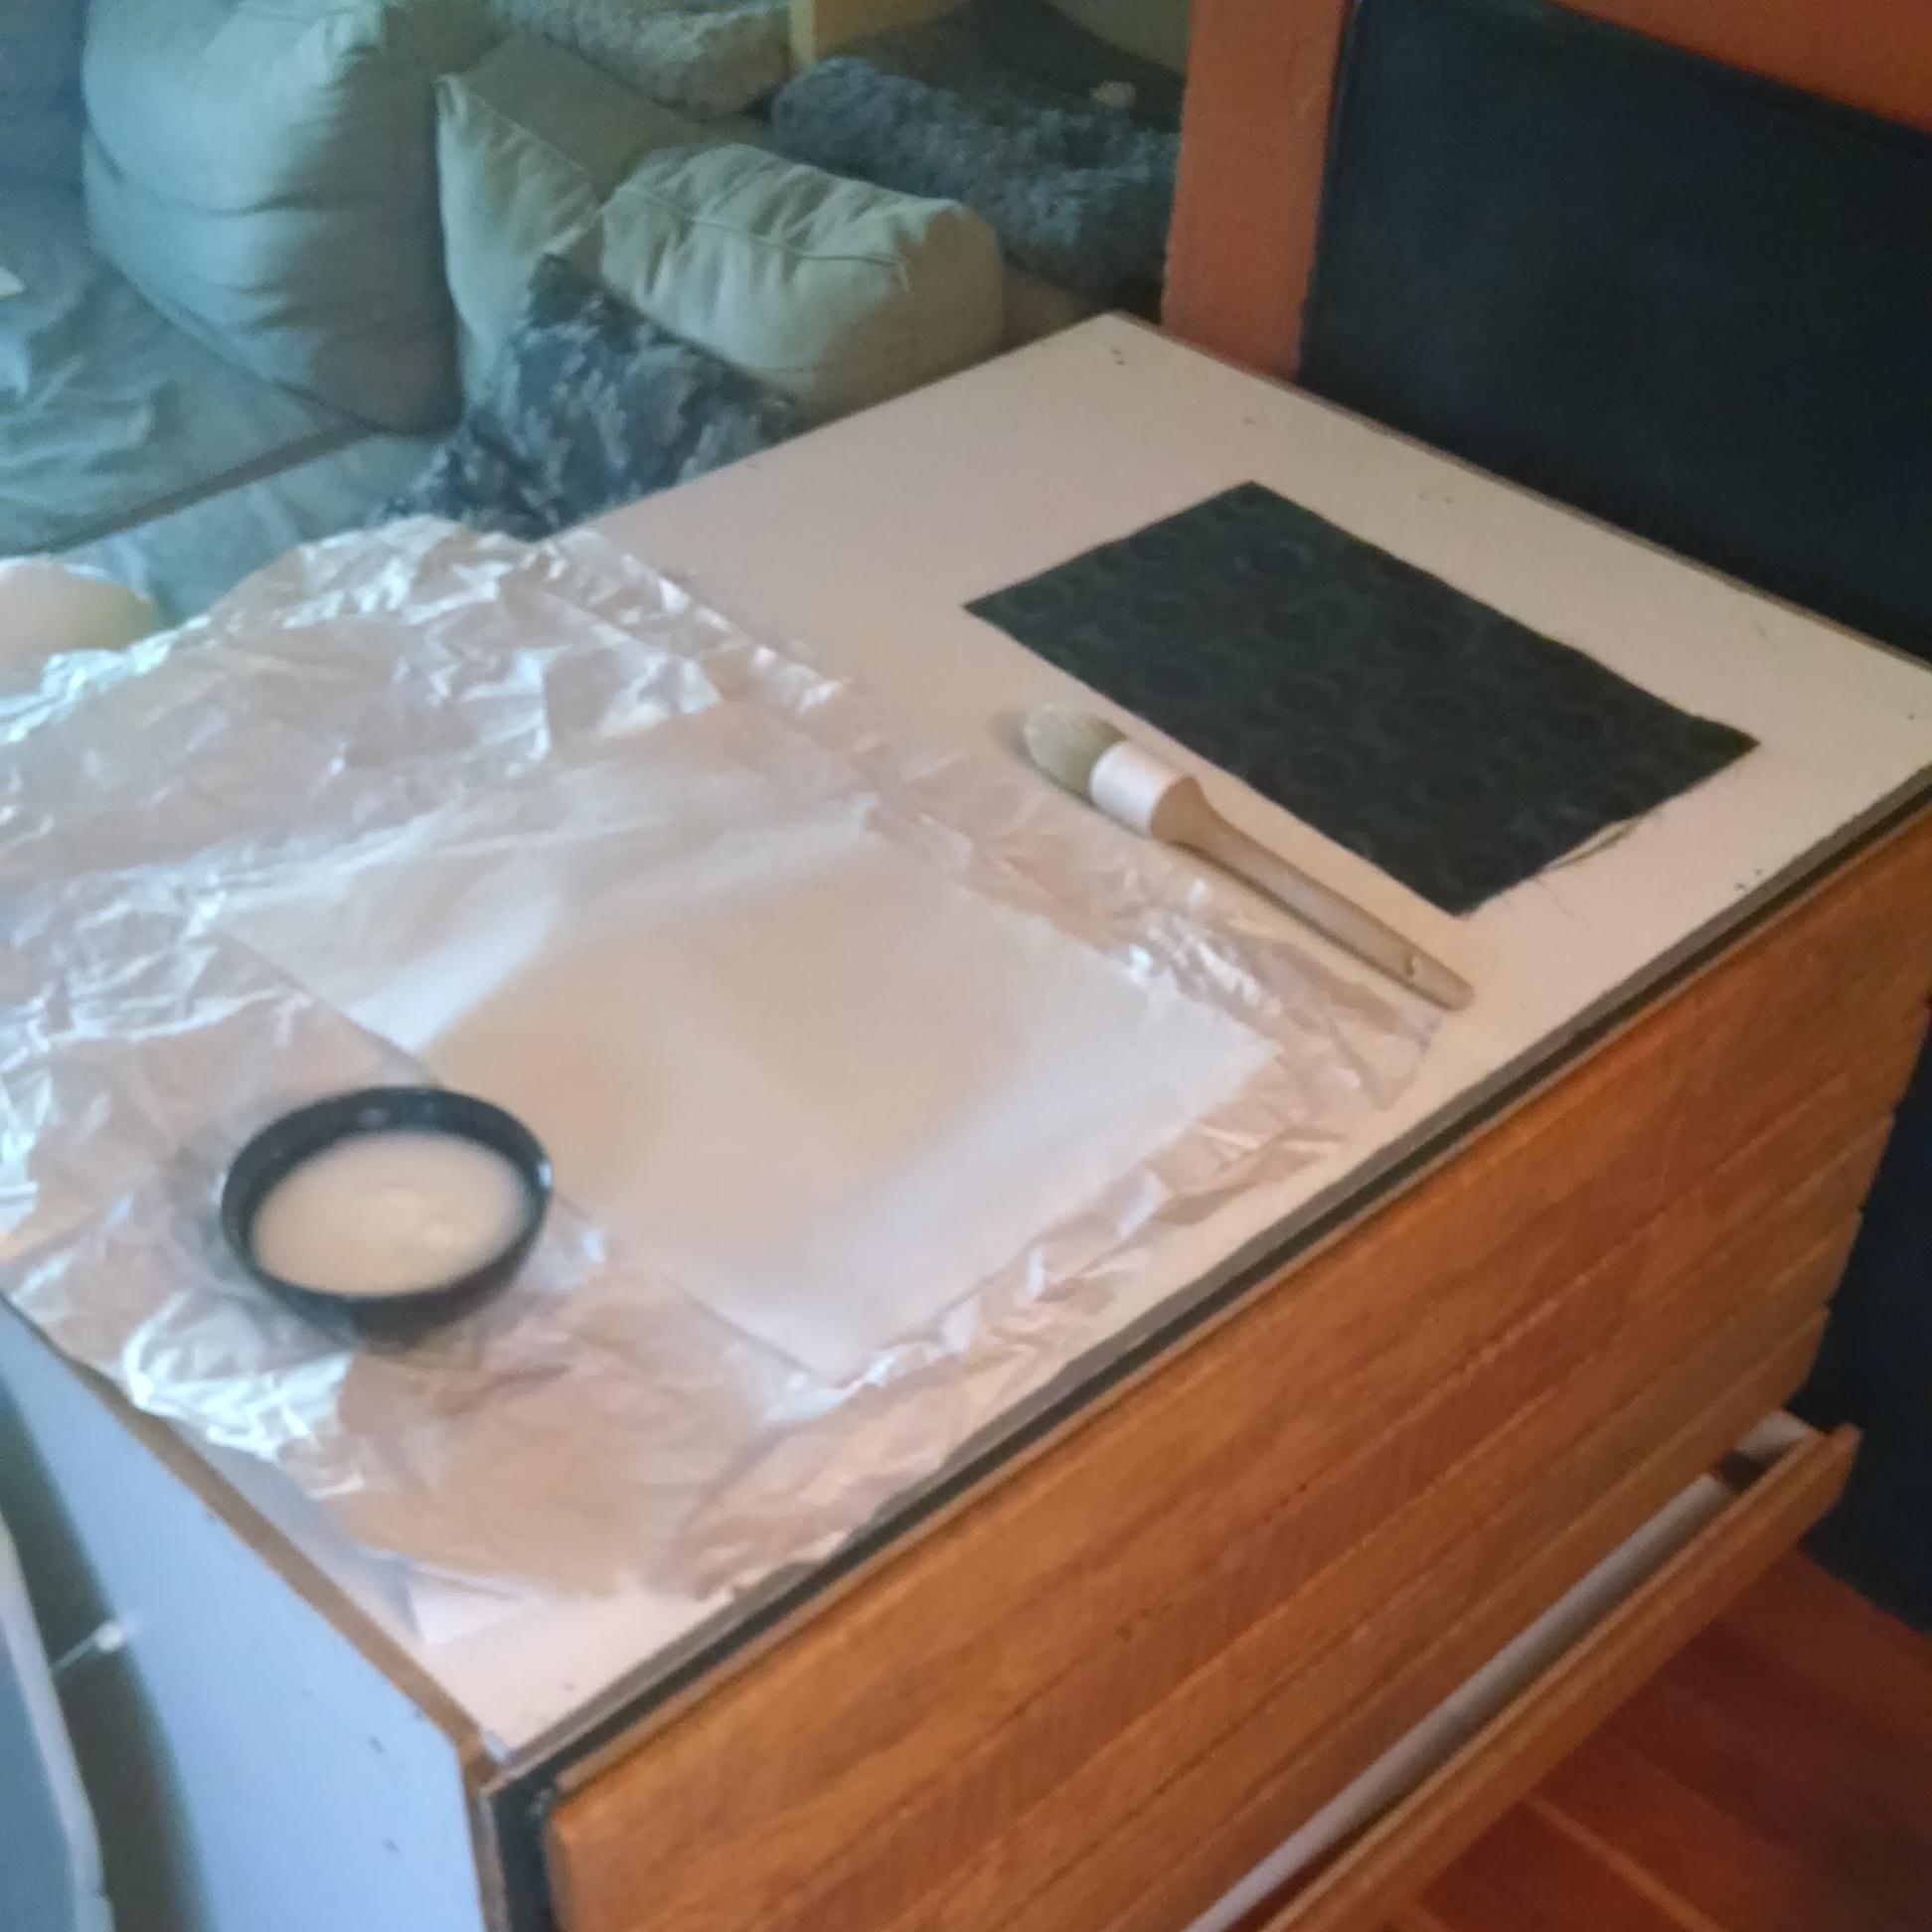
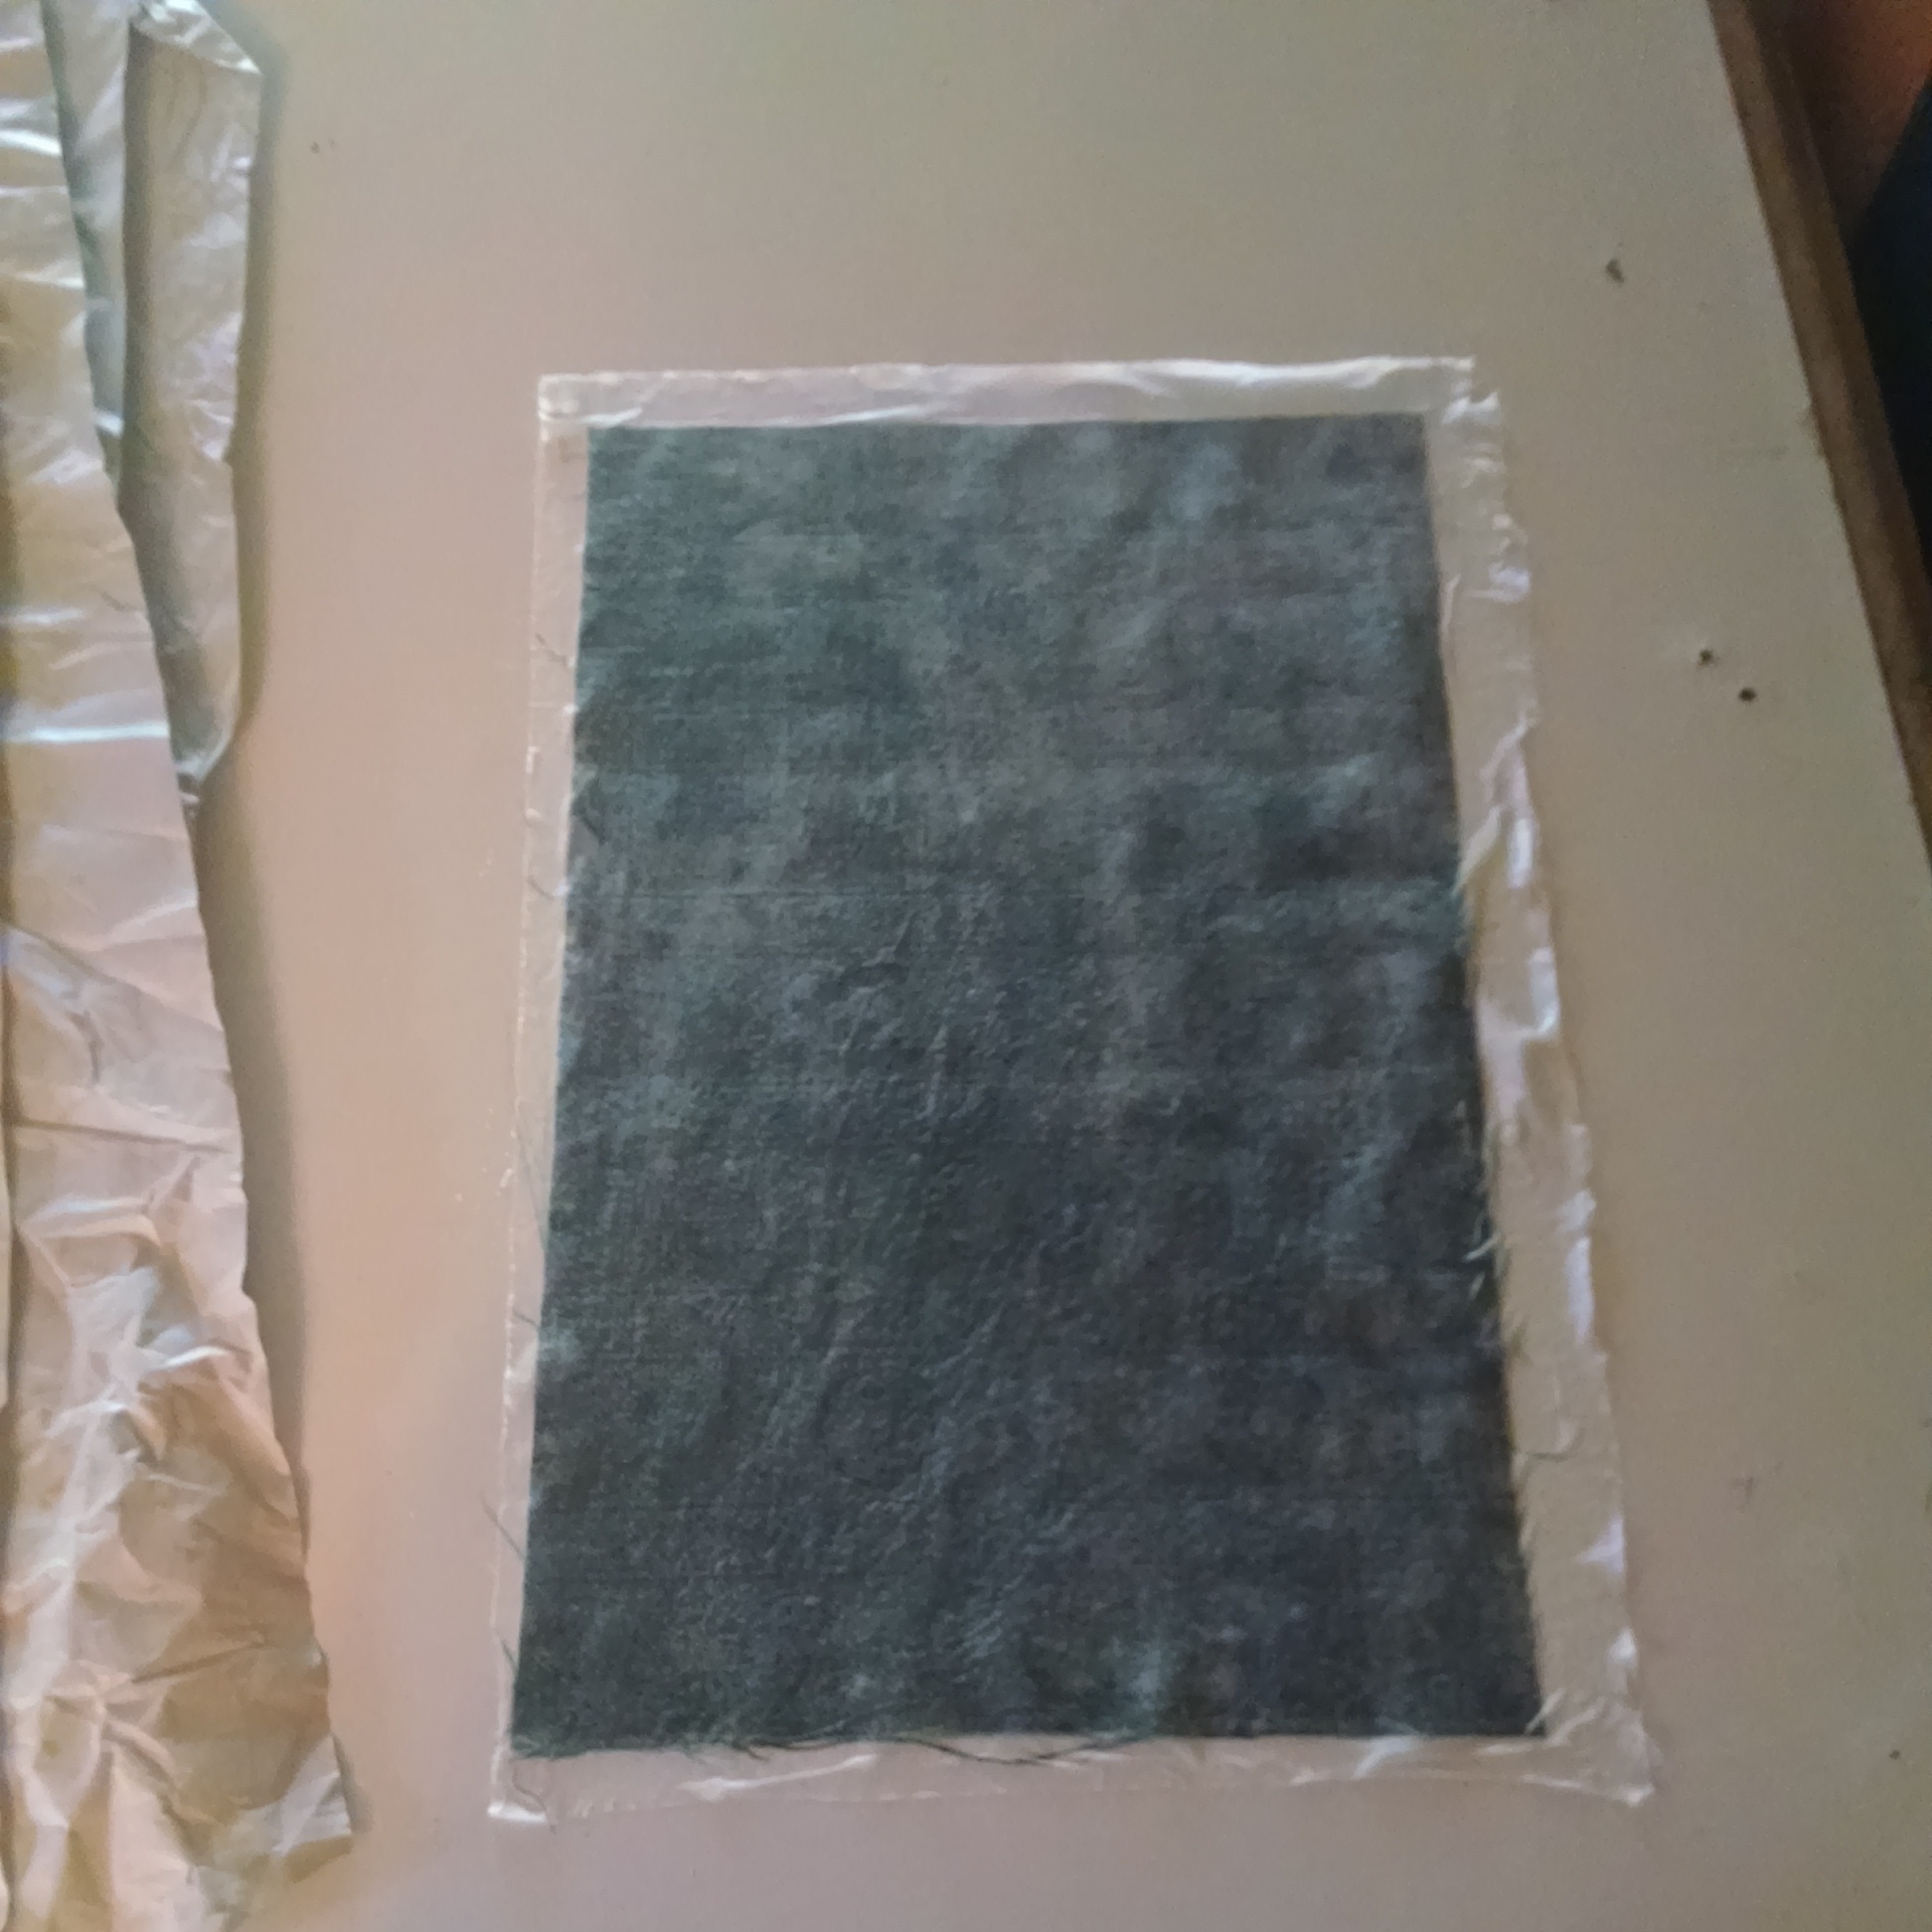
Paste time! Put the fabric face down, smooth it flat (you can spray it with water if it’s being troublesome), and paste up the paper.
Carefully lower paper, paste side down, onto the fabric. This is definitely the hardest part.
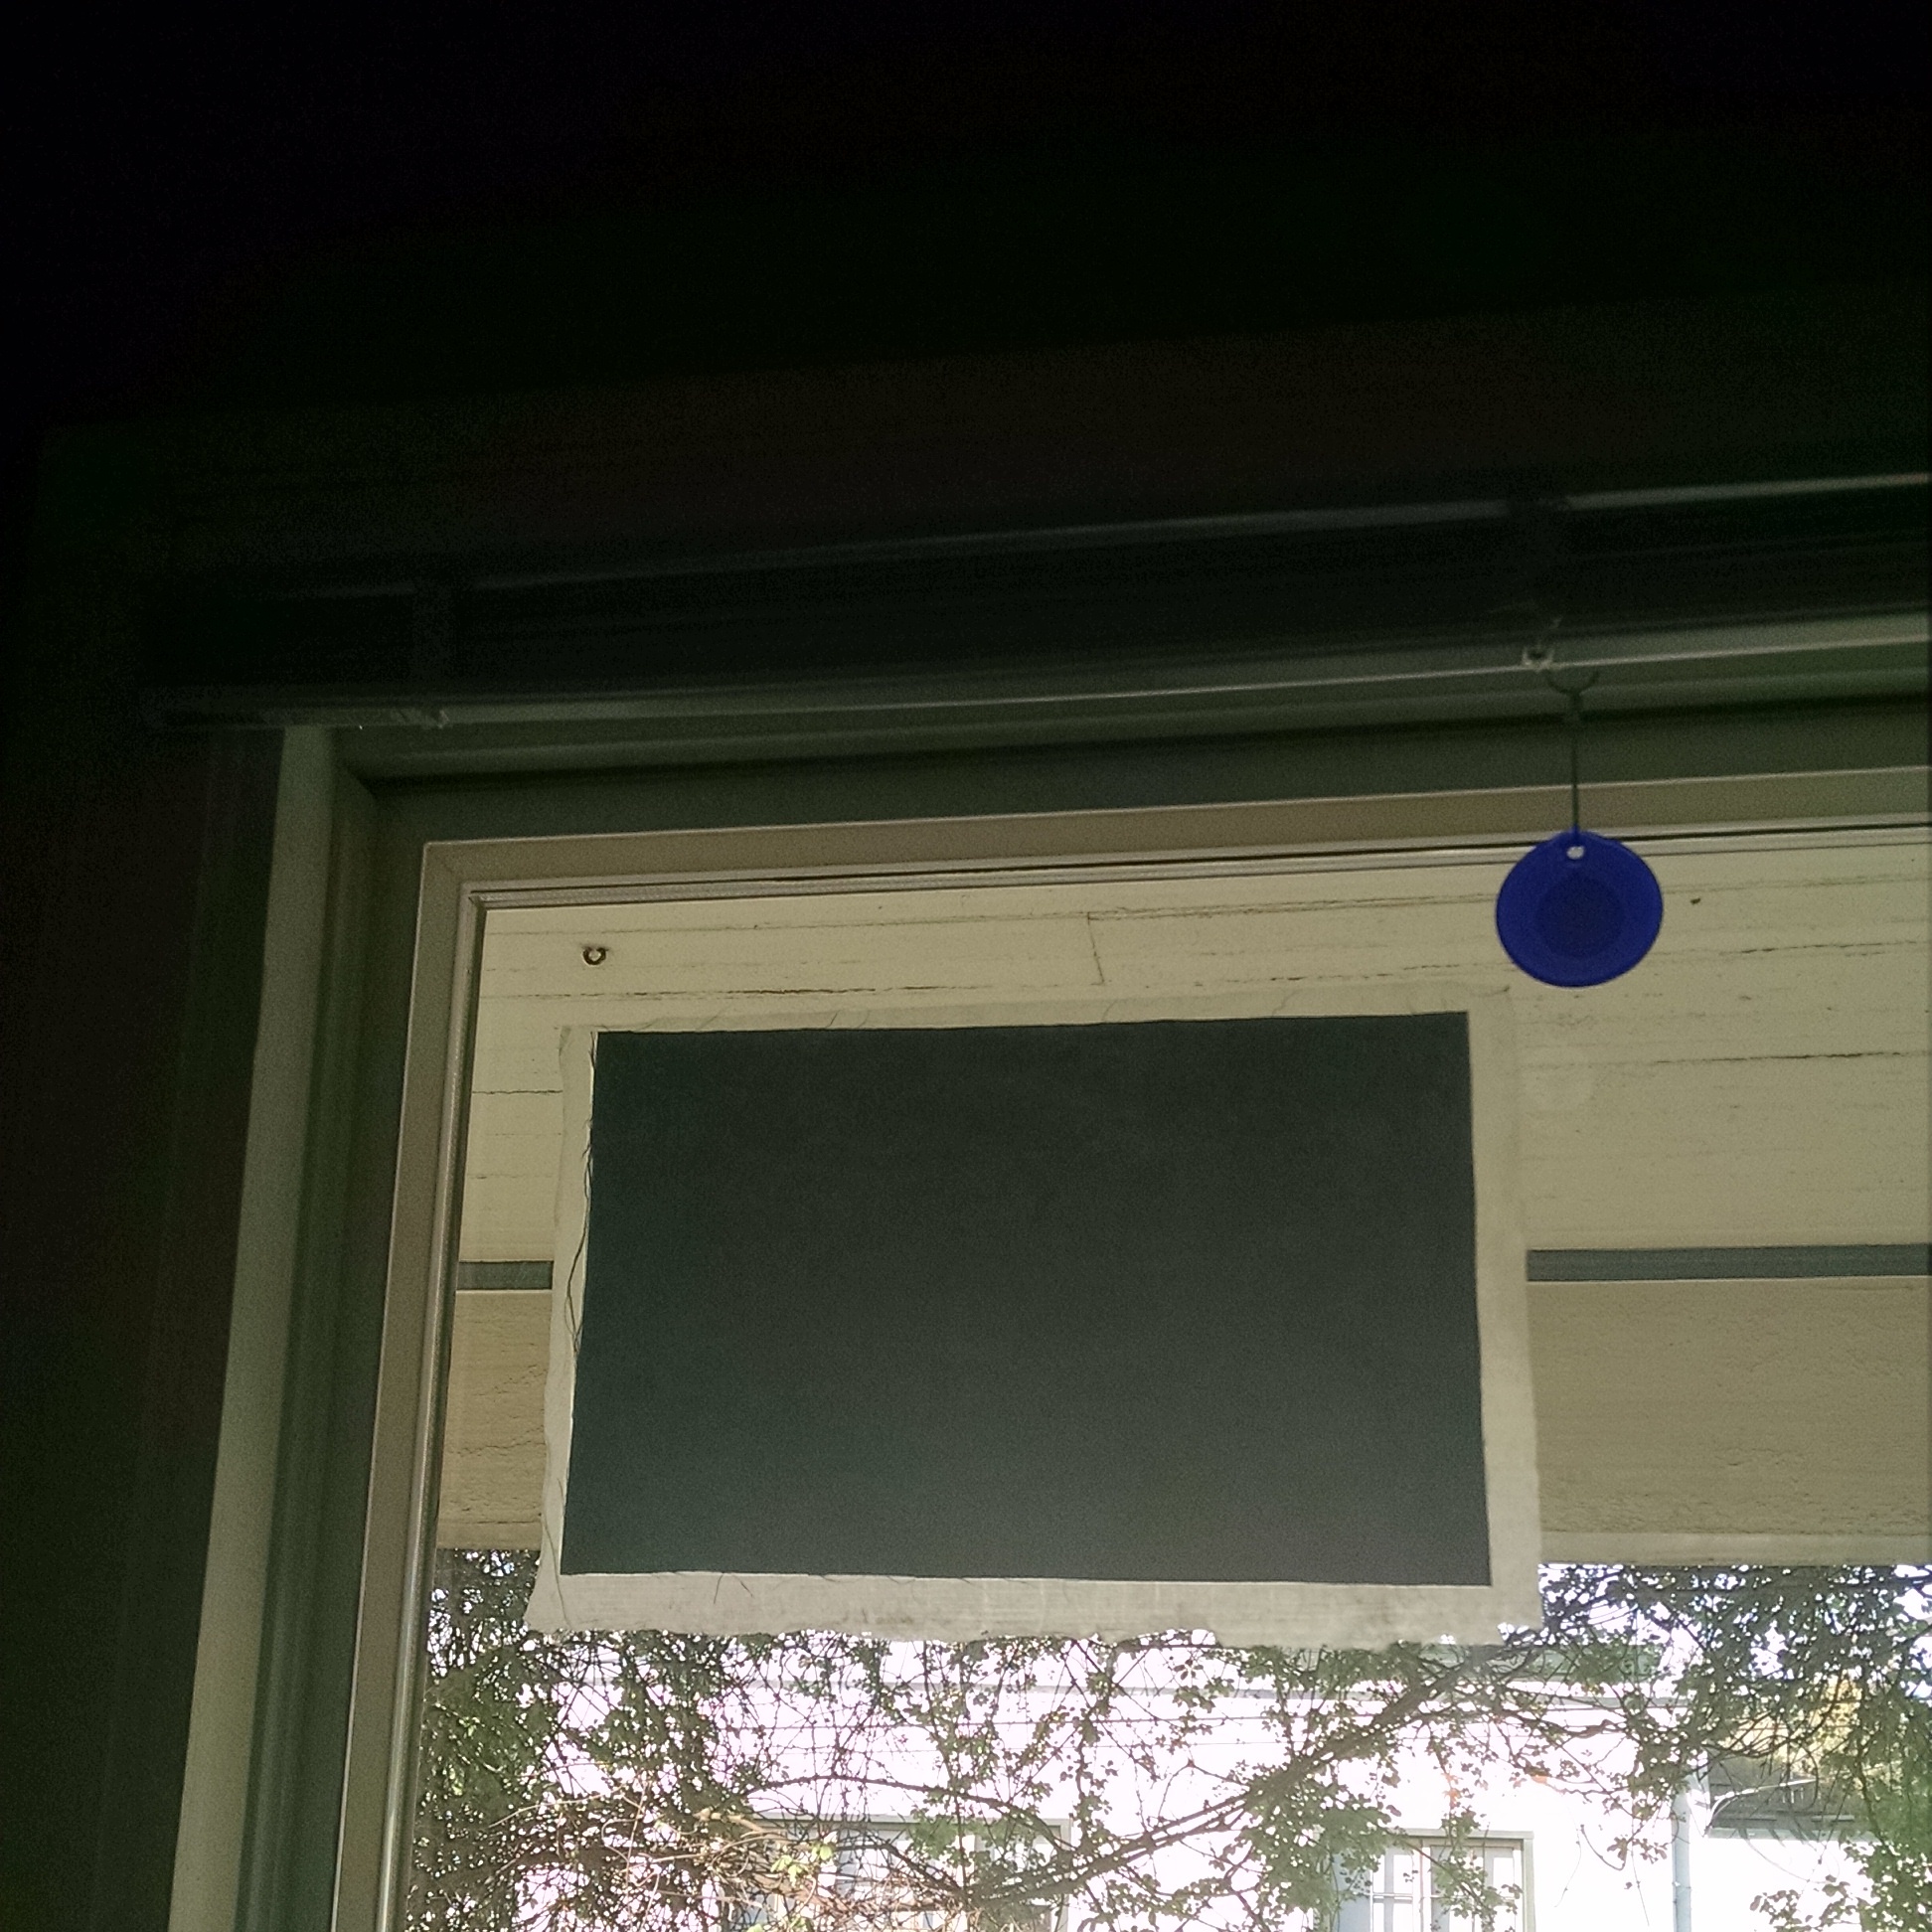
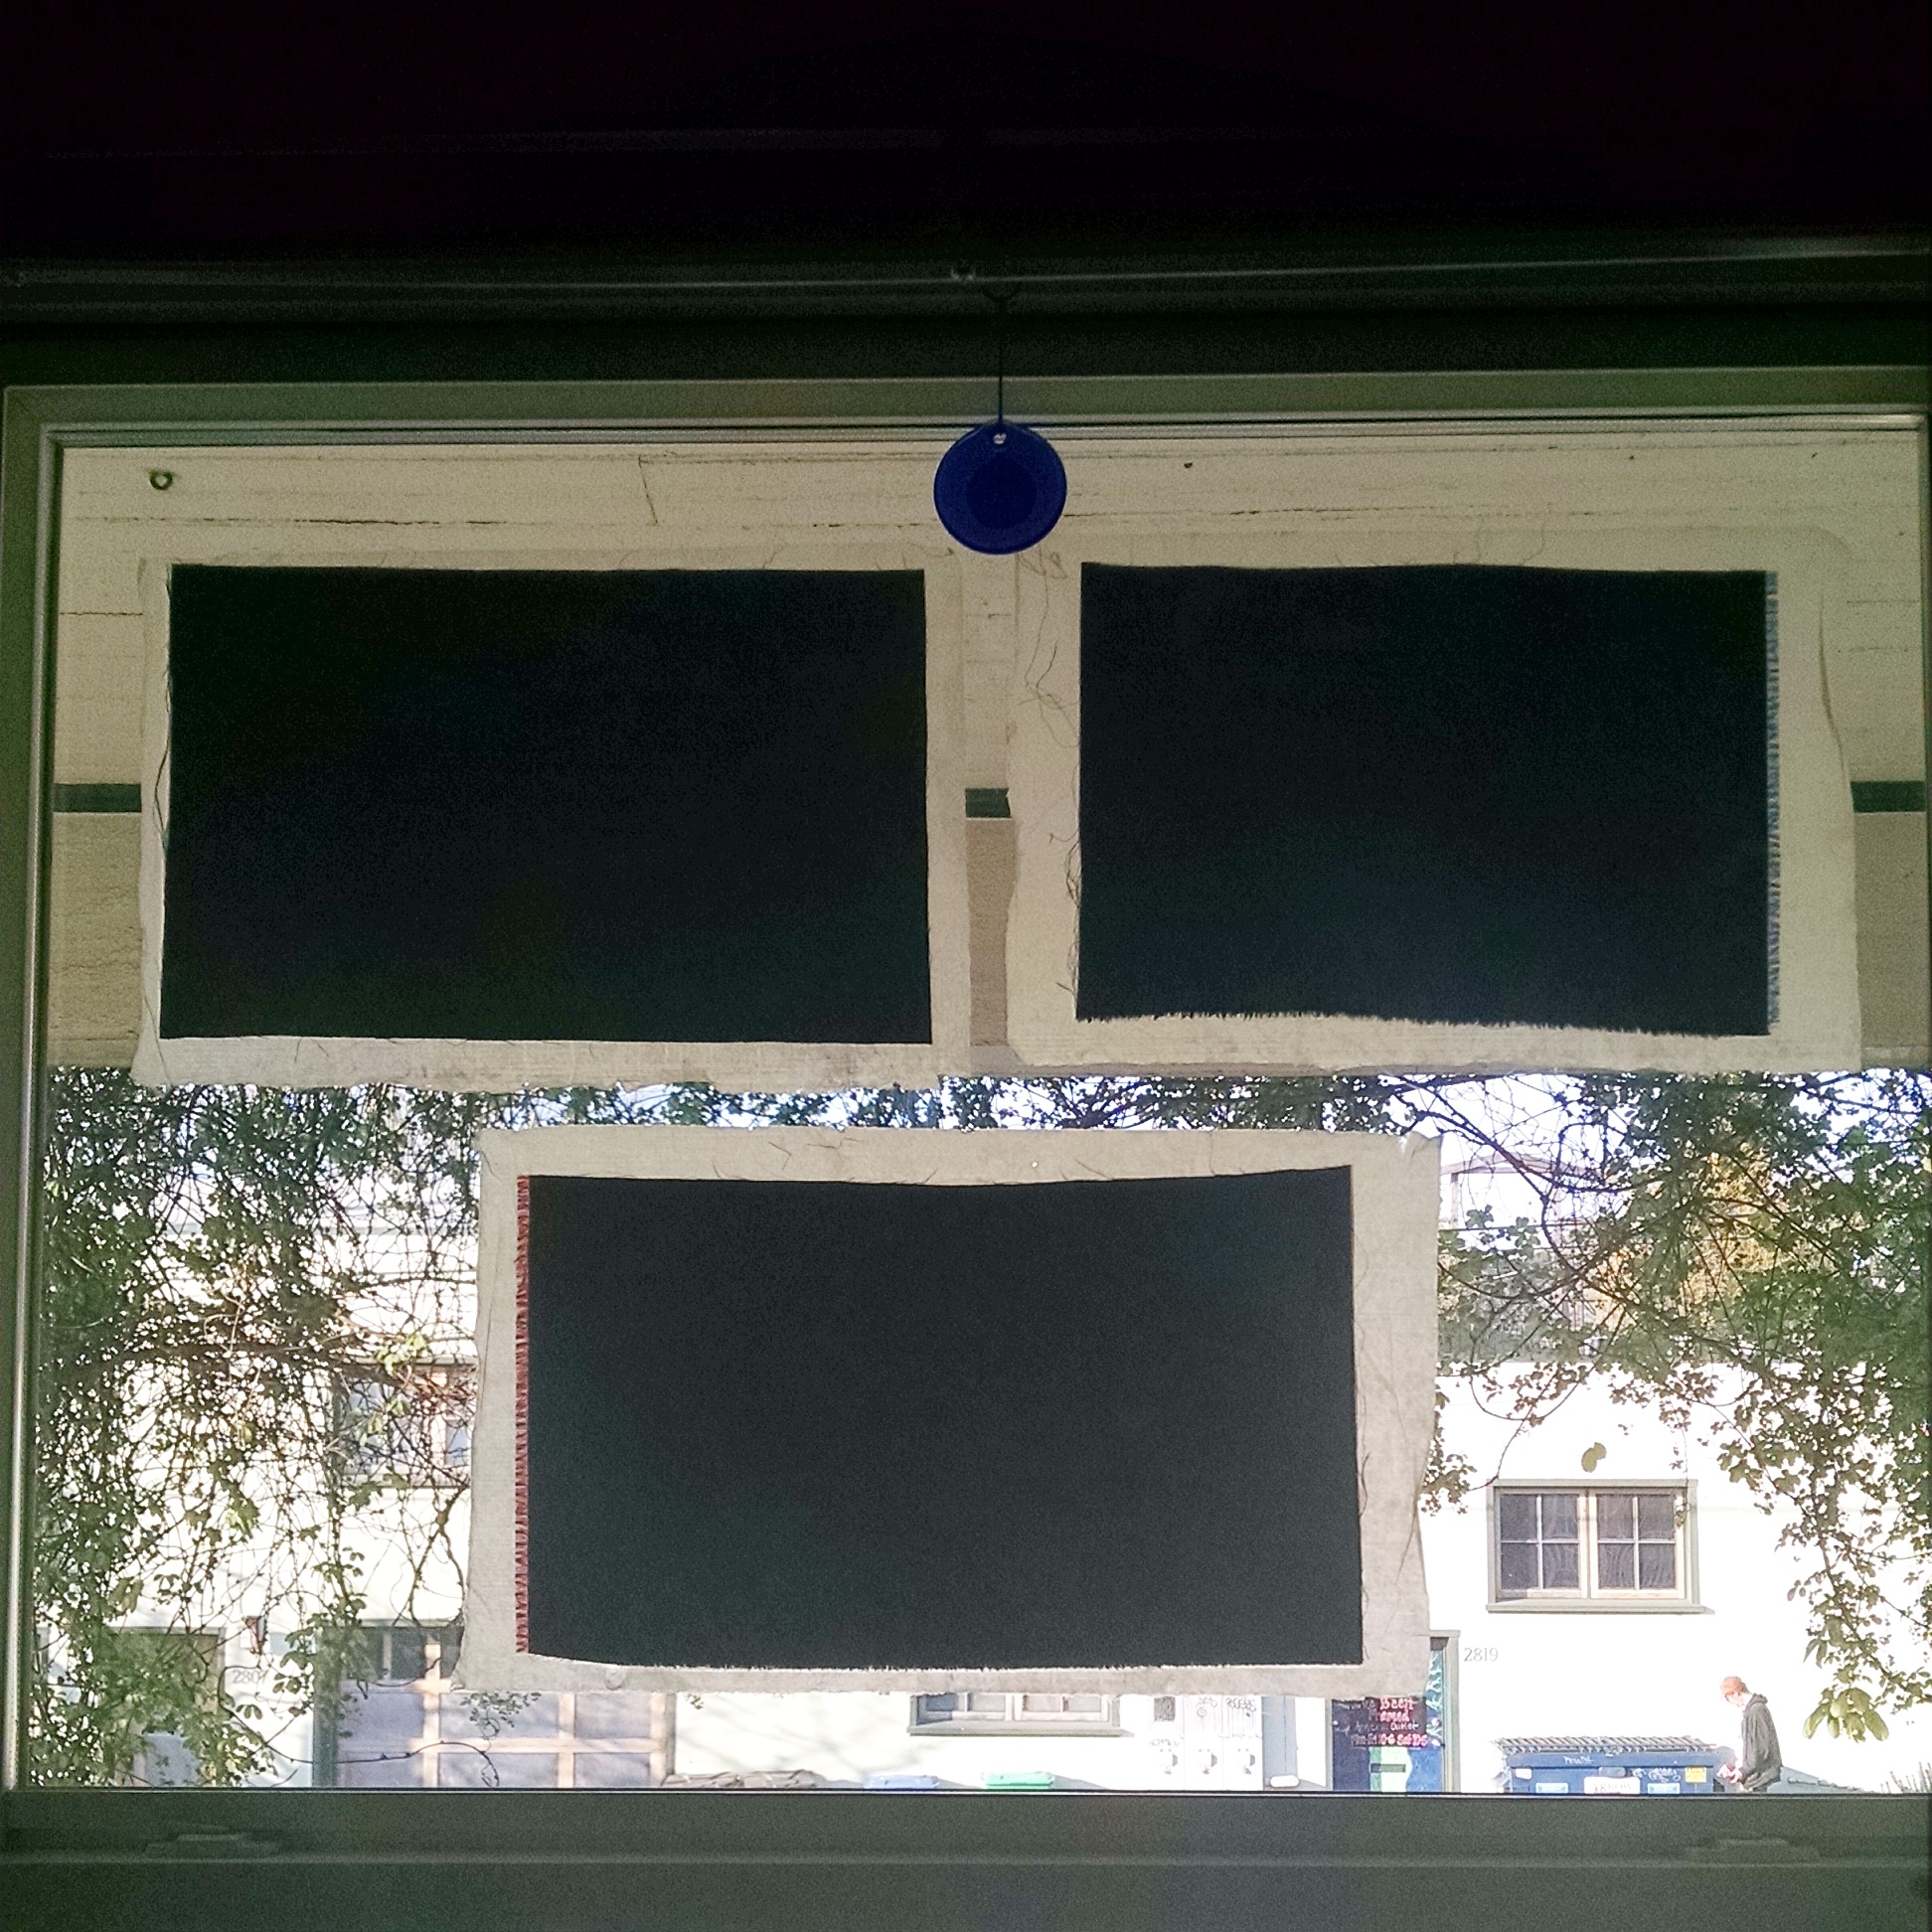
Use the pasted up margin affix to a piece of glass. A clean window works well. (Bonus: the pasted margin will keep your bookcloth from shrinking as it dries!)
Repeat as desired, allow to dry overnight.
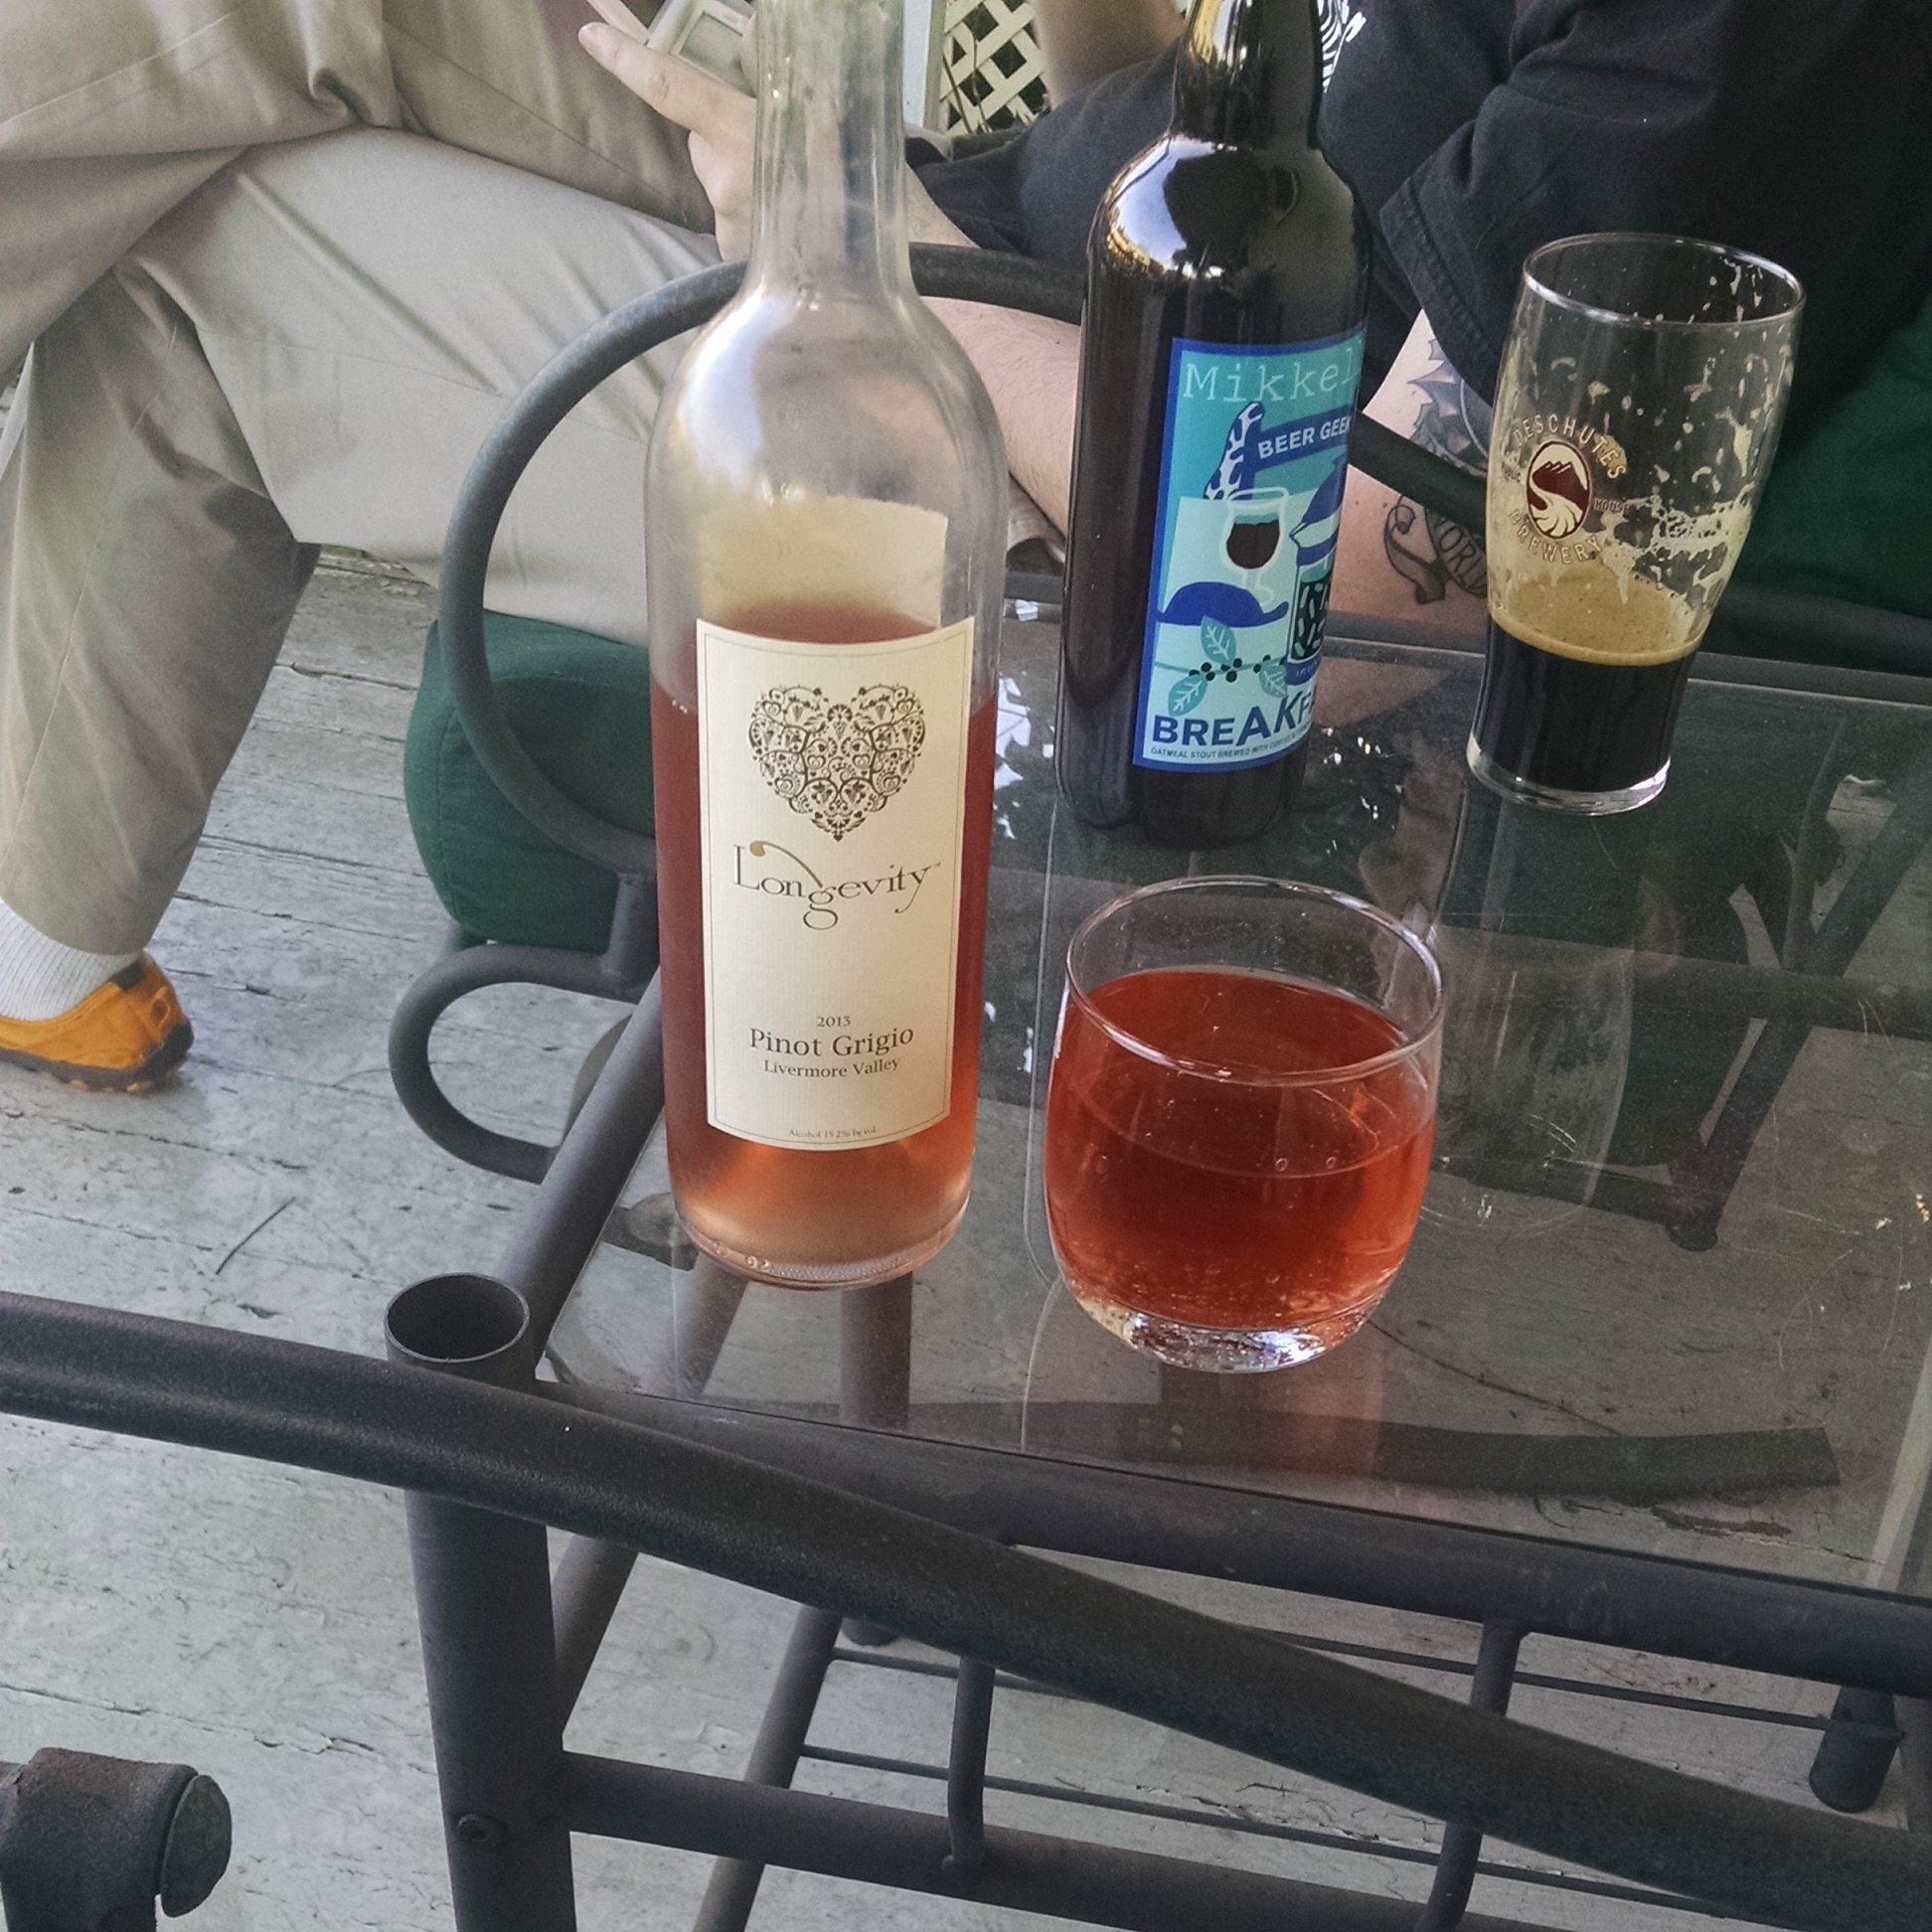
Optional: relax outside with cute person and refreshing beverage.
Cut around the fabric with a sharp knife and carefully peel away. Ta-daa! Book cloth (cleaning is easiest with a sharp blade like a razor or utility knife blade – just scrape the remaining paper off the window.)
And bam! Your very own custom bookcloth.
One of my favorite sources for fabric when I want an unusual pattern is Spoonflower, which is sort of like Cafepress but for fabric. They have SO MANY PATTERNS WHOA.
I was able to take a pretty long vacation from my day job for the holidays this year, and I decided to keep roughly the same schedule but do bookbinding instead! I had a great time, and bound a ton of books. Check it out:
BOOKS COMPLETED: 19
BOOKS READY TO CASE IN: 13
BOOKS IN PROGRESS: 24
For the curious, the reason I separated “ready to case in” and “in progress” is that once a book is ready to case in, it’s almost done. The actual casing-in gets done all at once, so it’s basically a single, longish step that ends with the book in the press overnight. The steps leading up to that are many, so the in-progress books are a lot further from being done than the ready-to-case-in ones.
I’m back at my day job as of today, but I’m hoping to keep up the momentum as much as possible in the six weeks I have before I vend at Pantheacon. Wish me luck!
 Dot grid paper! Beloved of all sorts of folks, especially in the bullet journal community. It makes laying out page templates much simpler, works for writing vertically or horizontally, and so on.